That was until I met THIS style of icing. Now my confidence is back in tact because even my very first batch turned out beautifully! It’s super forgiving, easy to use, and it actually tastes good! The benefit of using an icing like this is that it dries to a solid sheen, making the cookies stackable and packable- perfect for giving or displaying on a platter. With a soft, fluffy buttercream, there’s just no easy way to give them away so you have to eat them all yourself (which may be the plan, right??)
Ingredient Notes
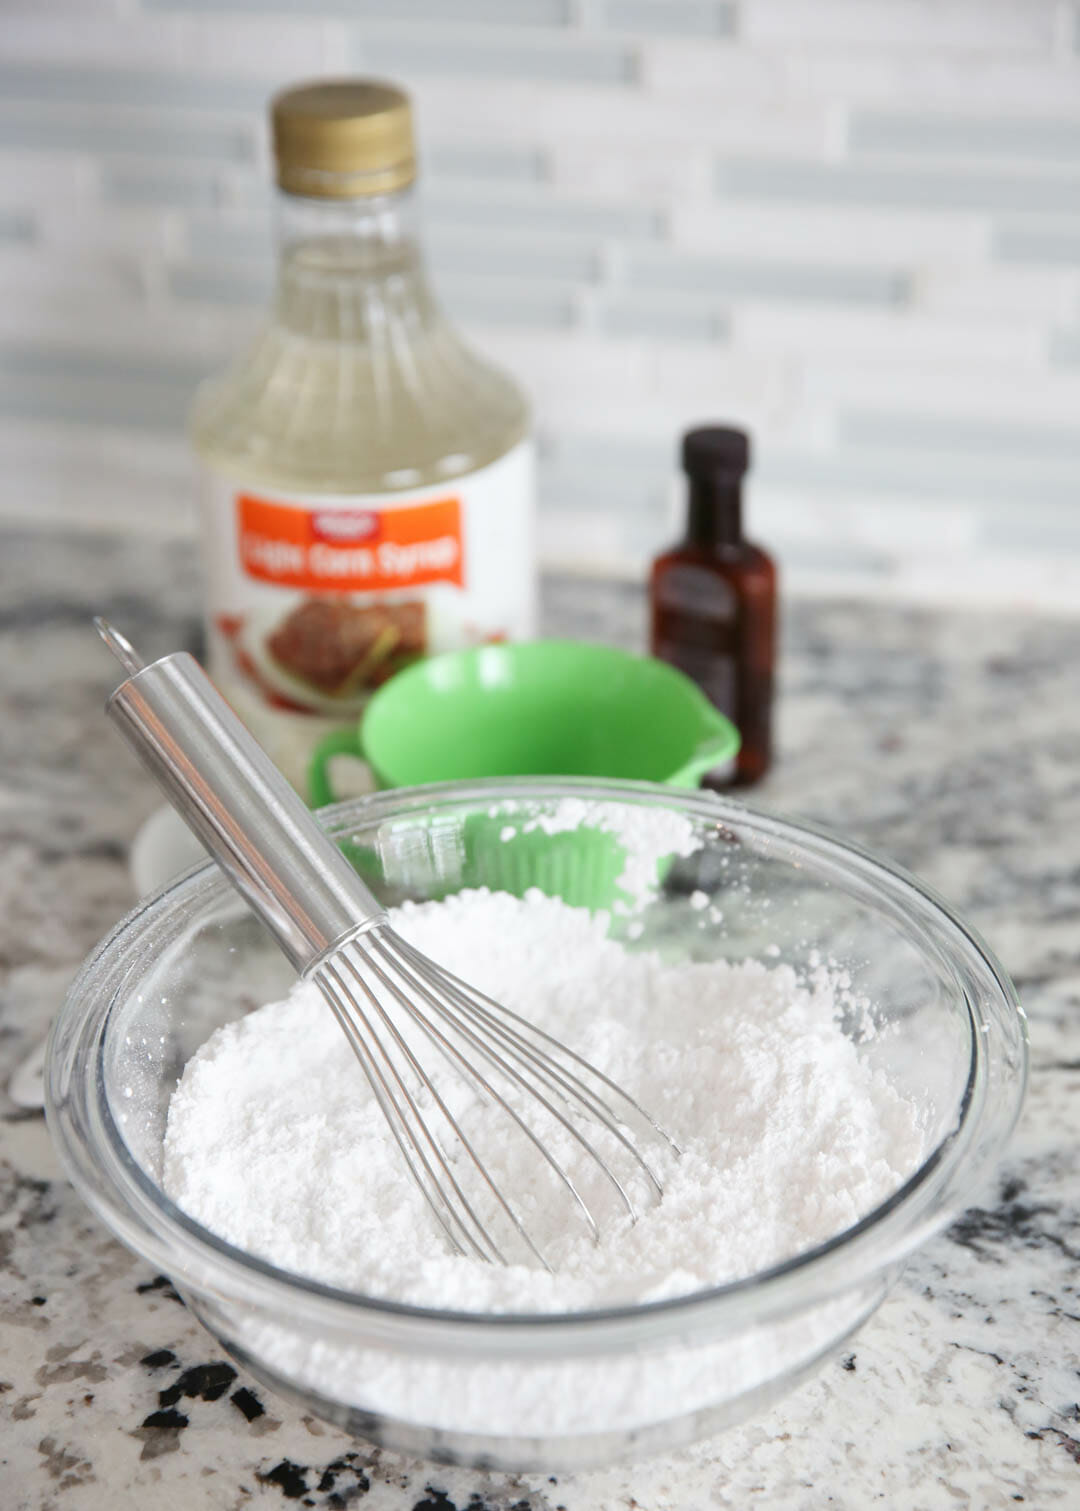
Simple Ingredients – All you need for this icing is powdered sugar, milk, corn syrup, and extract of your choice (I use almond, but vanilla is great, too.) And we all know that corn syrup is not the same thing as high-fructose corn syrup, right?? Like, we don’t have to have this conversation again? Okie-dokie then.Cookies – You’ll need cookies to decorate! I use The Best Sugar Cookies.
How to Decorate Using Glace Icing
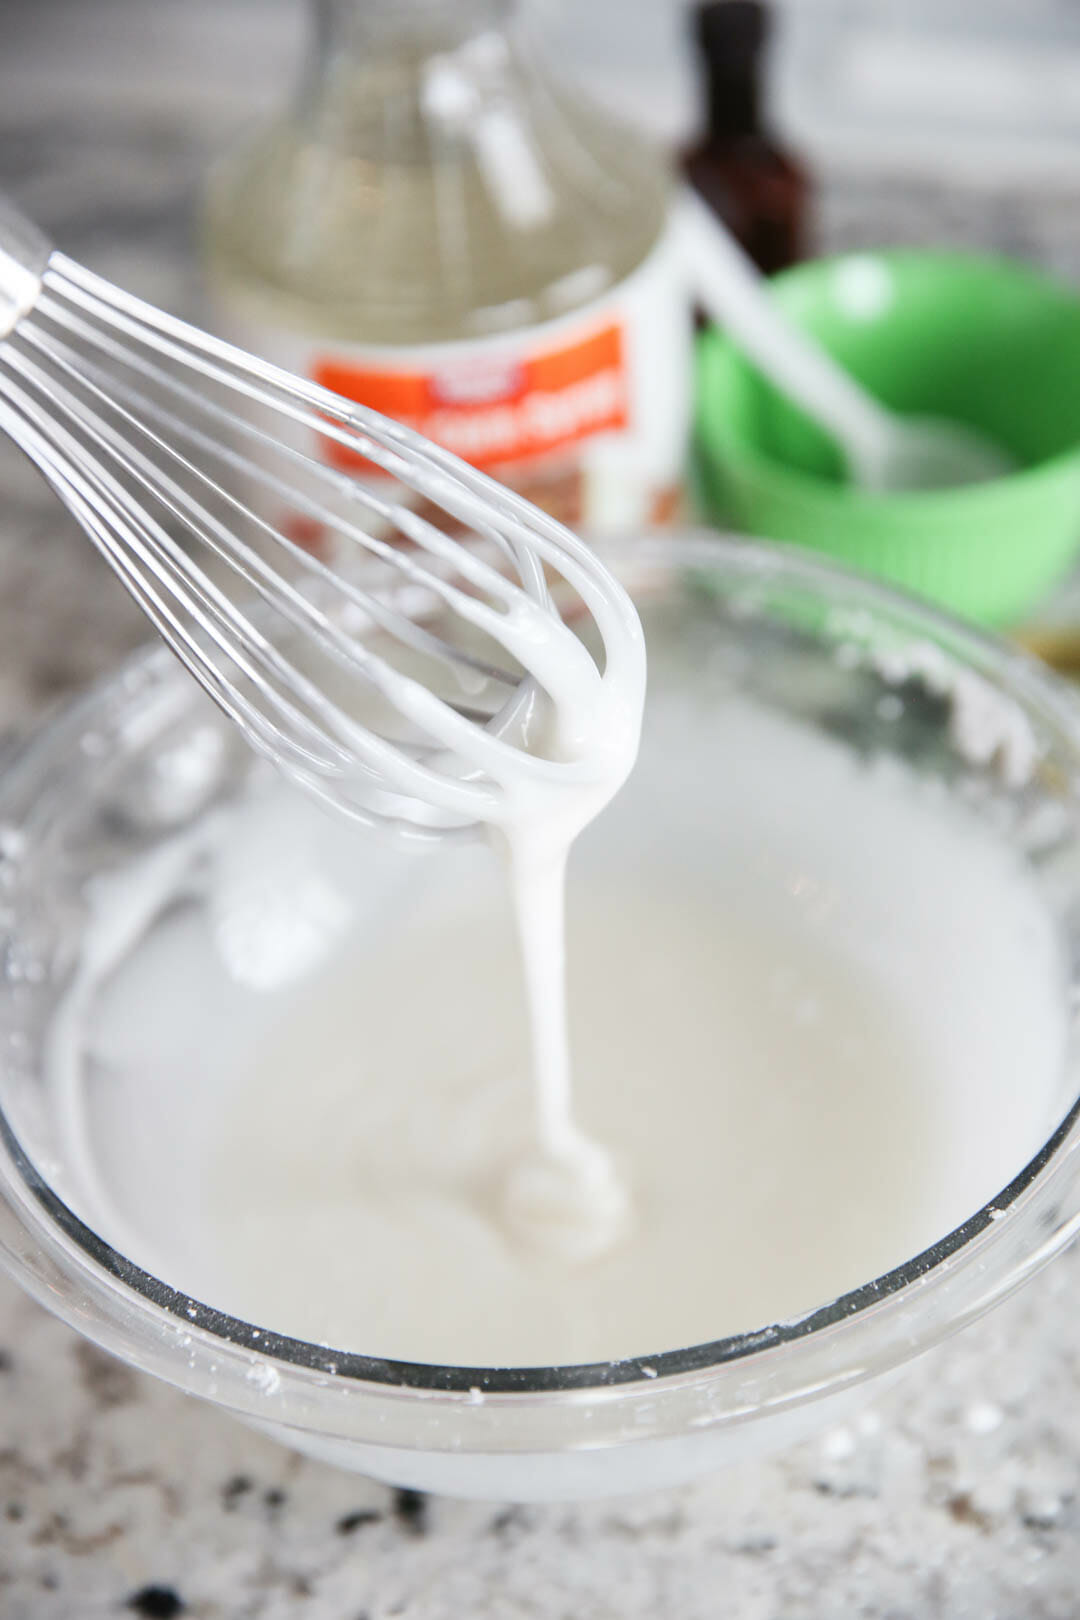
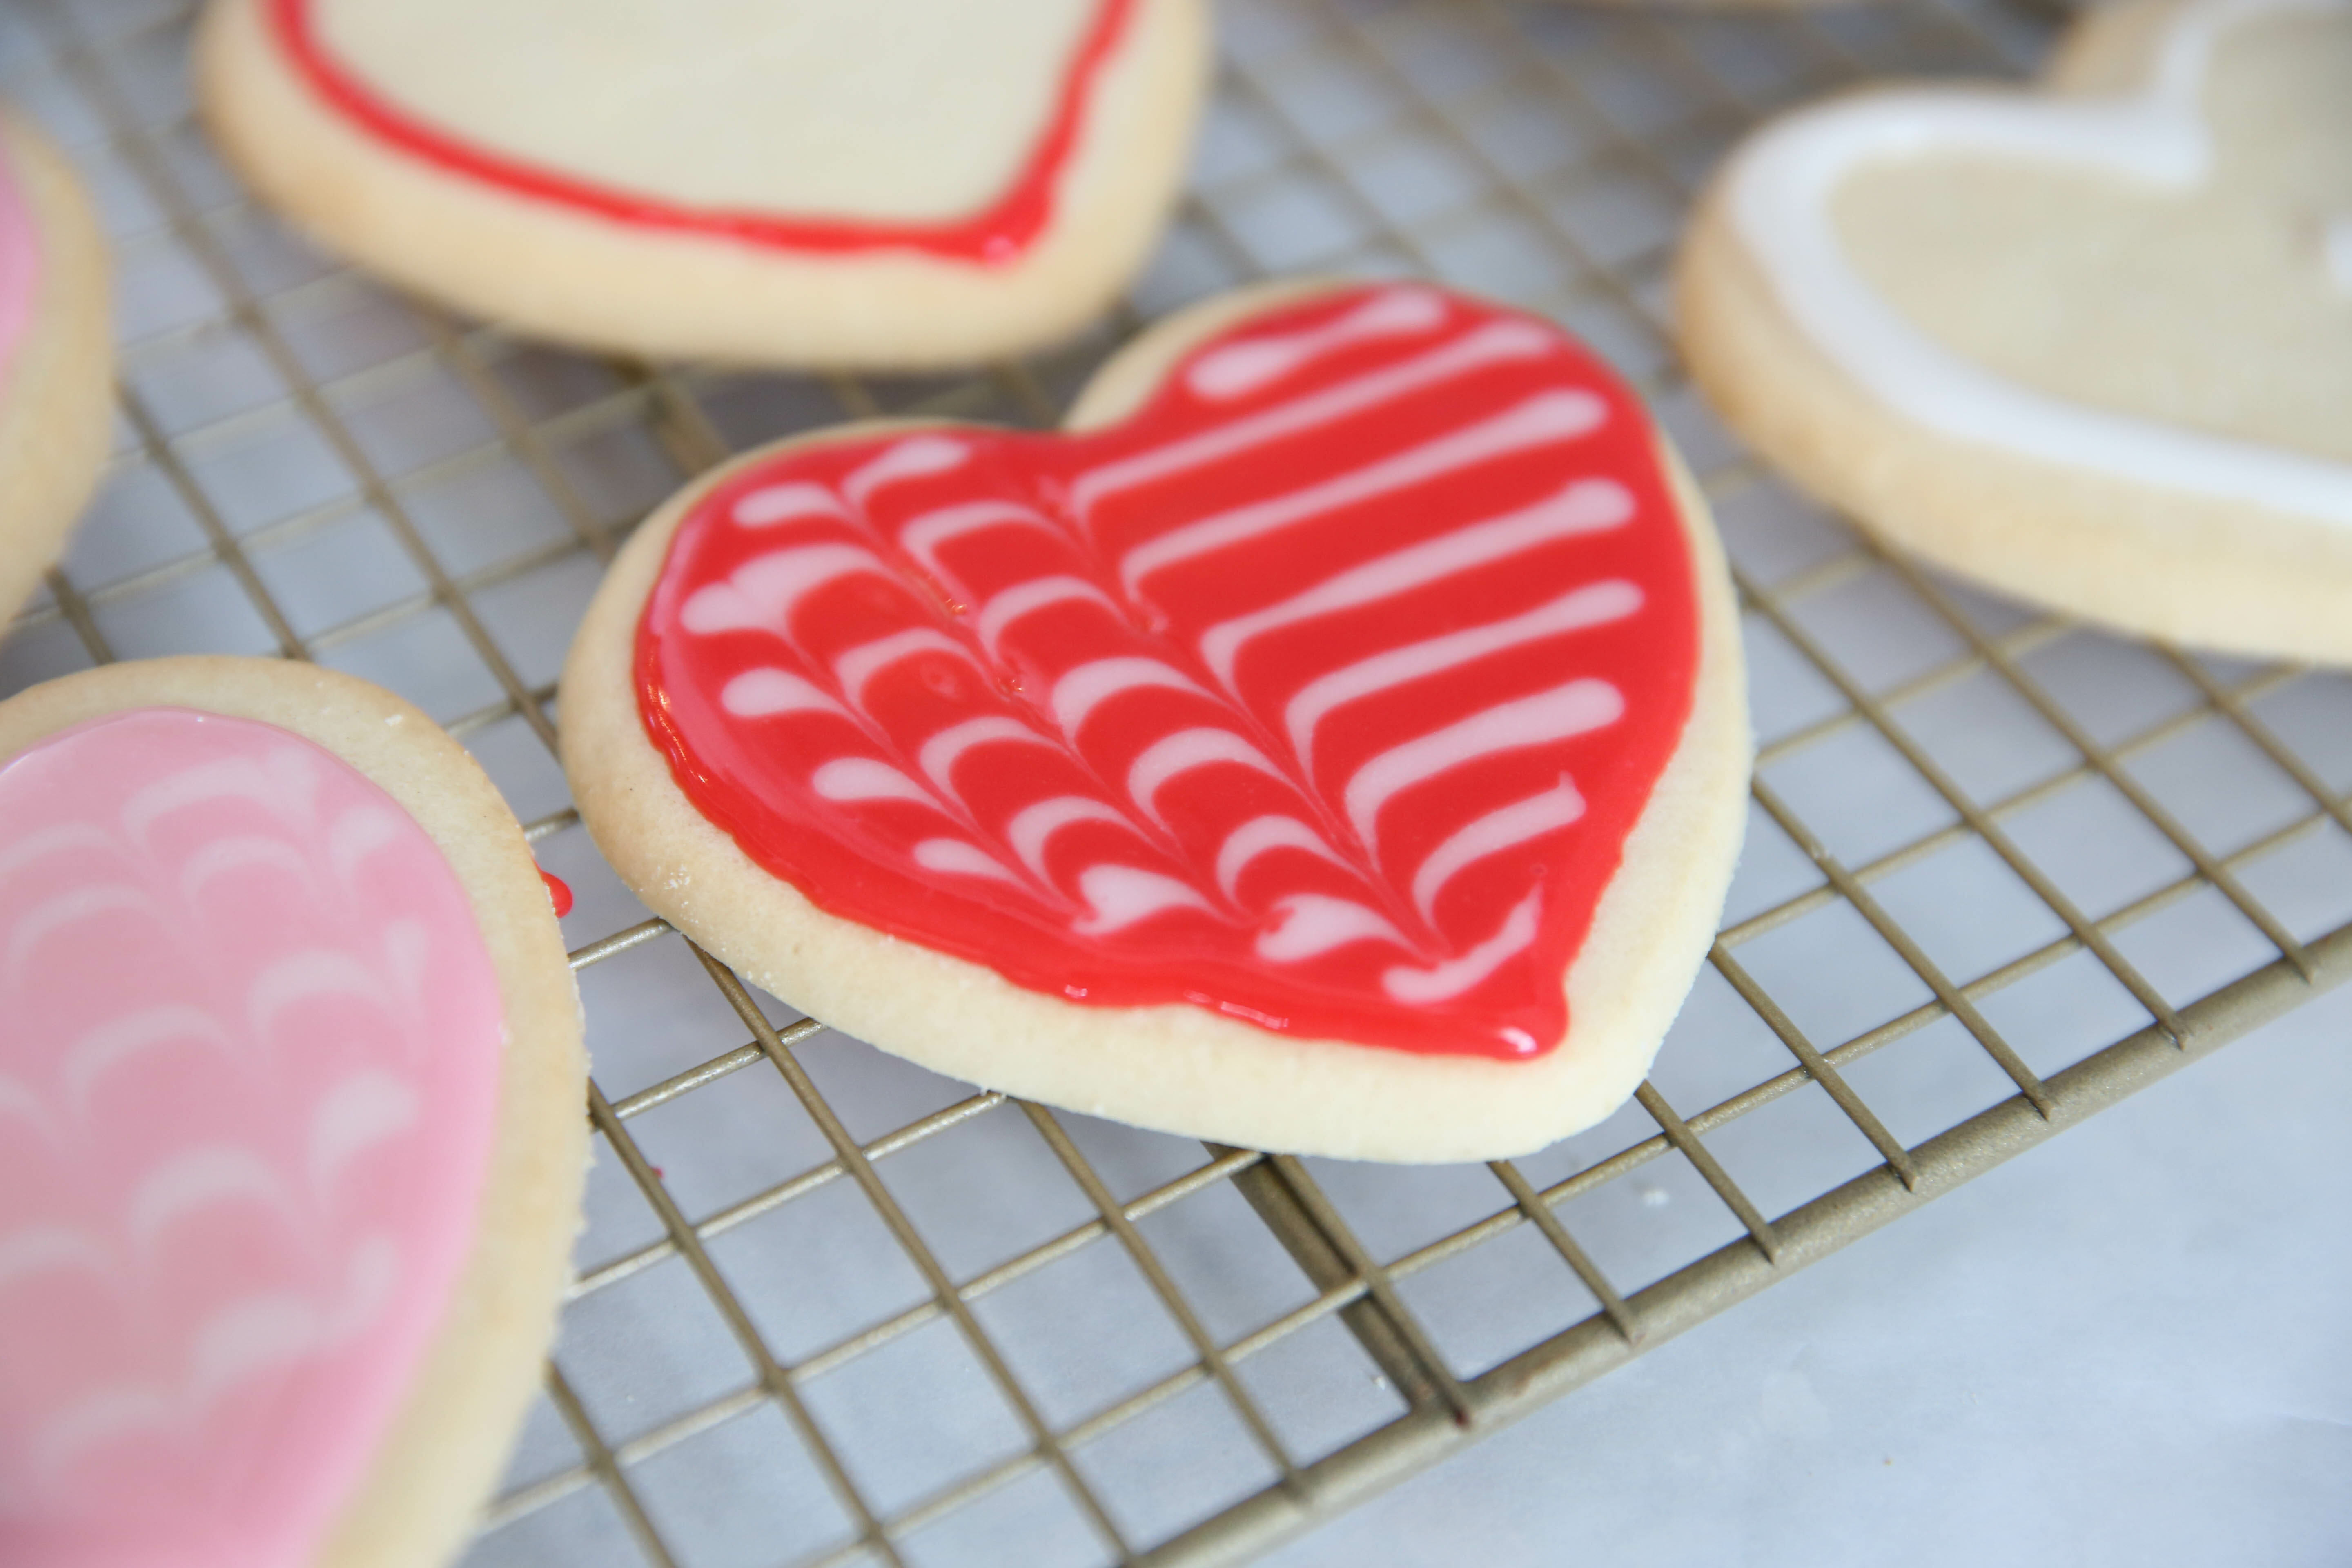
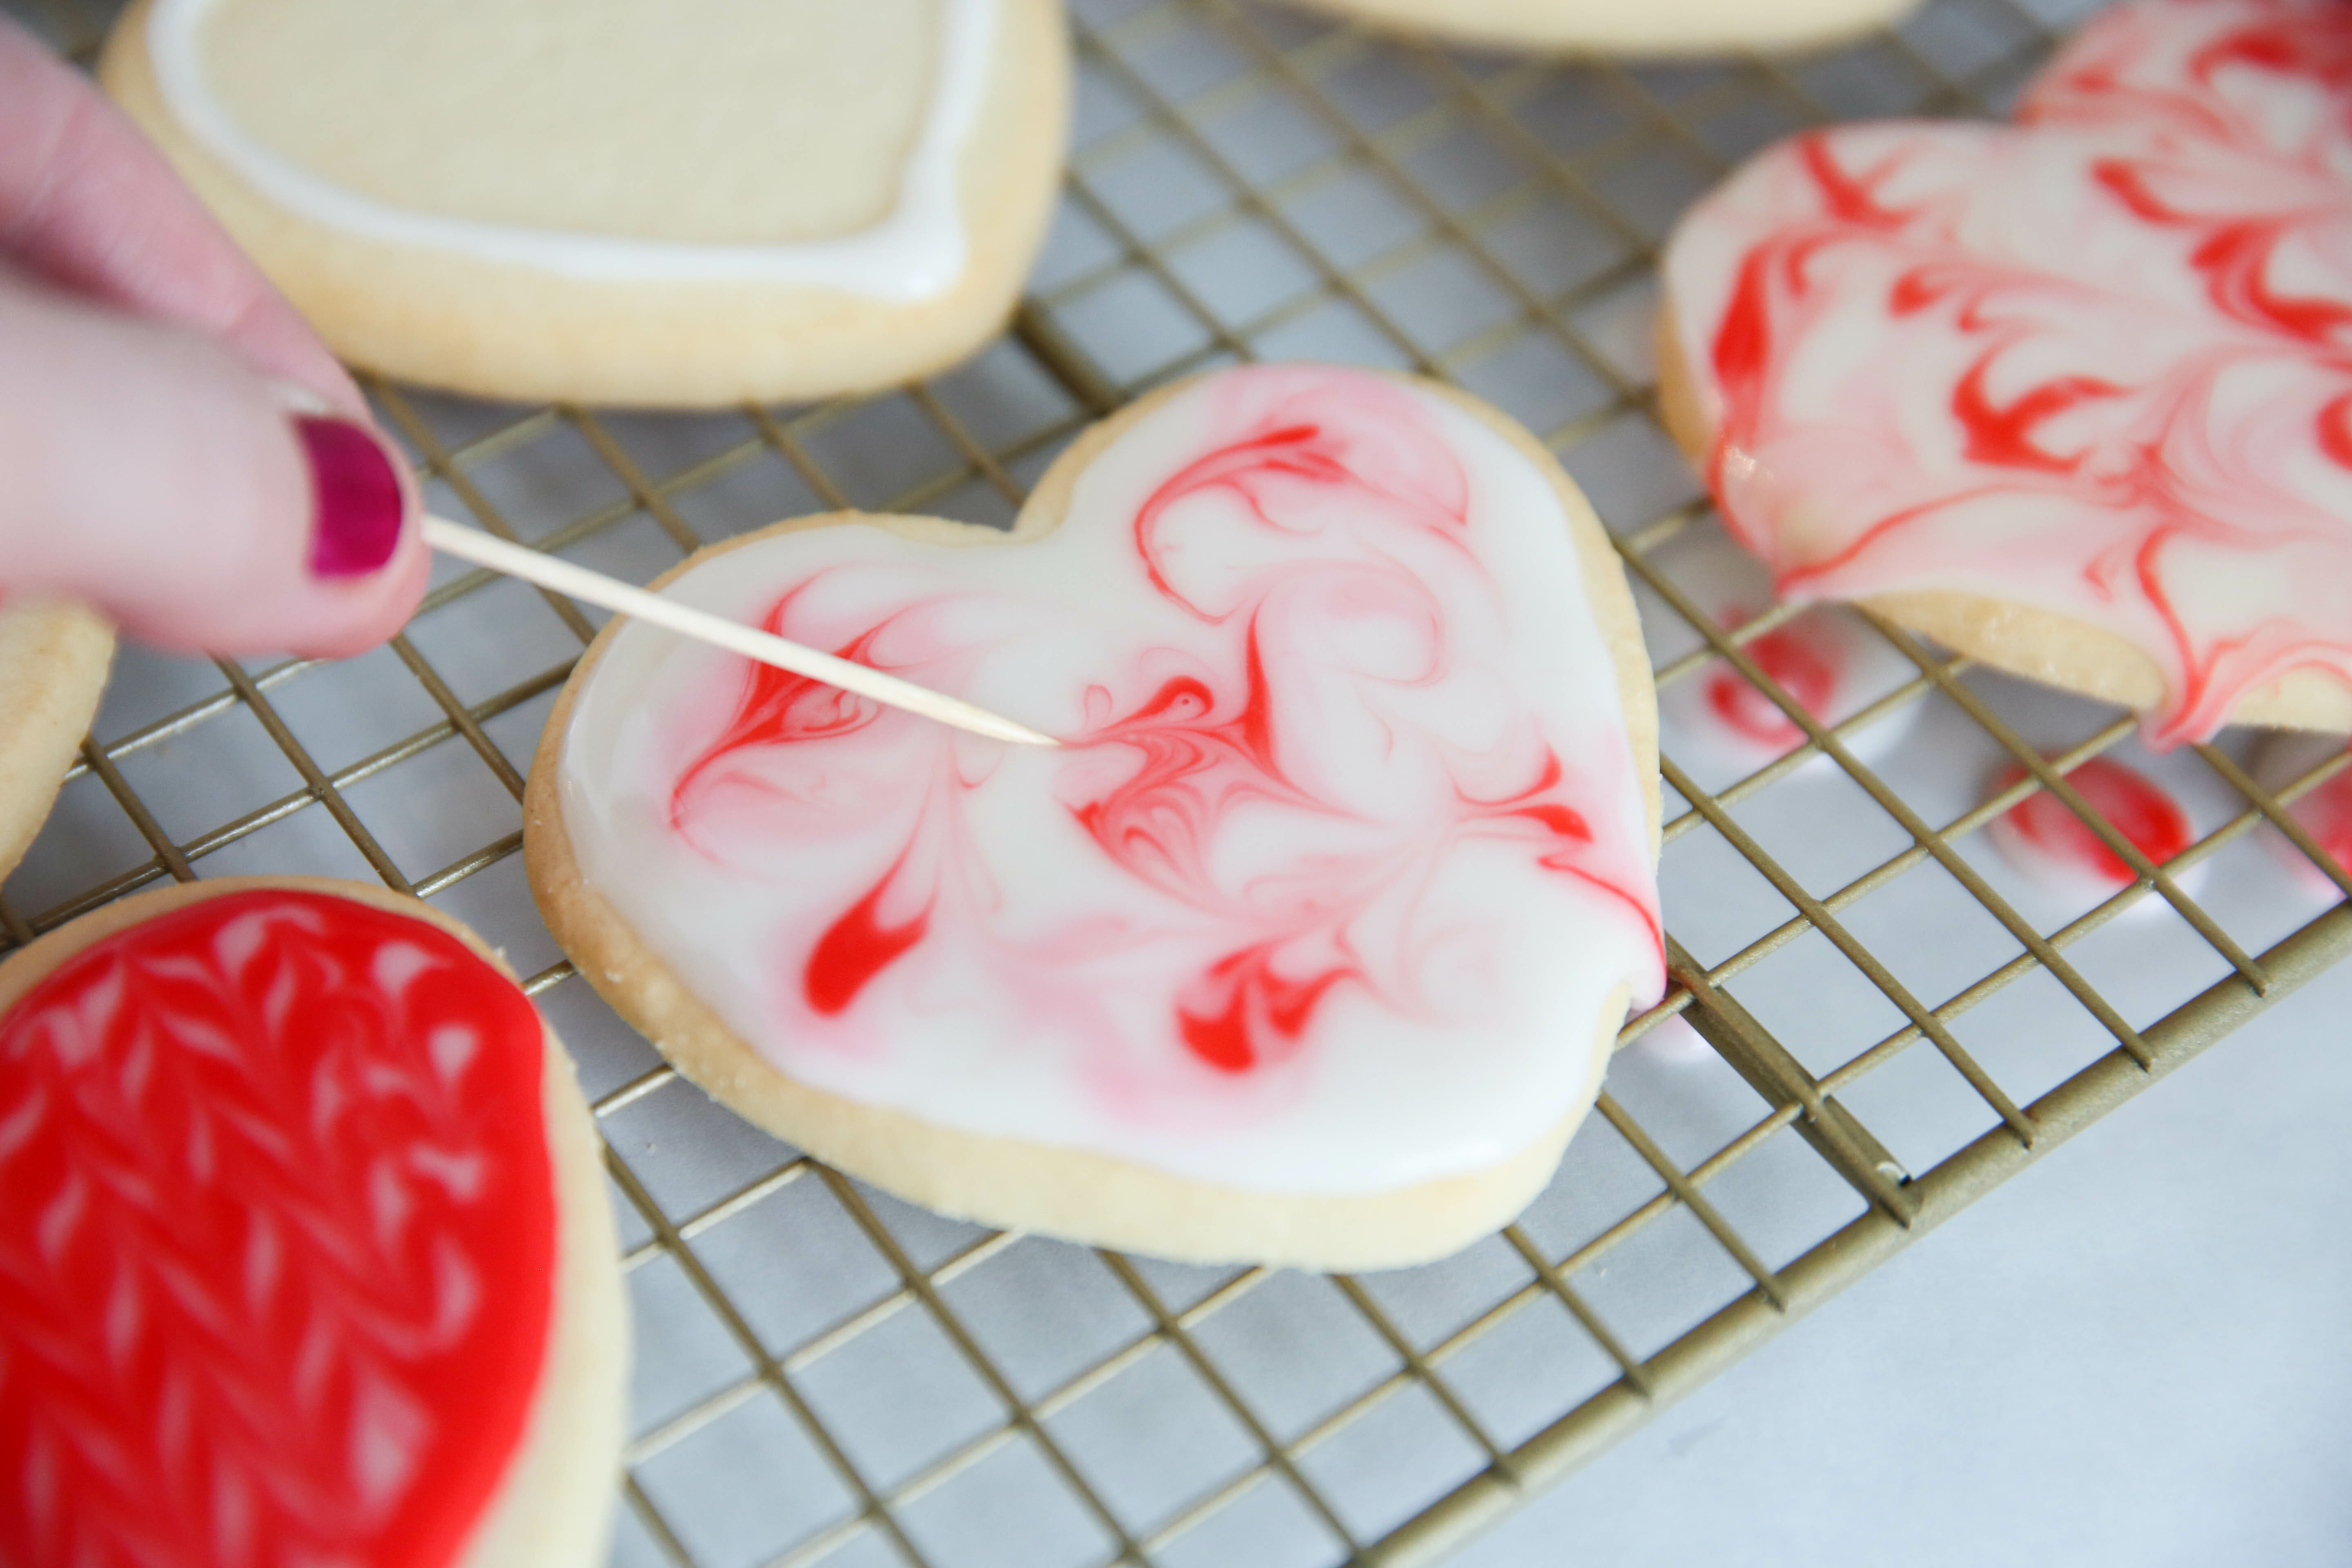
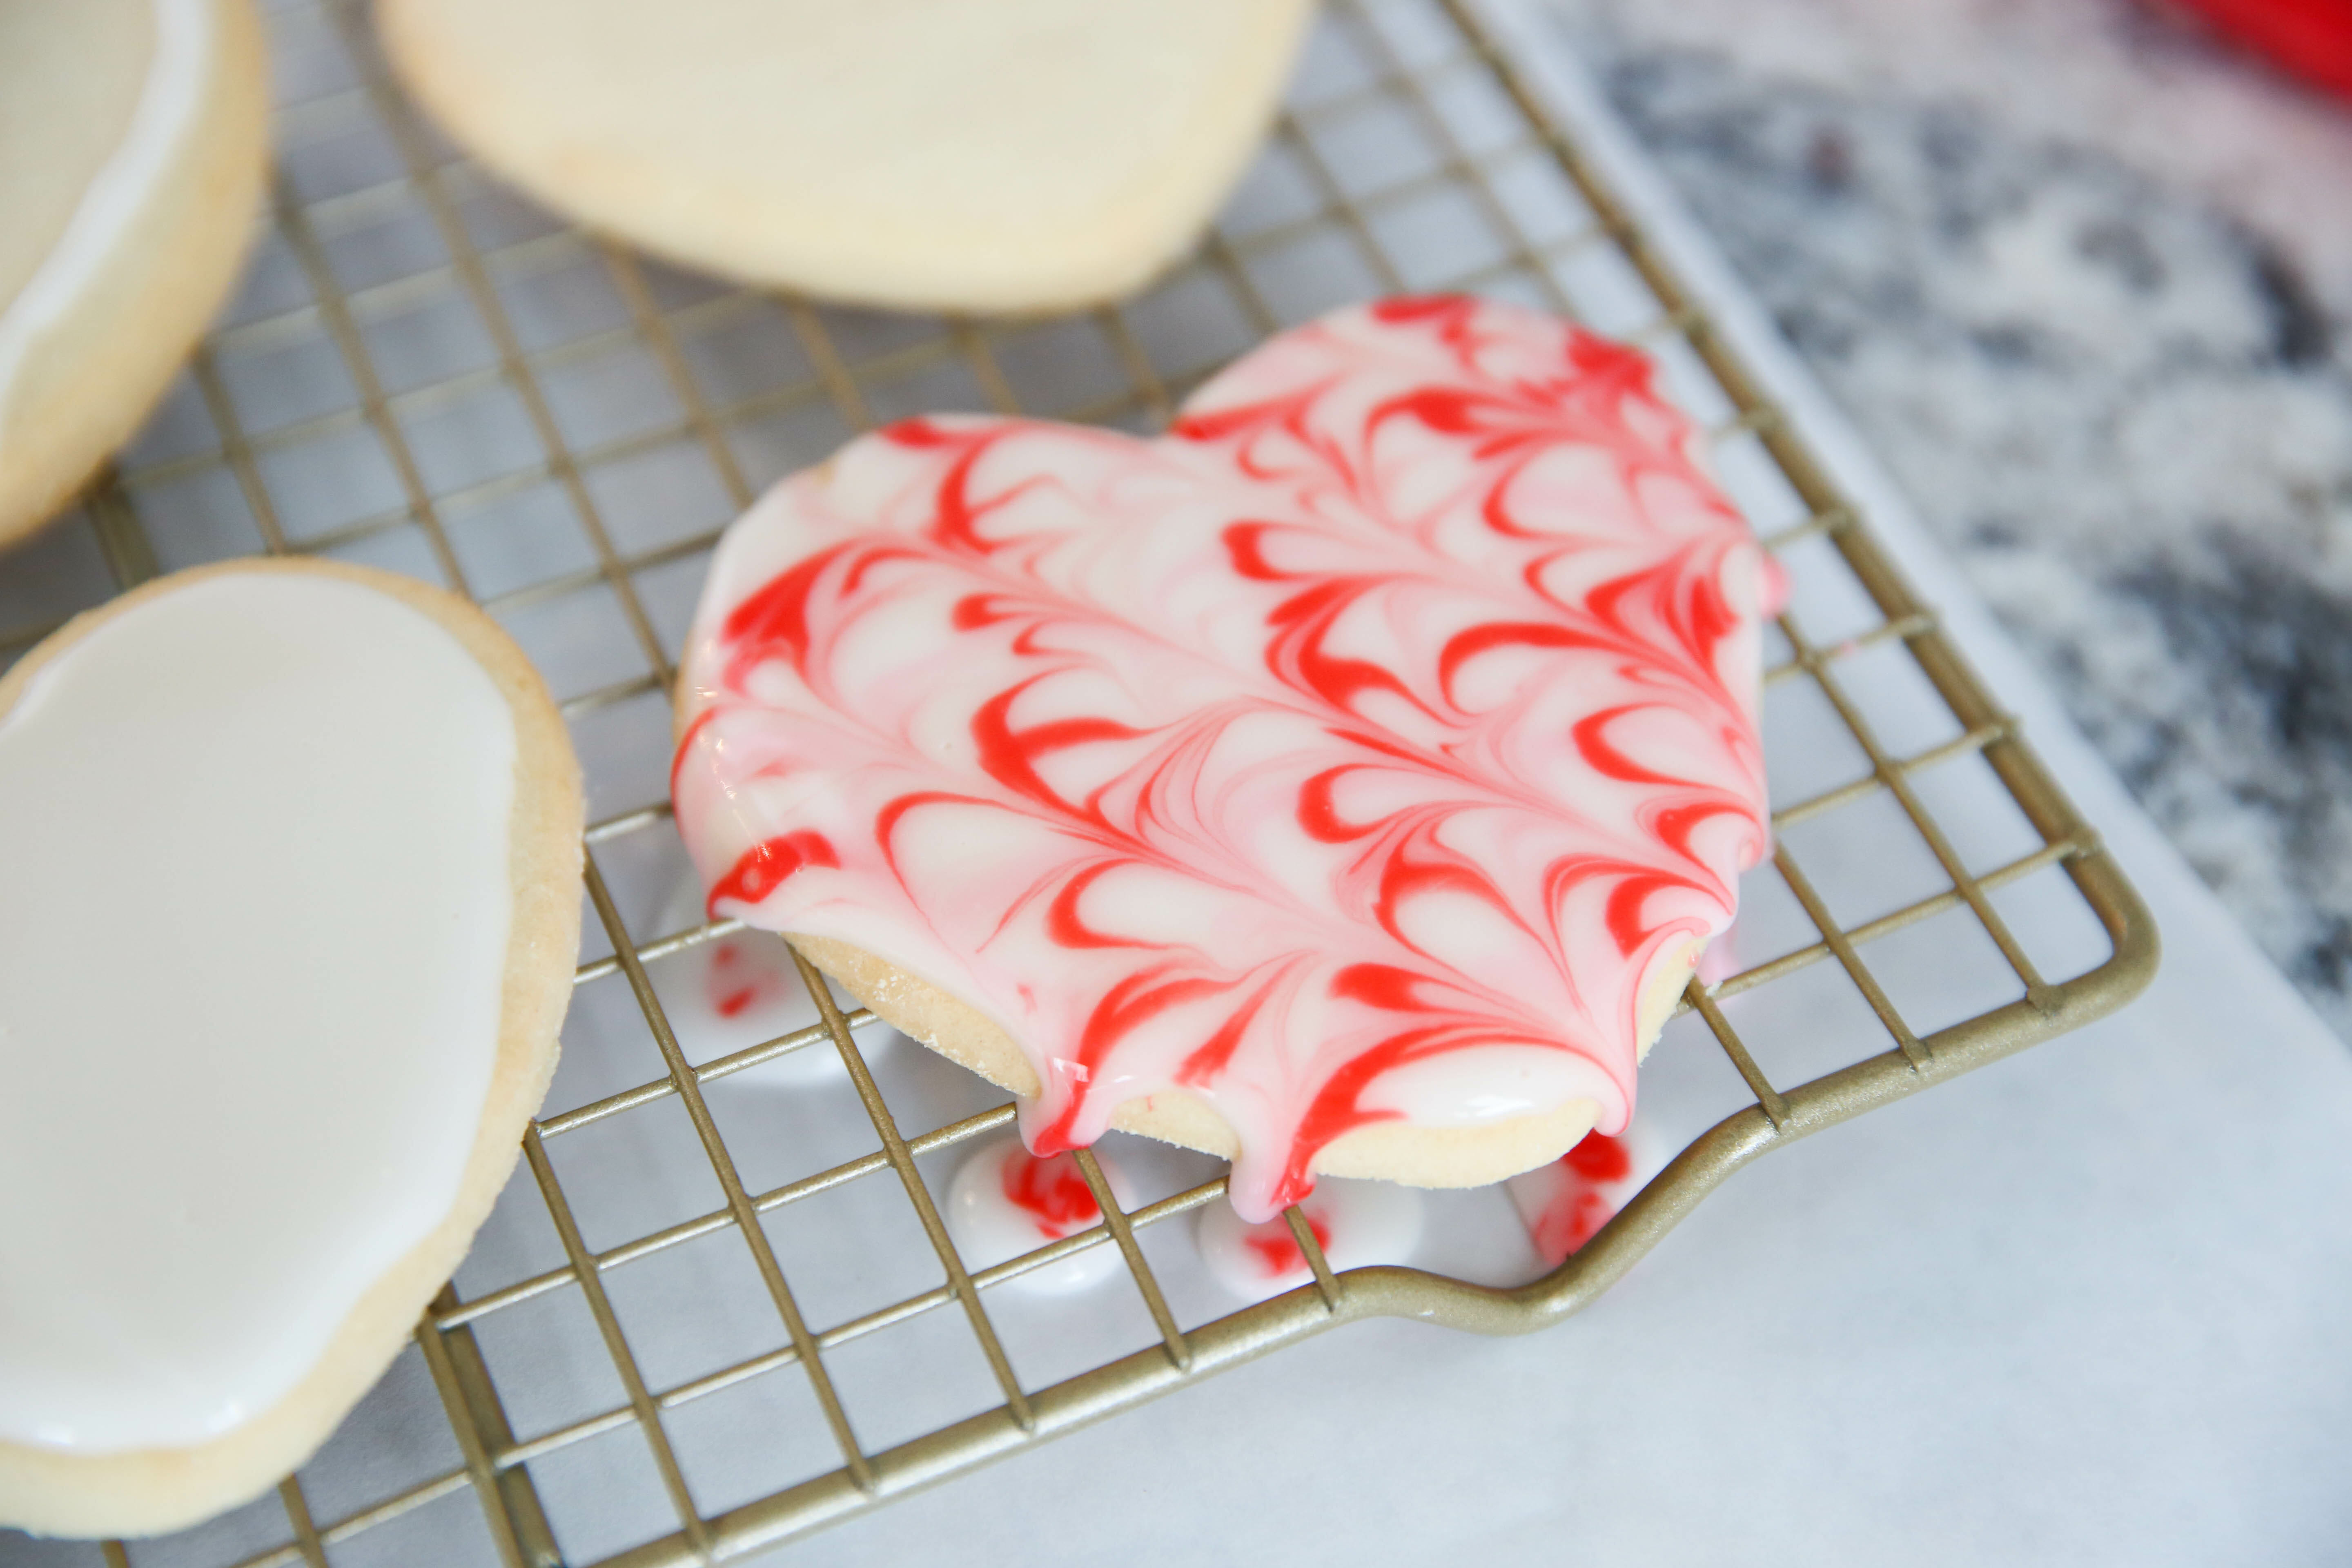
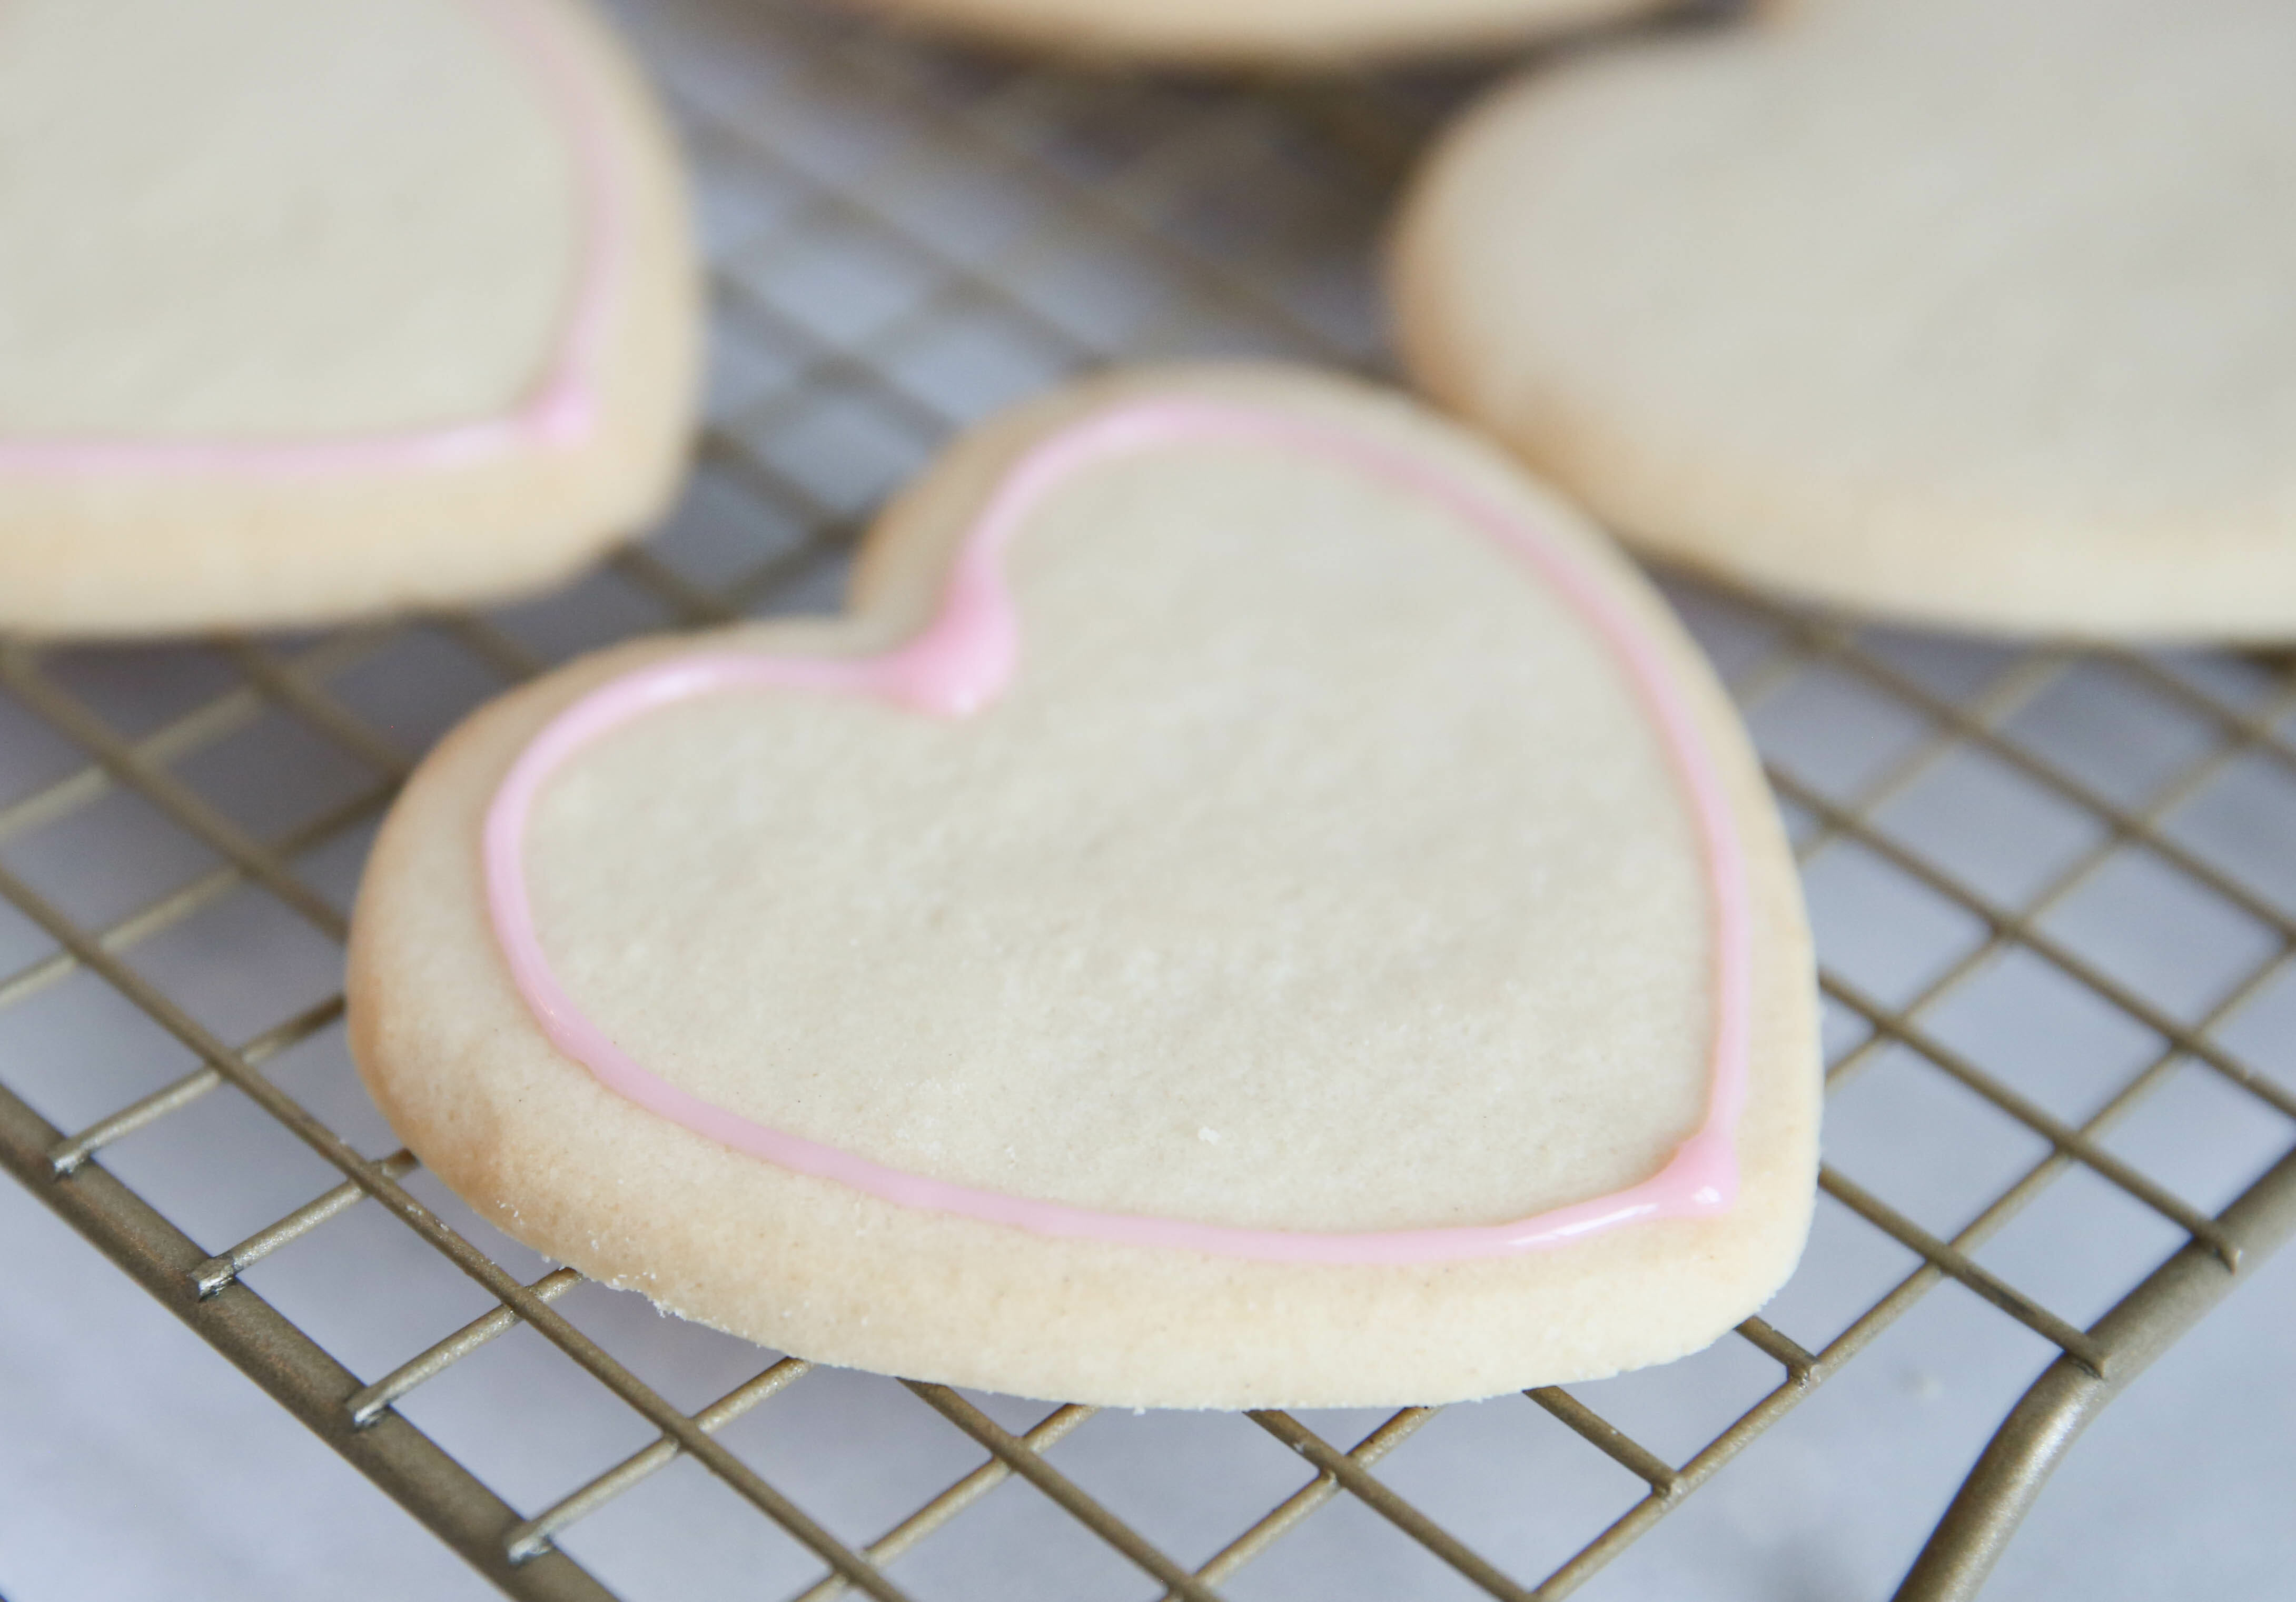
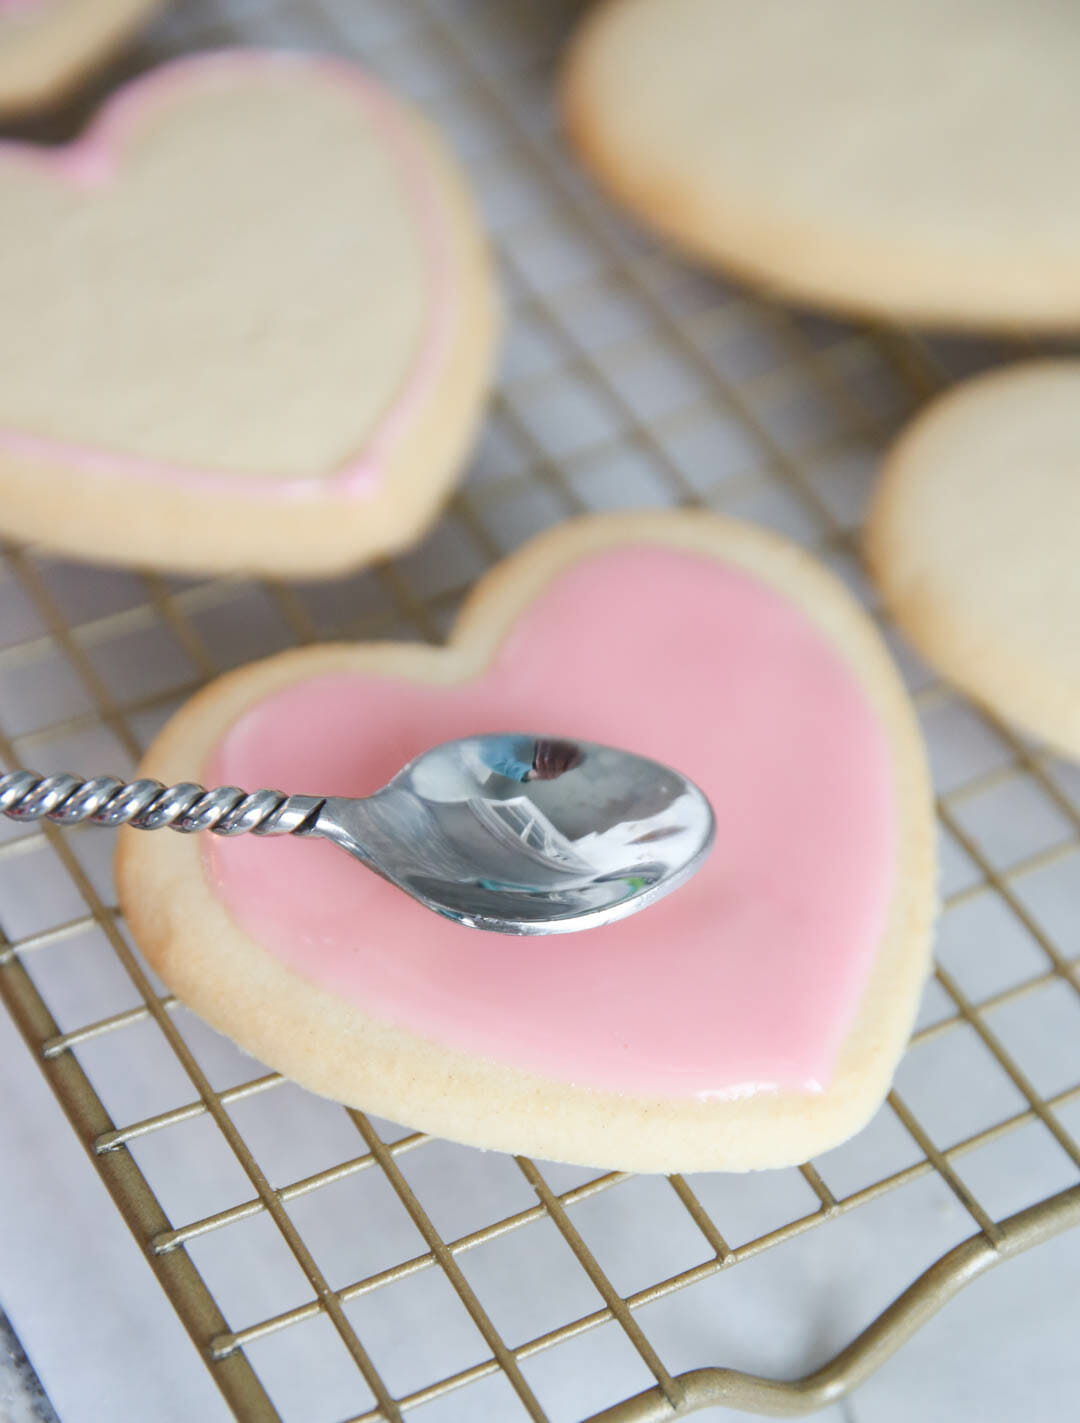
Whisk up some powdered sugar, milk, corn syrup, and extract of your choice and you’ll have a nice glaze-y consistency. You’re going to use the same recipe for both glazing and piping. The way it is right now is the consistency you want for glazing. It’s smooth and thin and it easily runs off the whisk in a pretty thin drizzle. Now, you have some options of where to go from here. You can simply spoon this icing onto your cookies and gently spread out with a spoon and be done! In fact, one of the easiest ways is to just quickly spread and let it go completely off the edges like this: While the icing is wet, you can mix colors and create all kinds of fun things. Try glazing in one color and then adding other colors from a piping bag with a very small, plain opening, and drag the designs with a toothpick to create gorgeous works of art. You honestly can’t make an ugly cookie here. Another method is to pipe an edge around your cookie, and then wait for a few minutes for it to firm up. When you’re piping, you’ll want to add a bit more powdered sugar to thicken up the icing just a bit. Once hardened a a little, go back in with your glaze and fill in the space. That outline will work as a dam and give you nice clean lines. Wet-on-wet icing will marble and swirl together. I actually did this whole batch this way because I didn’t have time to let mine dry very much. If you want to pipe designs on top of your cookies, you’ll want to wait until your first glazing layer is dry to the touch, which can take a couple of hours. You’ll want to leave them out un-covered to dry. You can see a great example of this method in this post, where I made darling little Owl Cookies. I also used that method when making these Valentine Cookie Pops. Either way, you’ll want to let these cookies dry all the way before stacking or handling too much. They develop a sheen and are dry to the touch after a couple hours, but they’ll need to really dry for most of the day, or overnight to be completely dry. Whenever I update ancient posts like this one, I always feel like I’m erasing a bit of history when I delete old, outdated photos, so I’m going to leave a few of the originals here- just because. How long do these keep? The icing will last longer than the cookies. For most cookies, I would say they are best eaten within a couple of days. Store stacked in an airtight container.
Related Recipes
The Best Sugar CookiesPeppermint Bark PopcornOwl Sugar Cookies {With a Trick!)Skeleton Gingerbread Men CookiesHand-Painted Sugar Cookies
Did You Try This?
I’d love to hear from you! Snap a picture and tag me on Instagram, then come back and give this recipe a rating!