Working with Phyllo Dough
If you’ve never worked with phyllo, it’s like thin sheets of paper! You find them rolled up in a box in the dessert section of the freezer aisle. You’ll want to let it defrost overnight in the fridge. The crinkle part of this recipe might be the most important, but I can speak from experience and say that even if you don’t really know how to crinkle, or if your phyllo ends up breaking all over the place and falling apart, you can still just kind of crinkle it up haphazardly and it totally works!
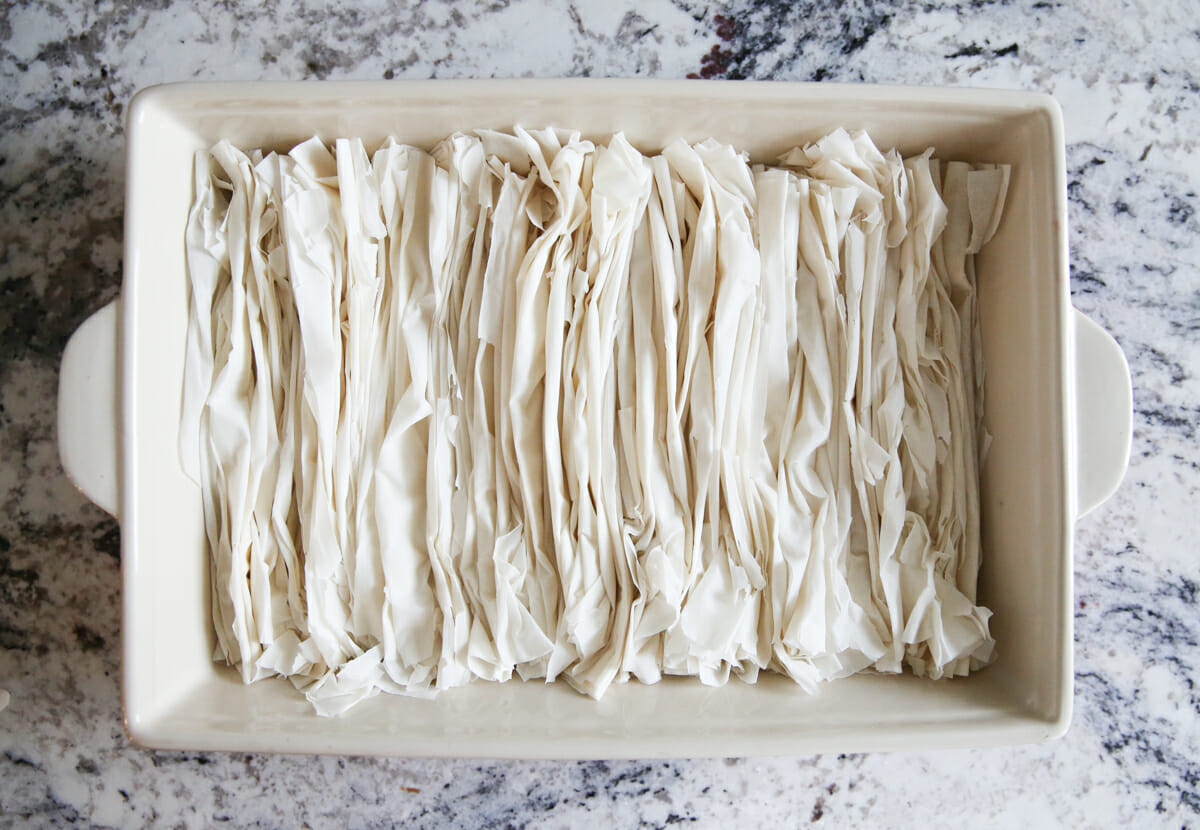
Step 1. Crinkle your Phyllo Dough
To crinkle, you’ll take two sheets of phyllo at a time and hold them up in the air by the shorter end. You’ll use your fingers to fold/crinkle the phyllo up kind of accordion style, like the folds of a fan, only not so precise. It’s easiest to see this in action, so take a peek at Ramena’s TikTok, or my Reel on Instagram. Continue this process until all your phyllo sheets are layered in the pan. I find that precision is not the best tool here- I get the best results when the folds are kind of loose and inconsistent, so sometimes I even “fluff” them up before baking.
Step 2. Bake, Butter, Bake
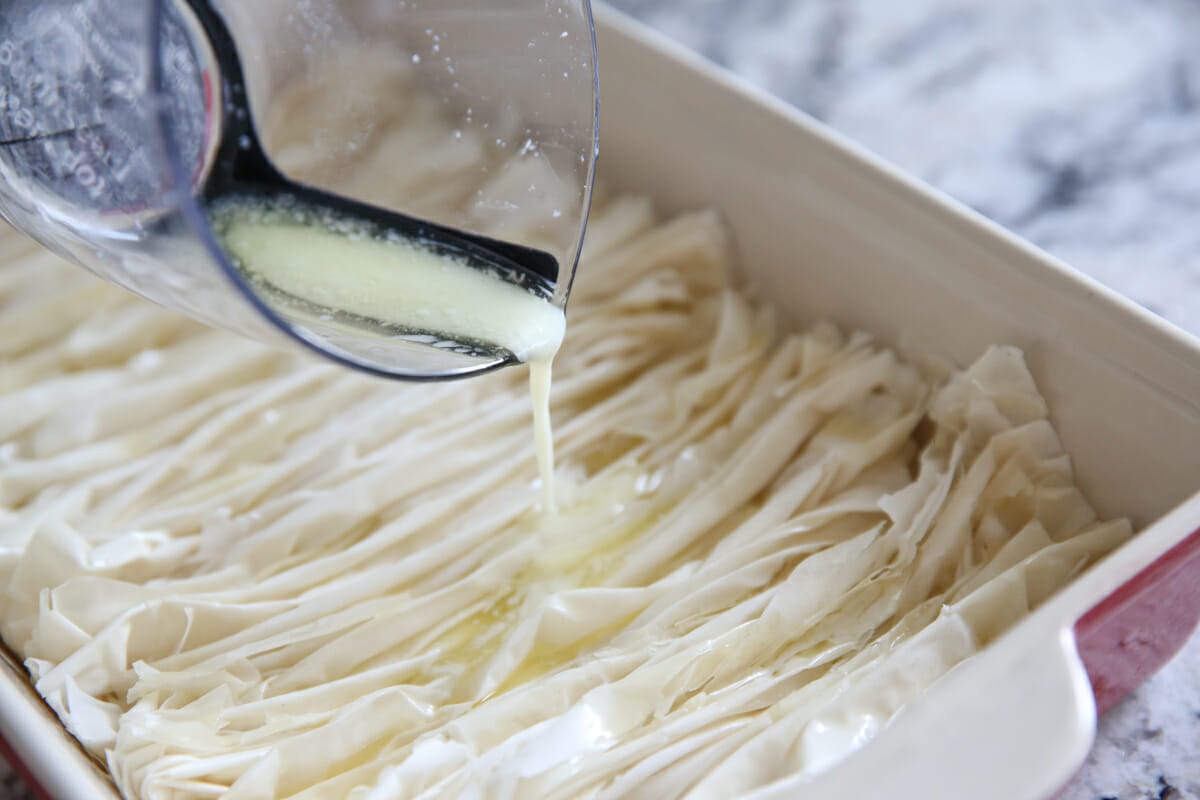
When all the phyllo sheets are arranged in the pan, you’ll bake it for 10 minutes. When it comes out, you’ll pour 2 sticks of melted butter over the top and bake for another 10 minutes.
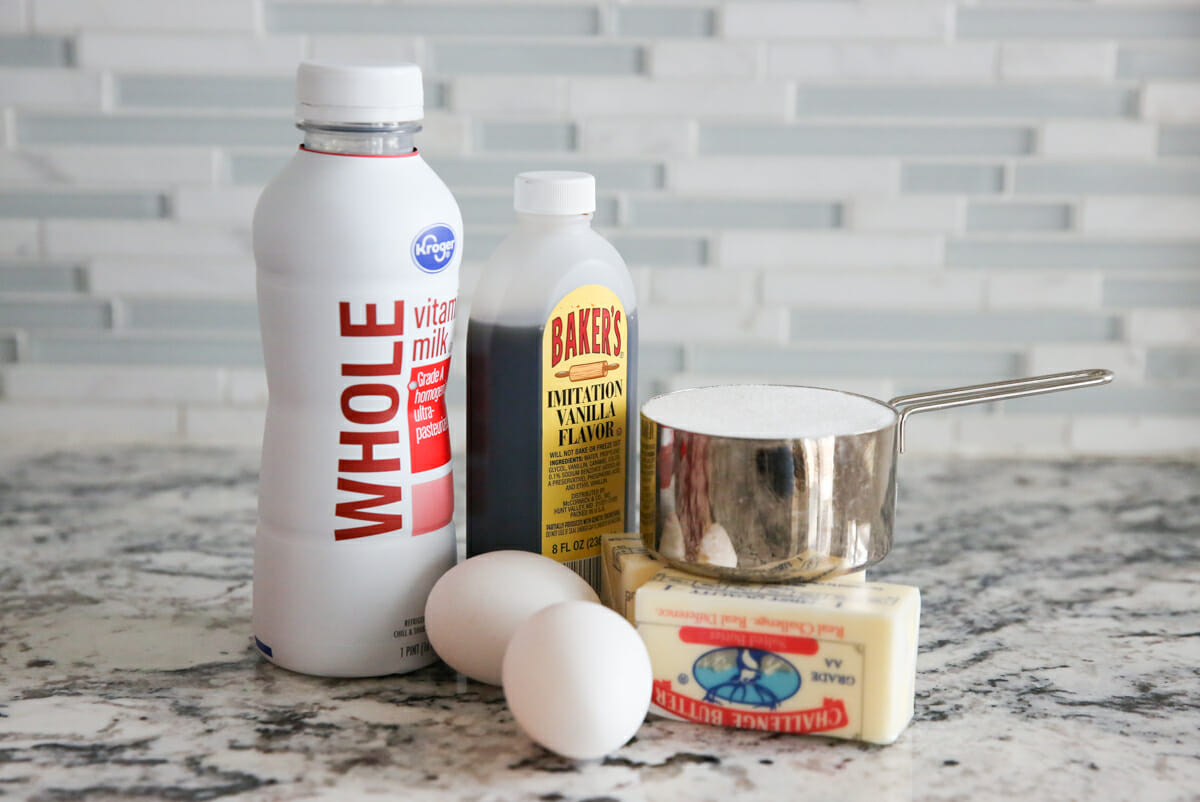
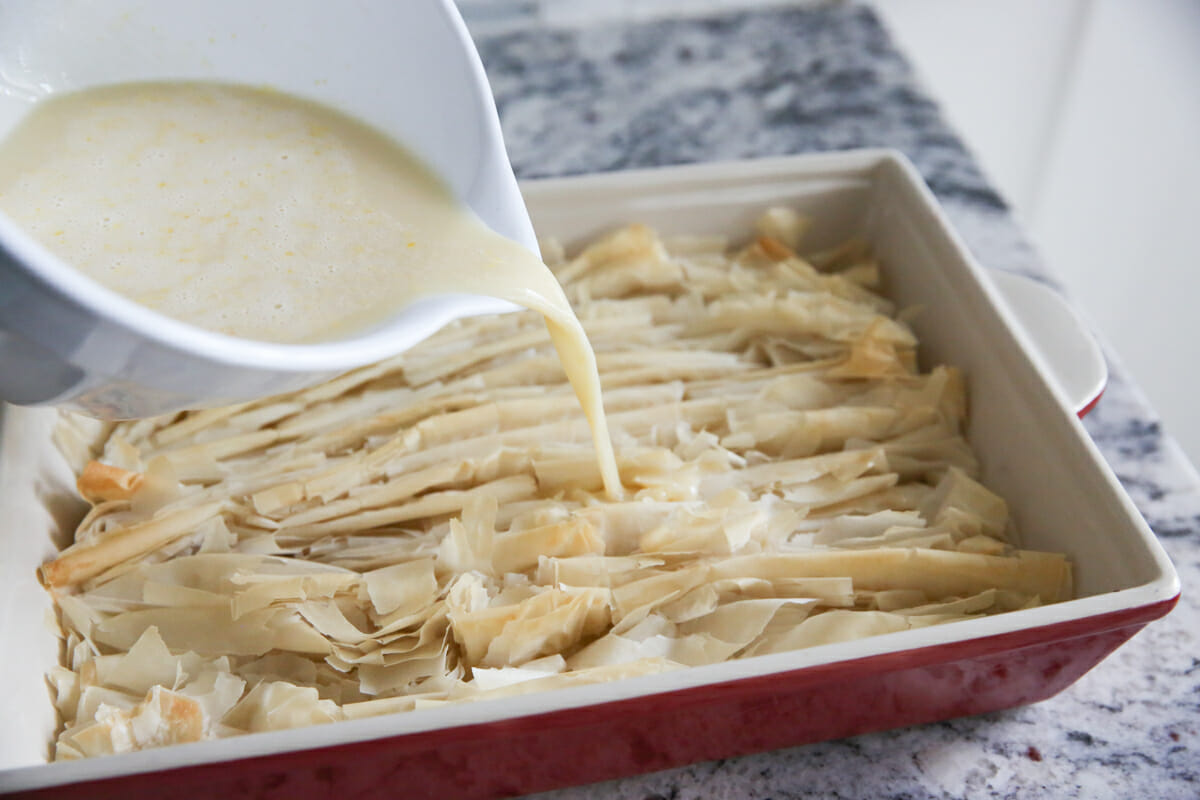
Step 3: Mix up a custard
While it’s in oven for the second time, mix up a simple custard. You’ll need some milk, eggs, sugar, and vanilla. I highly recommend a little almond extract as well!
When the pan comes out of the oven it will still be quite light in color. Immediately pour your custard mixture over the top and pop it back in the oven.
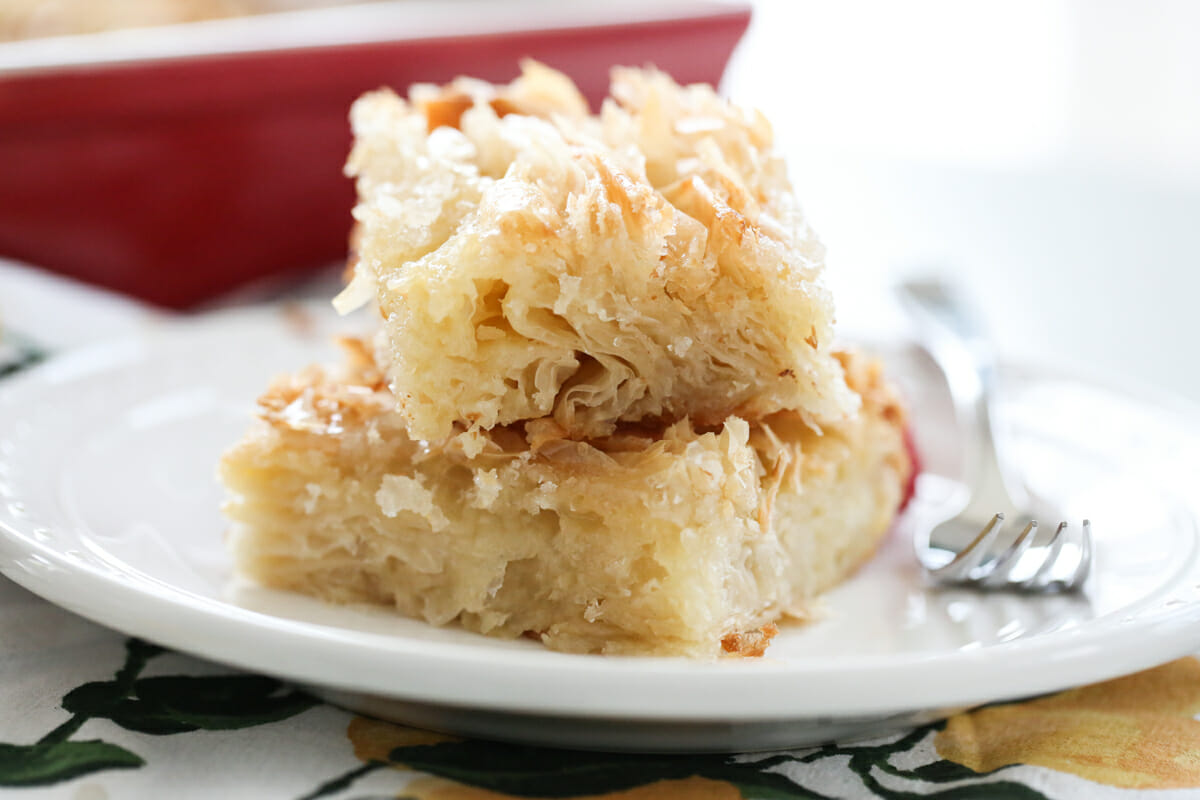
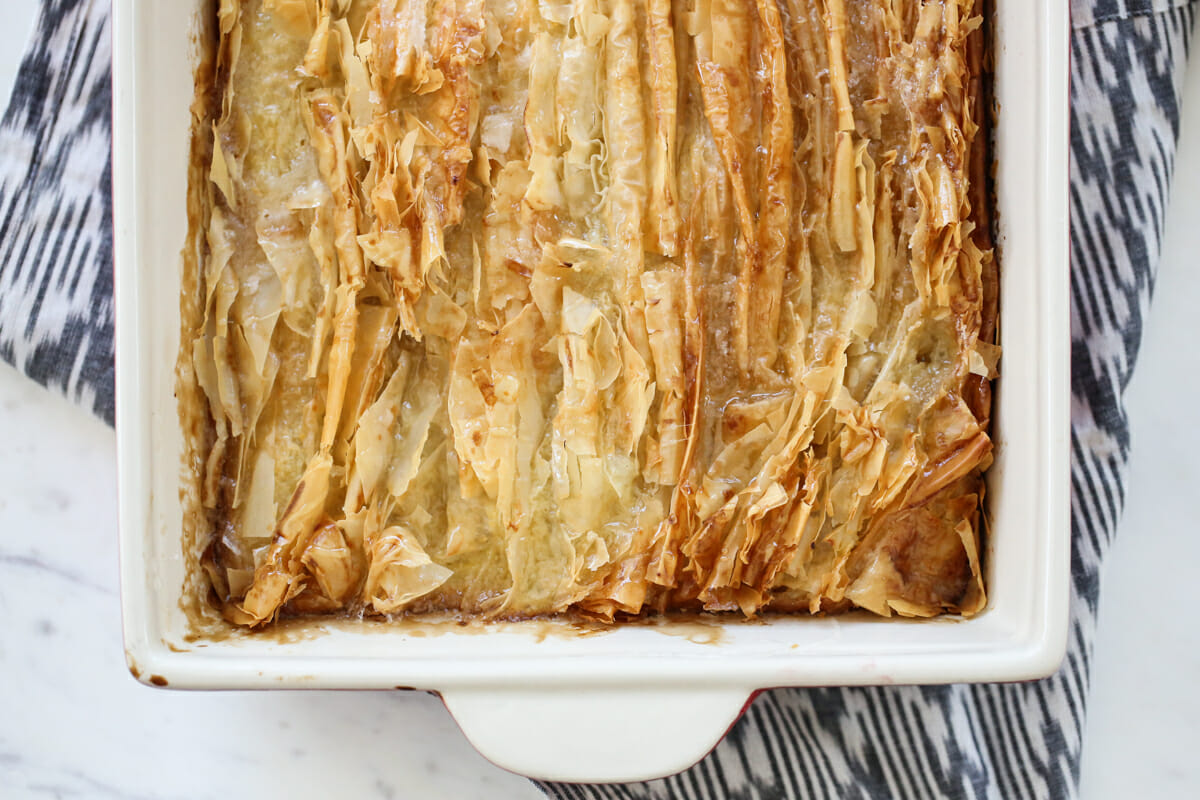
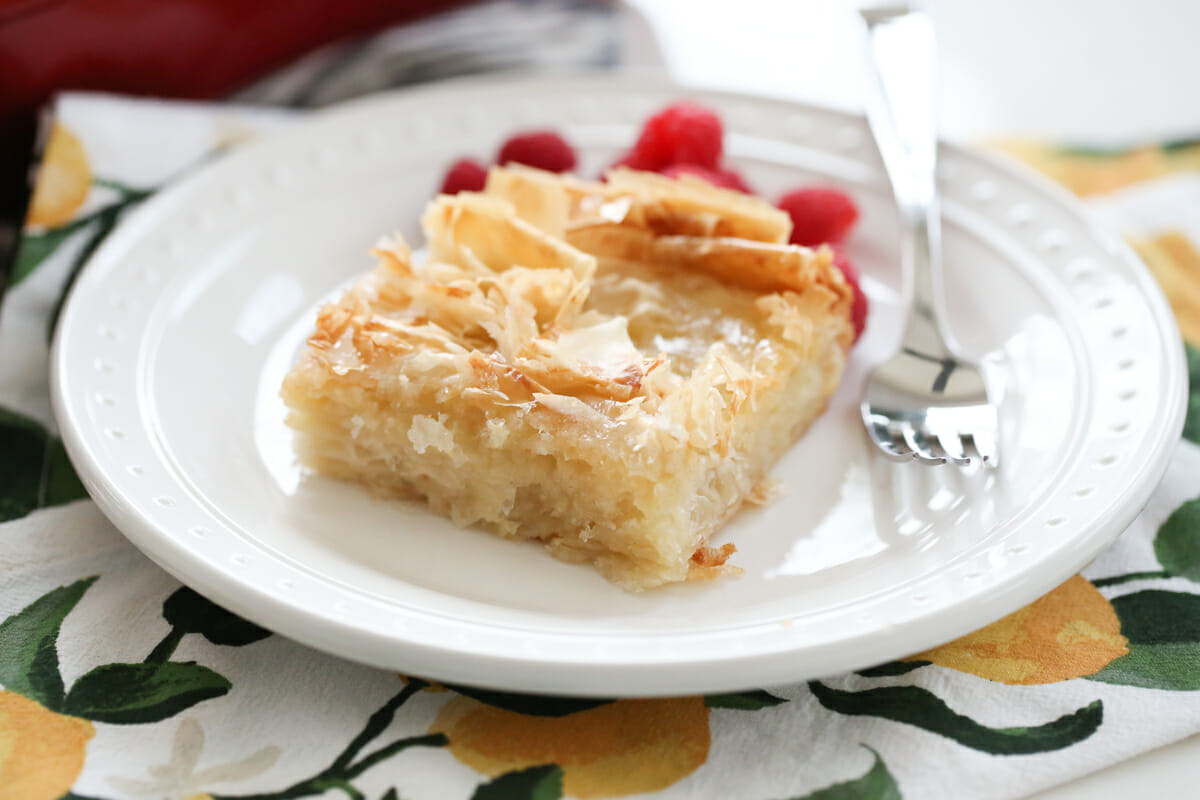
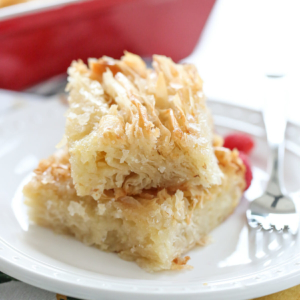
This time it will stay in the oven for 30-40 minutes, until the top is golden brown. You can see in the photos here that my pastry folds are NOT perfect by any means! I actually photographed this twice and this photo above is from a time where my phyllo totally broke apart on me and this still turned out phenomenal.
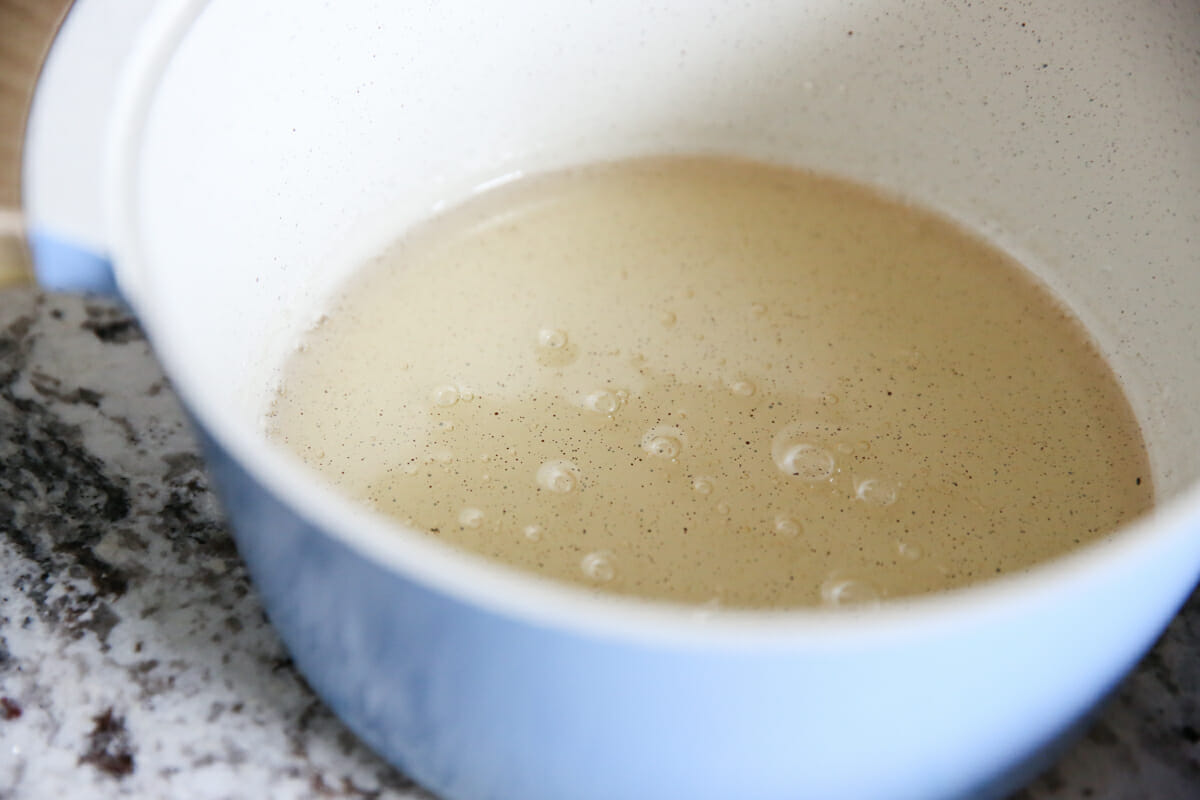
Step 3. Make a Syrup
While your crinkle is baking, you’ll prepare a super simple syrup on the stove top. It’s just sugar and water, plus a little lemon juice (the citric acid helps prevent crystallization) and you’ll cook it for about 10 minutes while it cooks down and becomes thick. You are aiming for the consistency of maple syrup.
A good test is pouring a bit onto a plate, blowing on it to let it cool enough to touch, and it should stick a little between your fingers.
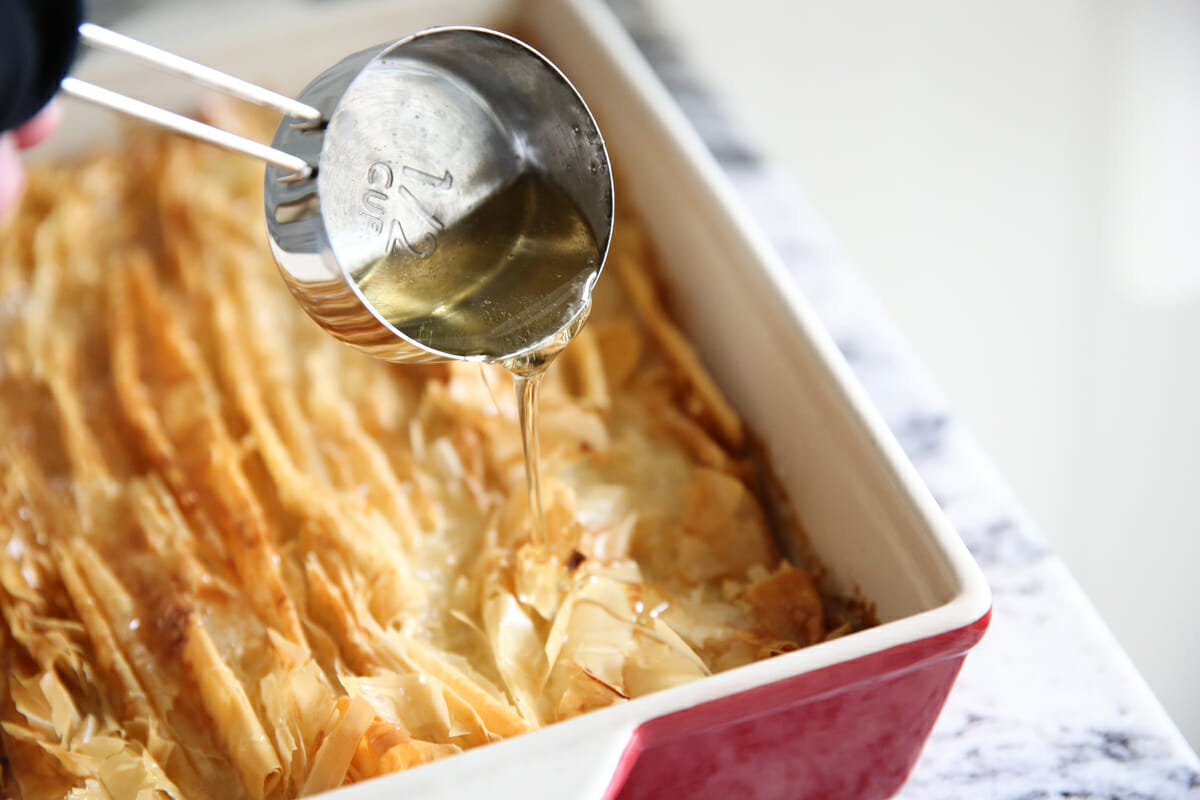
When the crinkle cake comes out of the oven, pour the sugar syrup over the top and watch it sink into all of those nooks and crannies.
Step 4. Serve the Crinkle Cake
This is best served at room temperature. Simply cut into squares and use a small metal spatula to serve. We honestly love to eat this with our hands!
But you can certainly be a little more refined and use utensils.
You can see all of those beautiful folds in there. There’s not an actual layer of custard, but rather the parts that absorb the custard are soft and the top browned parts are crispy and crunchy. The sugar syrup adds a lovely chewy component.
How to Put a Spin on a Crinkle Cake
This basically begs for adaptations! Try different extracts or citrus zests in your custard, or add cinnamon or chai spices. The traditional version of this dish uses rosewater in the syrup and crushed pistachios over the top. I also think it would be great with fresh berries tucked into the folds before baking or even mini chocolate chips. If you try a variation, let me know how it turns out!