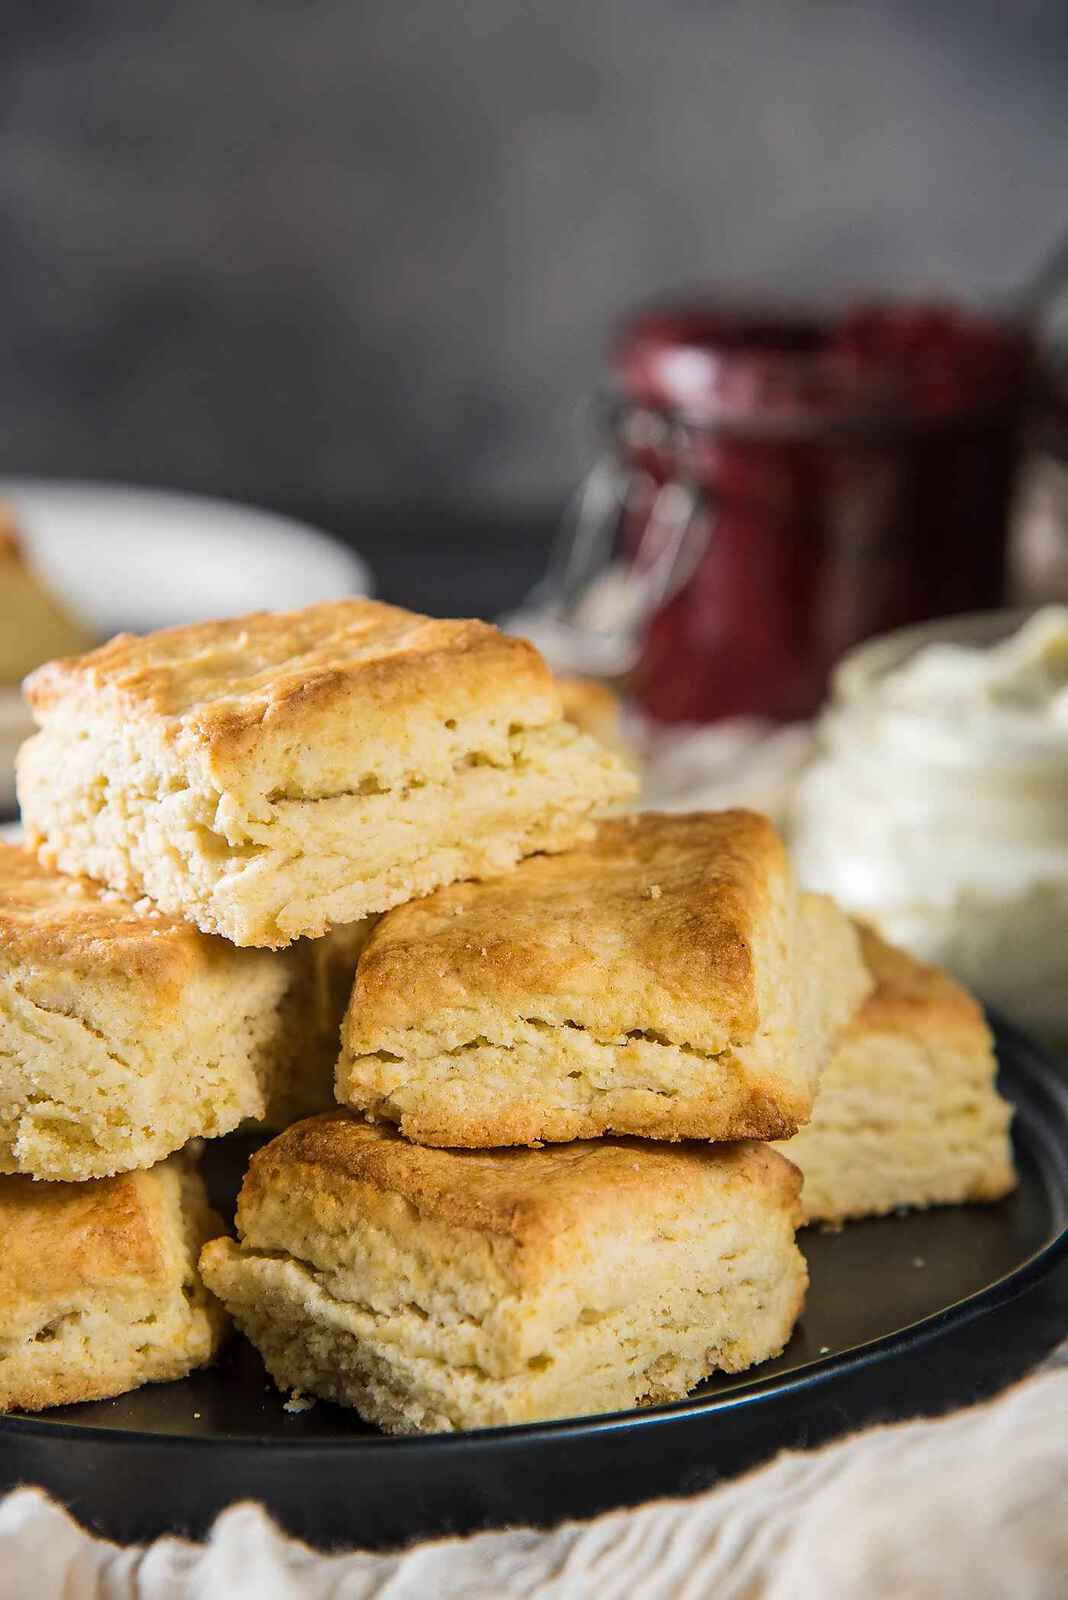
They are similar to American buttermilk biscuits, but flakier. Read the post for plenty of tips on how to make perfect classic cream scones!
Scones
I love a good scone. Especially with some butter, or even better, with some strawberry jam and cream! I’ve shared some of my favorite scone recipes on the blog before like blueberry scones, pumpkin scones, whole wheat scones, egg stuffed breakfast scones, date scones etc. Scones are obviously a popular breakfast and brunch recipe, but they are also great tea time snacks to enjoy with a cup of tea or coffee. Scones hail from Scotland, but the modern rendition of classic scones is vastly different to those original griddle-baked oat cakes. Scones today are delightfully flaky, soft, oven-baked goodies that are popular throughout Europe and Australasia. Cream scones are the most basic of all scones. They are somewhat similar to American buttermilk biscuits, but flakier. Classic cream scones are a great canvas on which to build different flavor and texture profiles. The first scone I ever made was a classic cream scone in 2011, thanks to one epic Australian grandma who was also my client back when I used to work as an audiologist. She walked me through her recipe for perfect scones, step by step, and I’m going to pass on all that wisdom to you guys today! 🙂 Unfortunately, my client didn’t actually give me a recipe that I could replicate, since she used old tea cups to measure ingredients (!), but she did say that getting the technique right was all I needed. That wasn’t exactly the case, and after some trial and error, I’ve now got the BEST Classic Cream Scones recipe, and I’m sure you guys will love it too!
What makes a beautifully flaky cream scone?
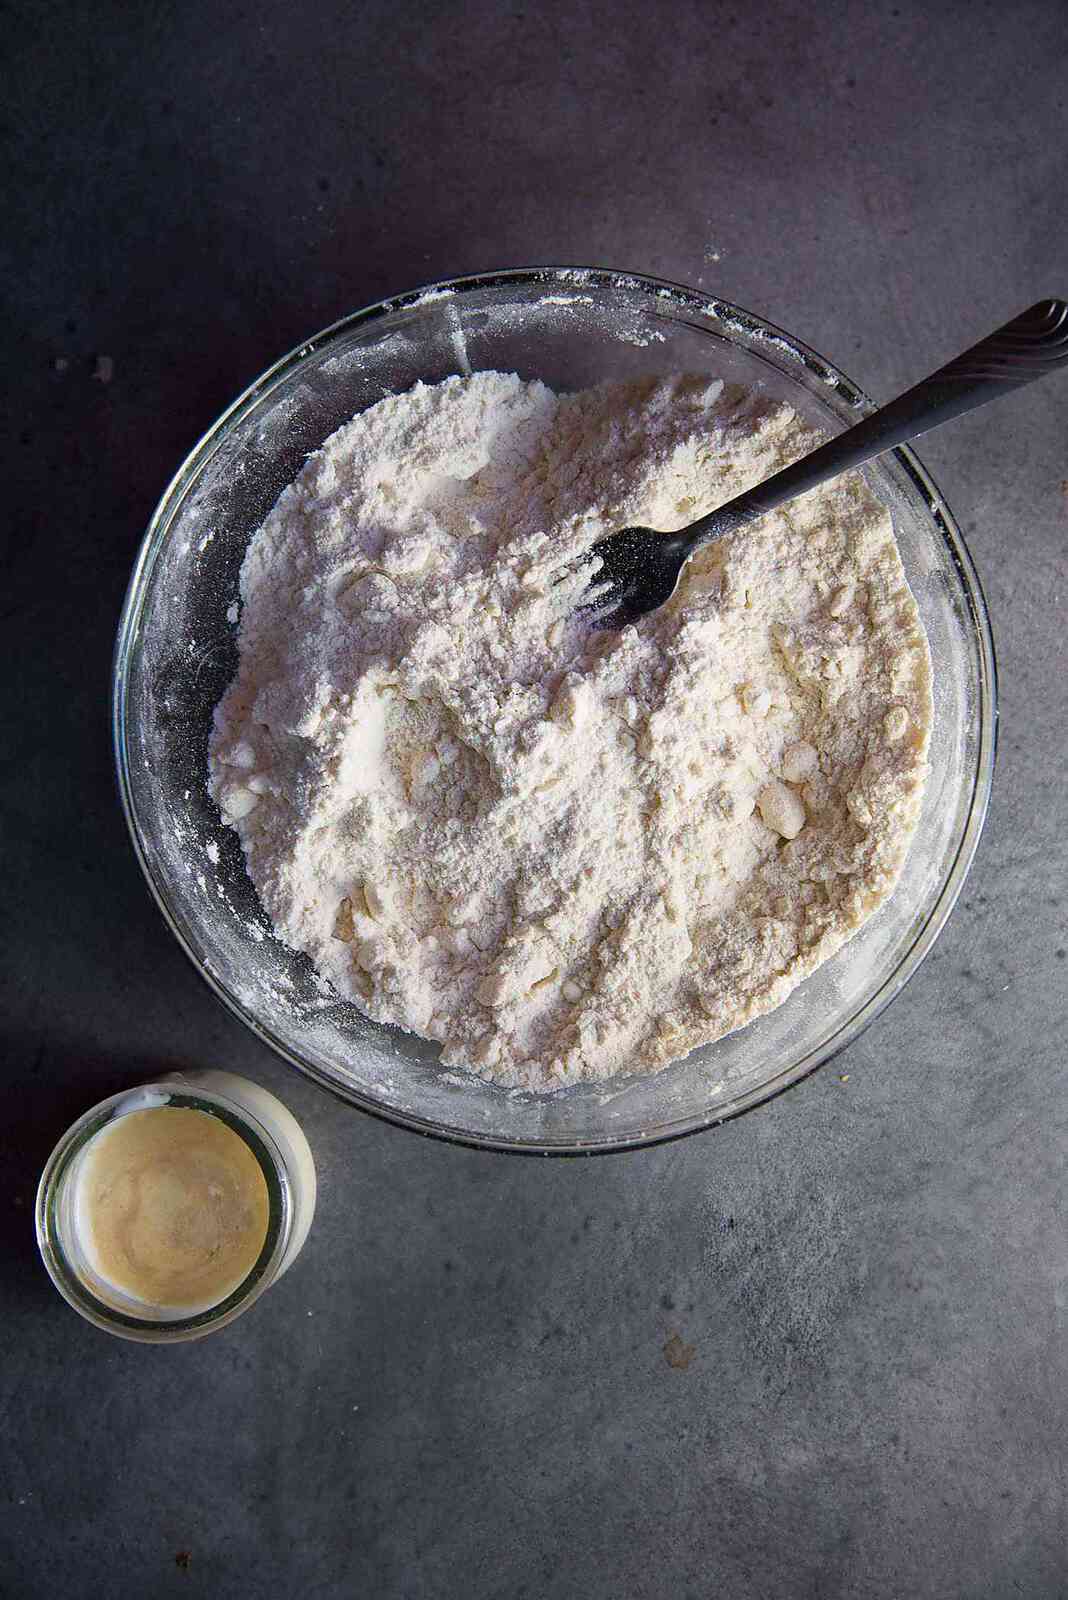
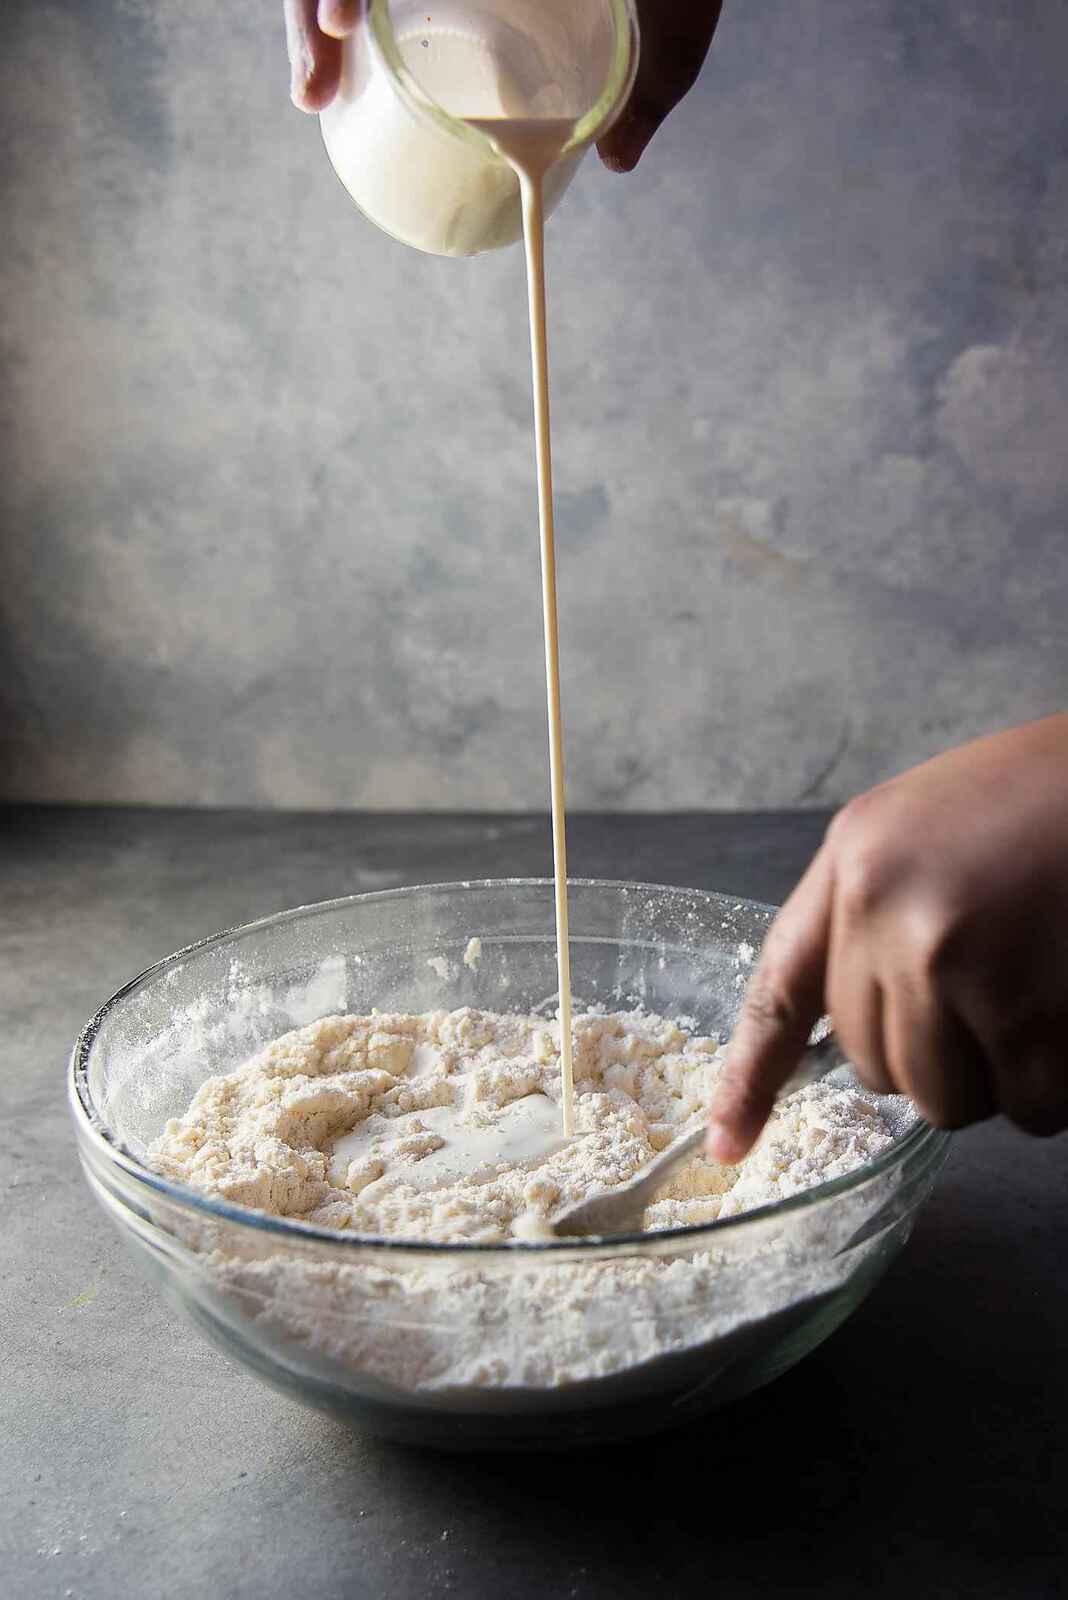
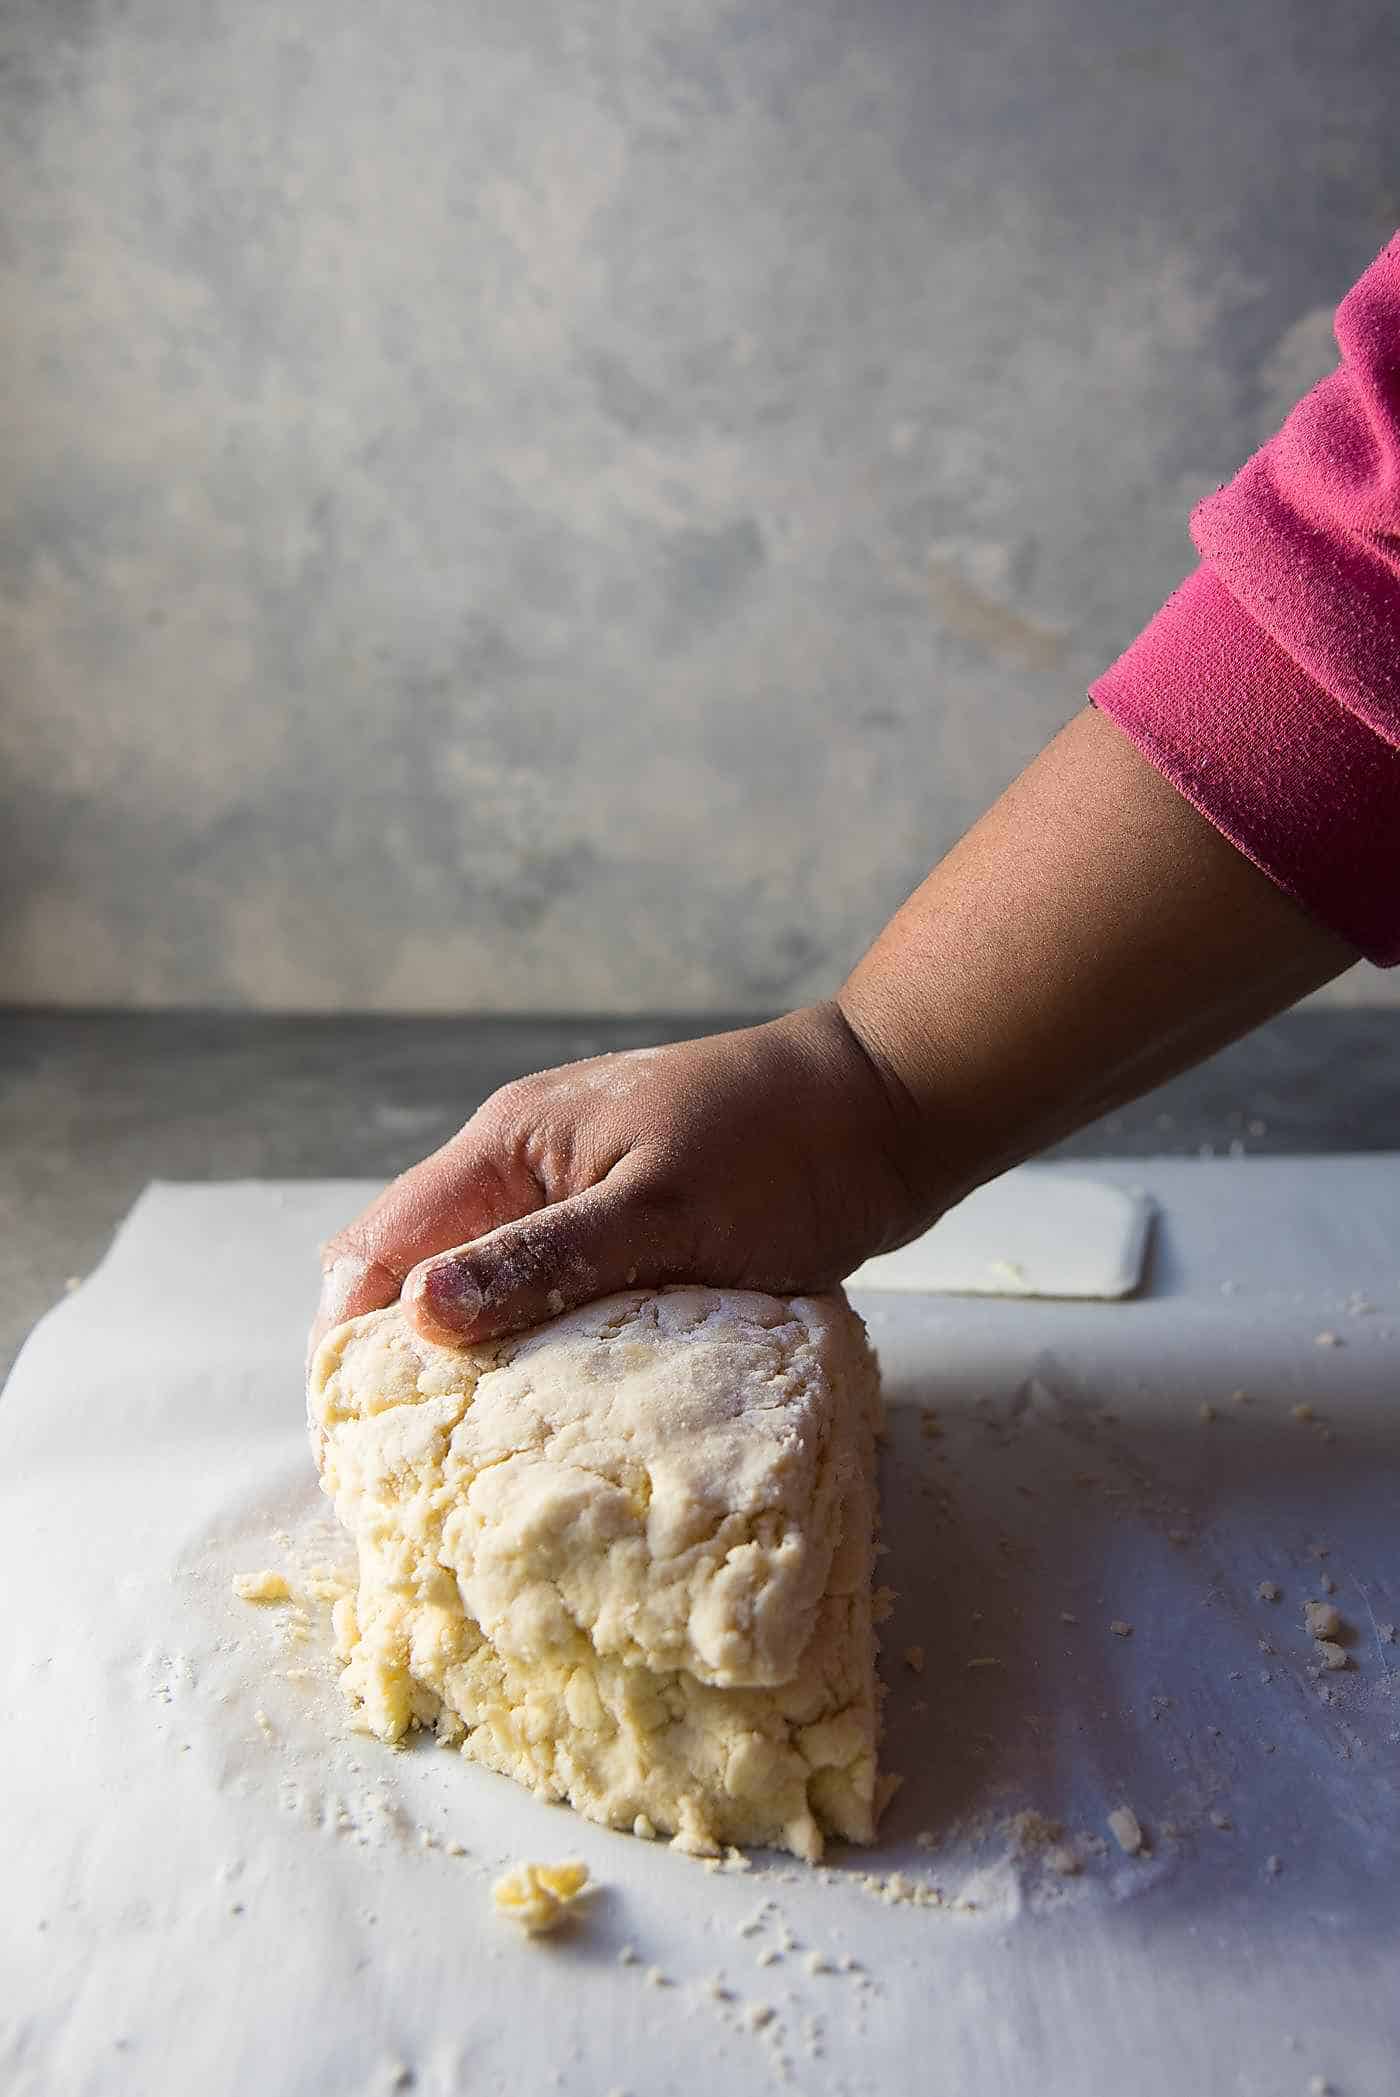
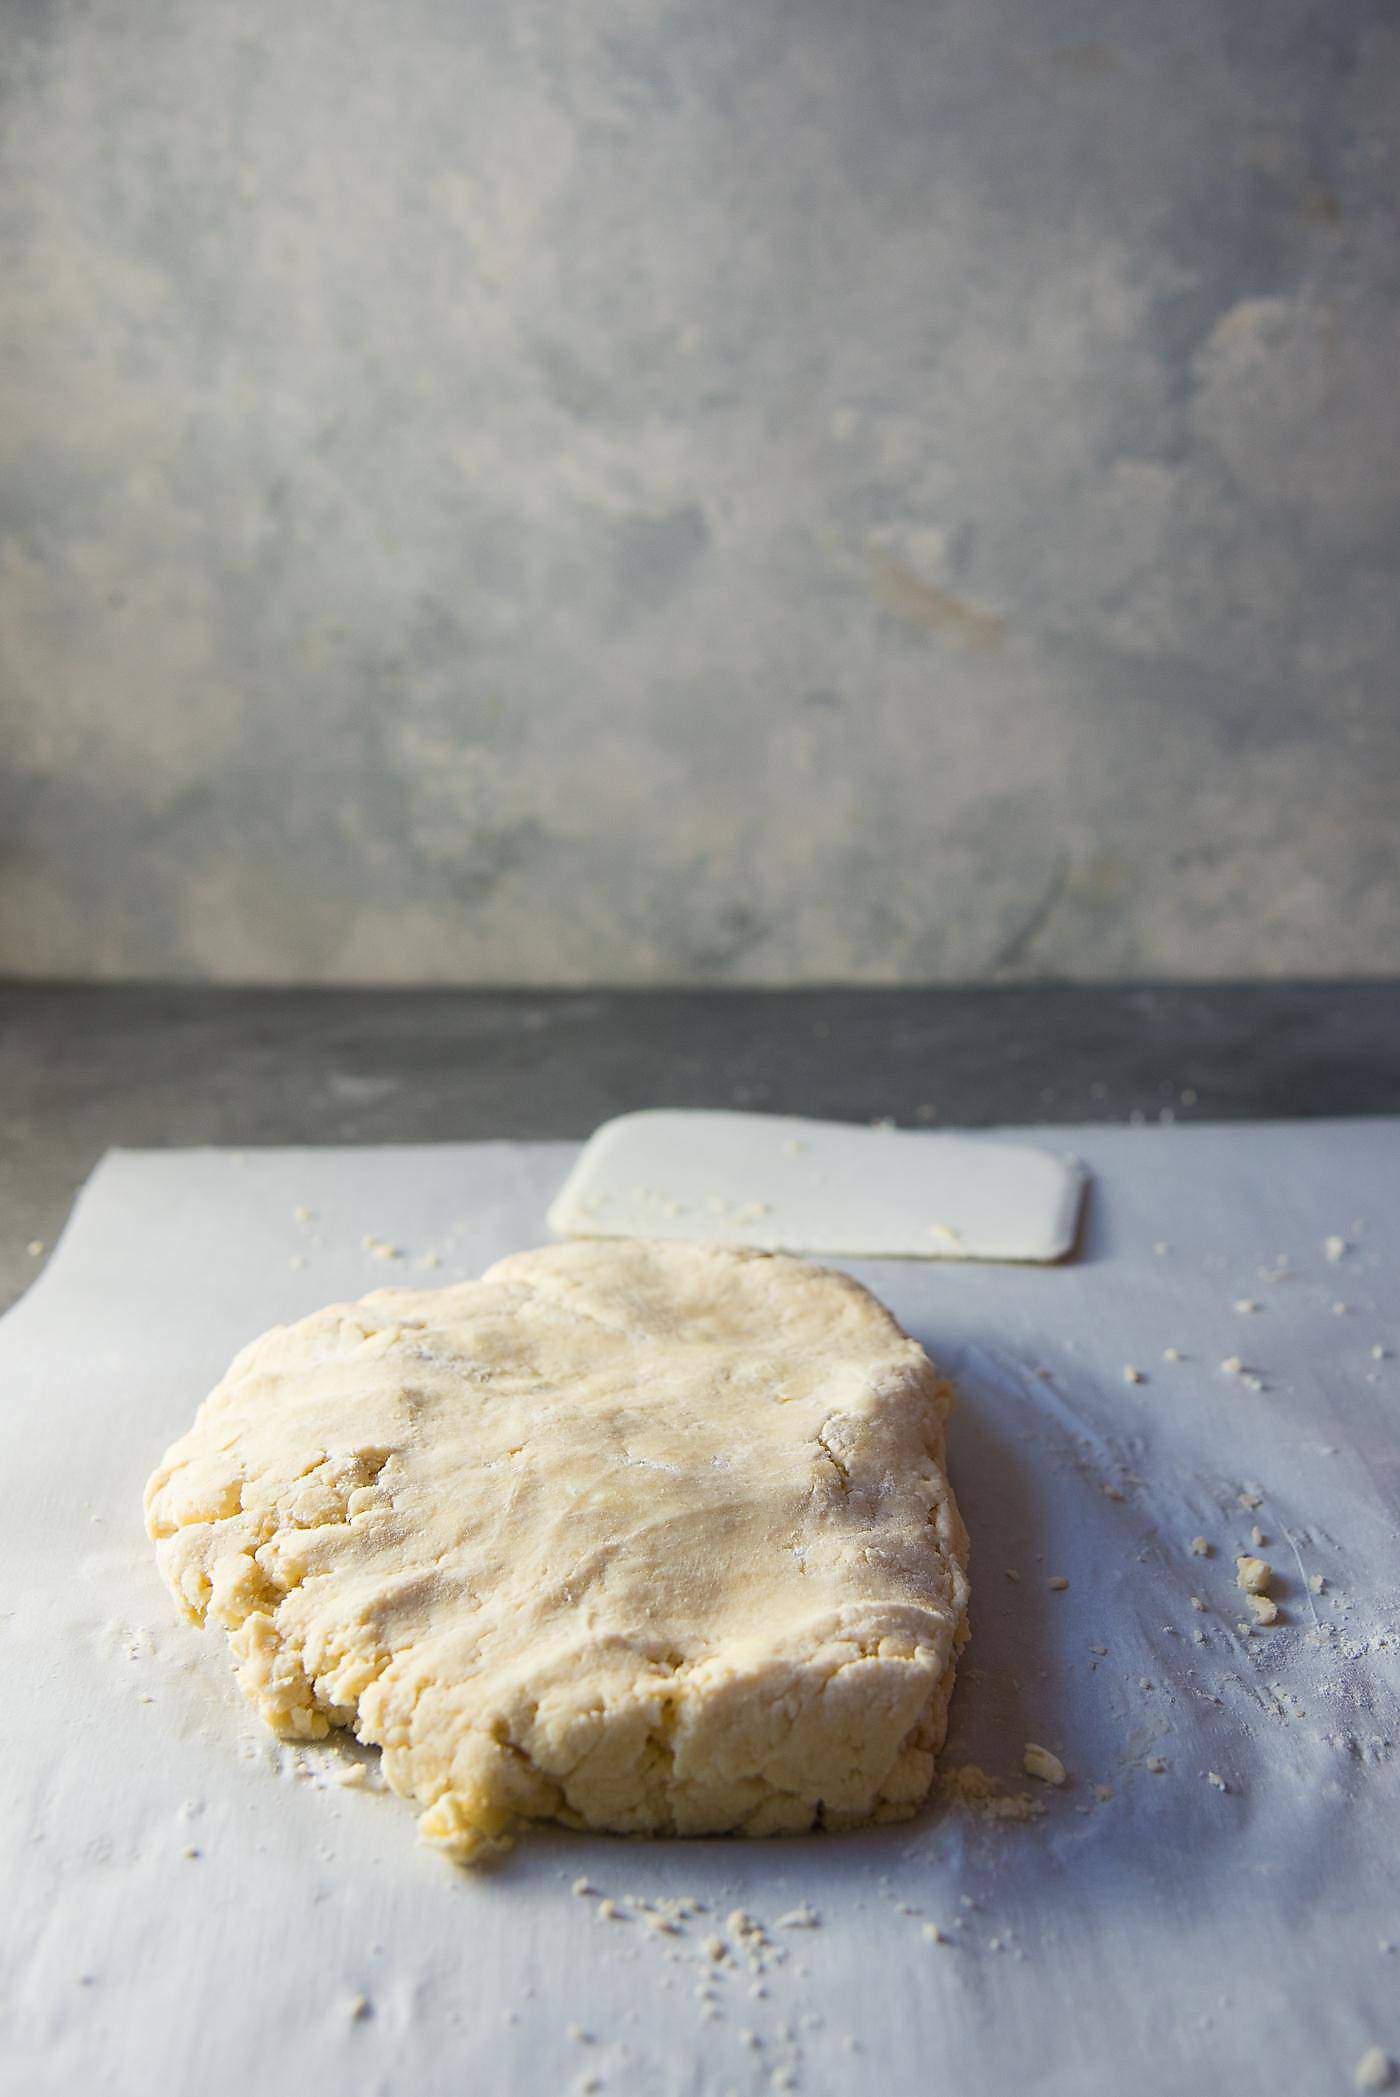
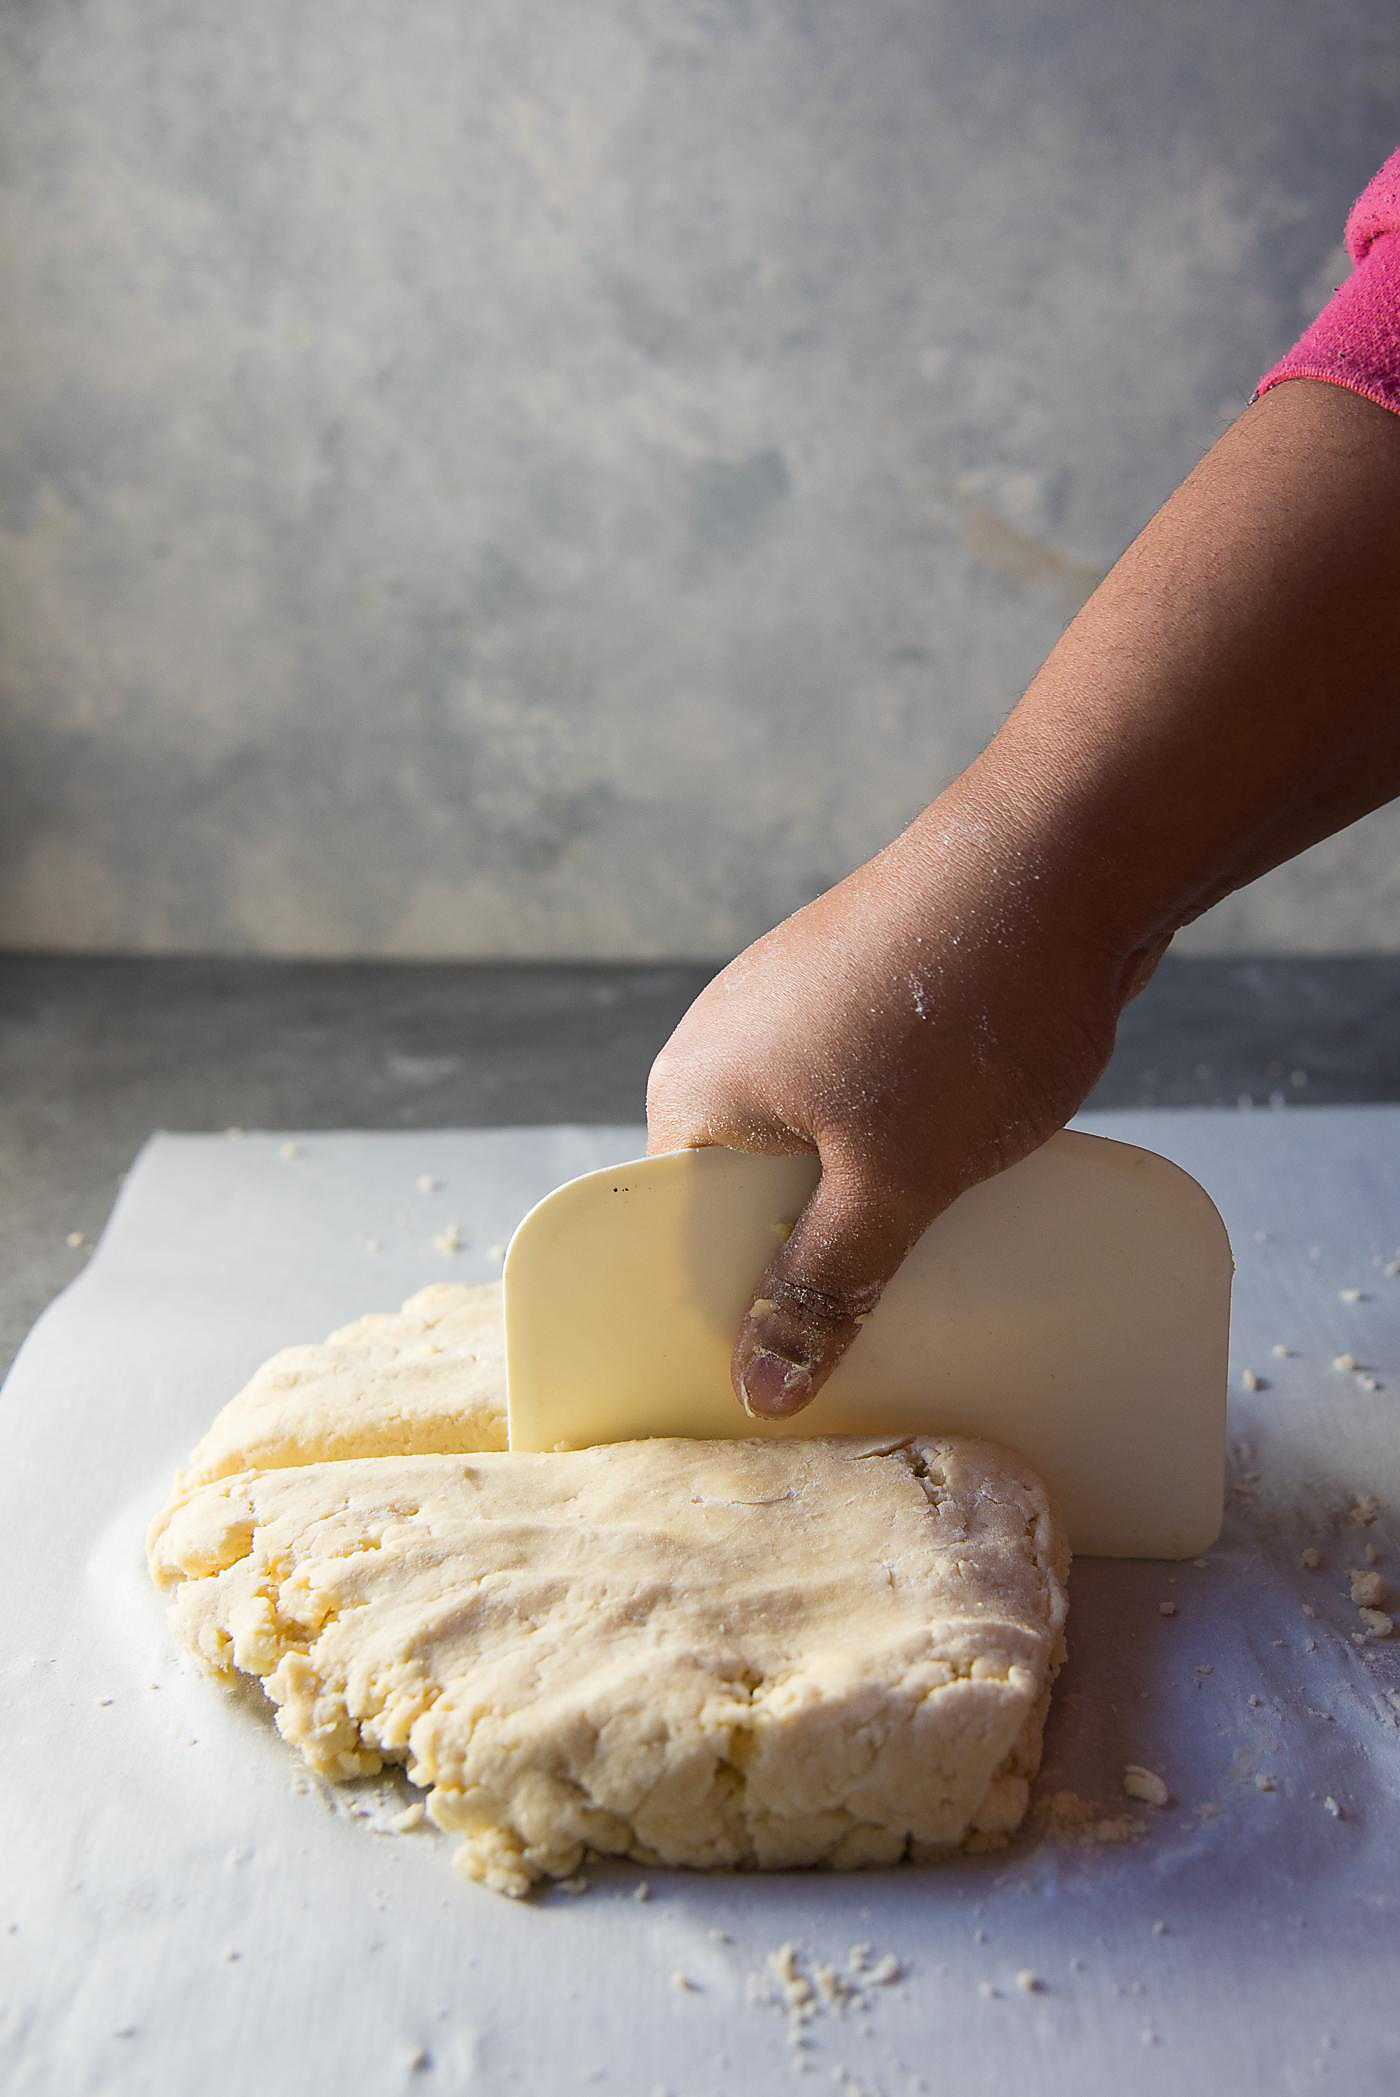
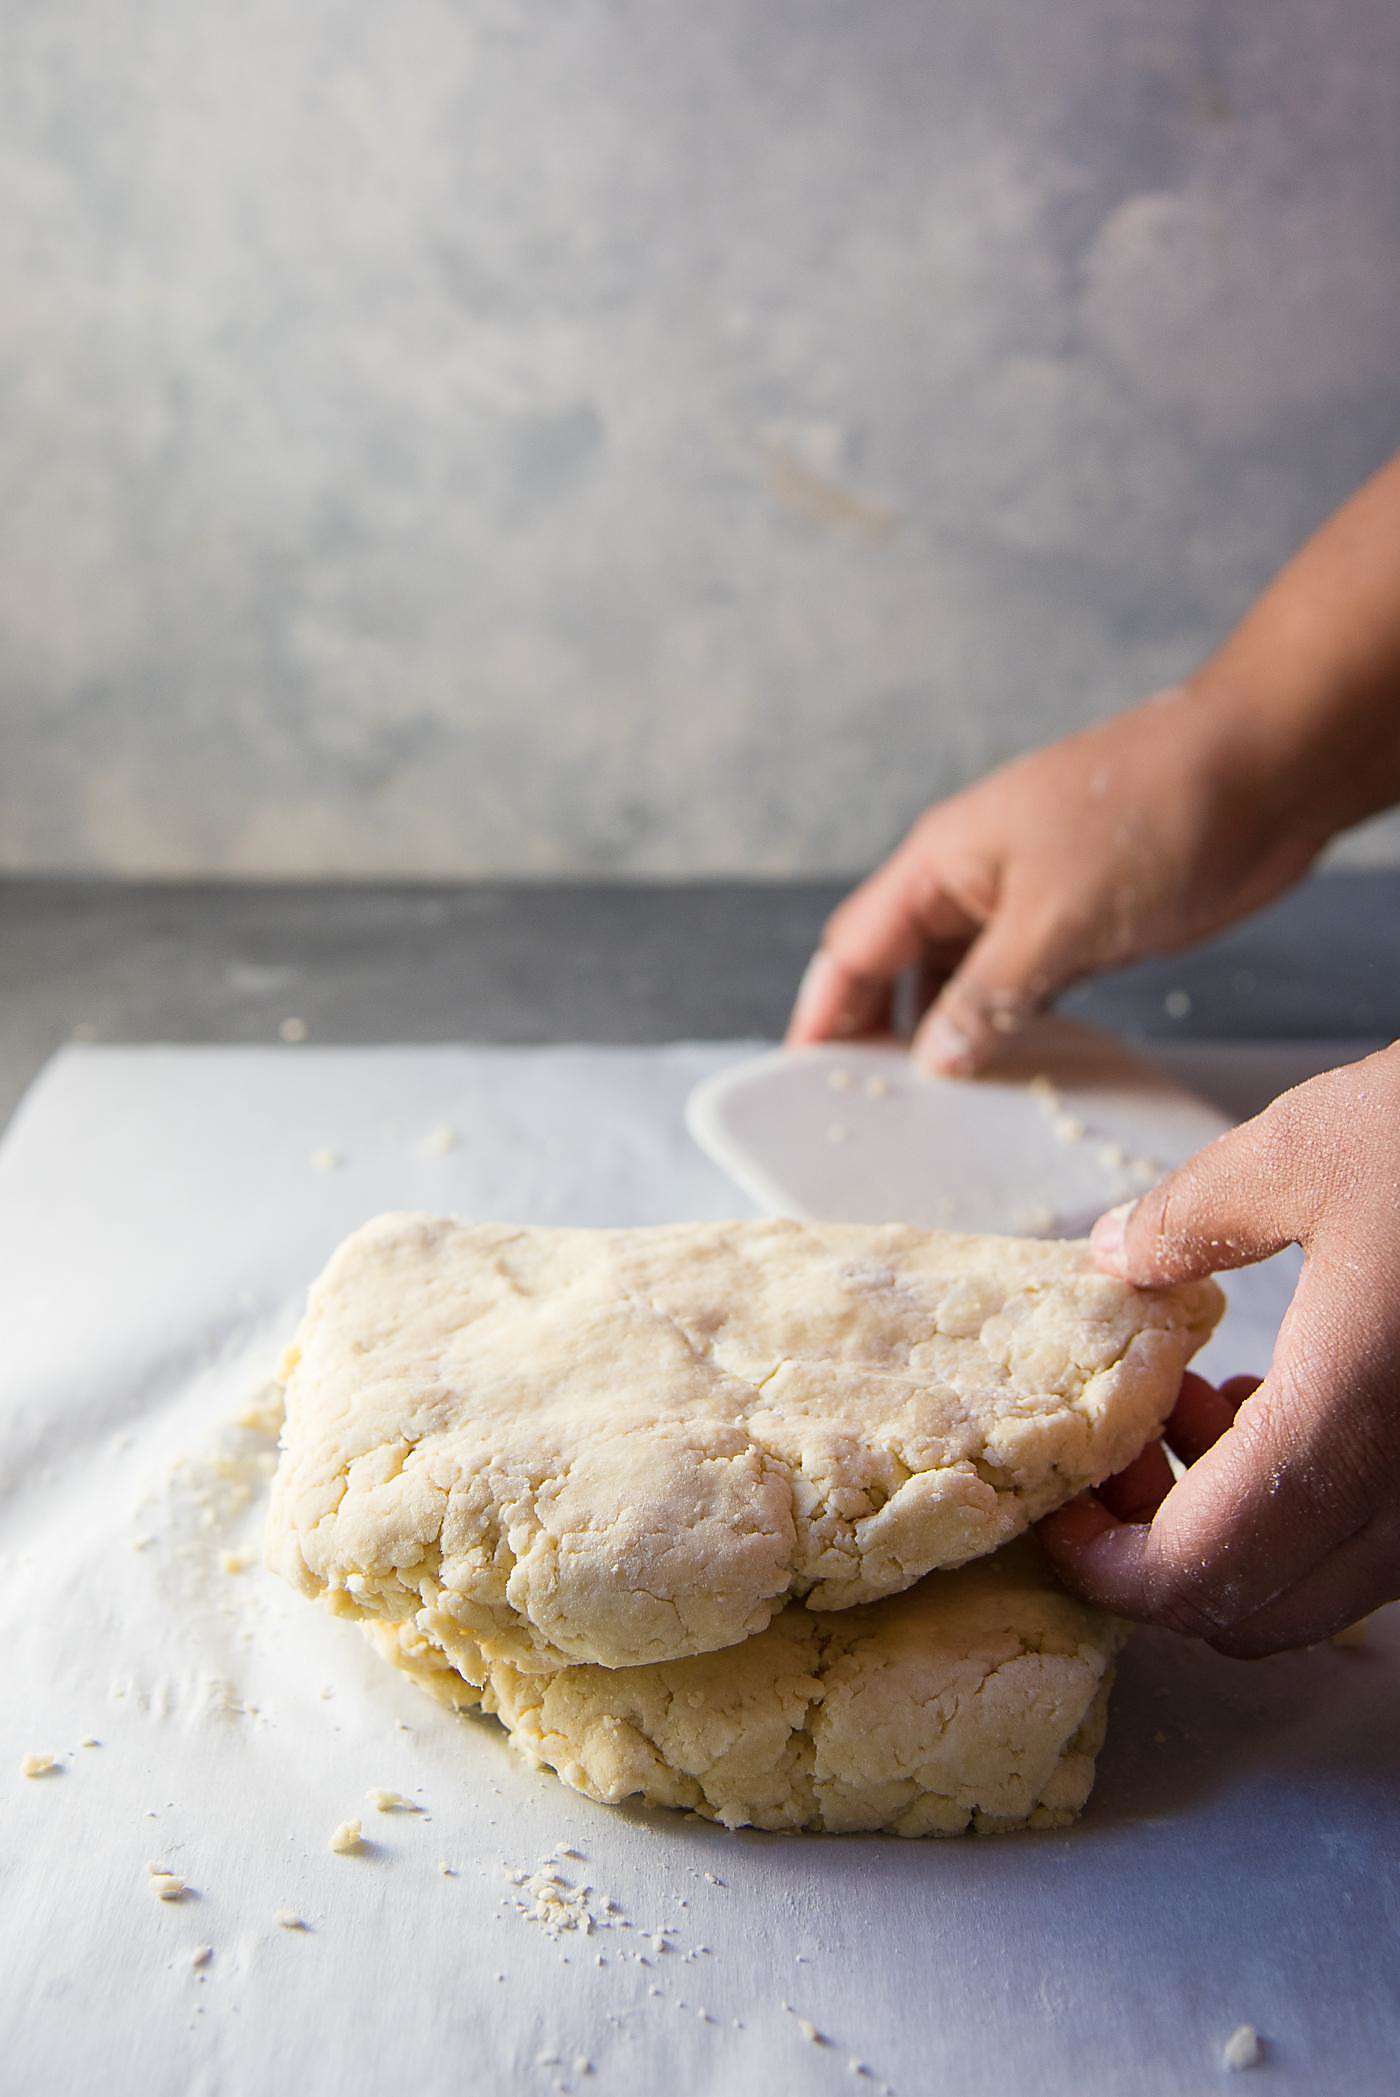
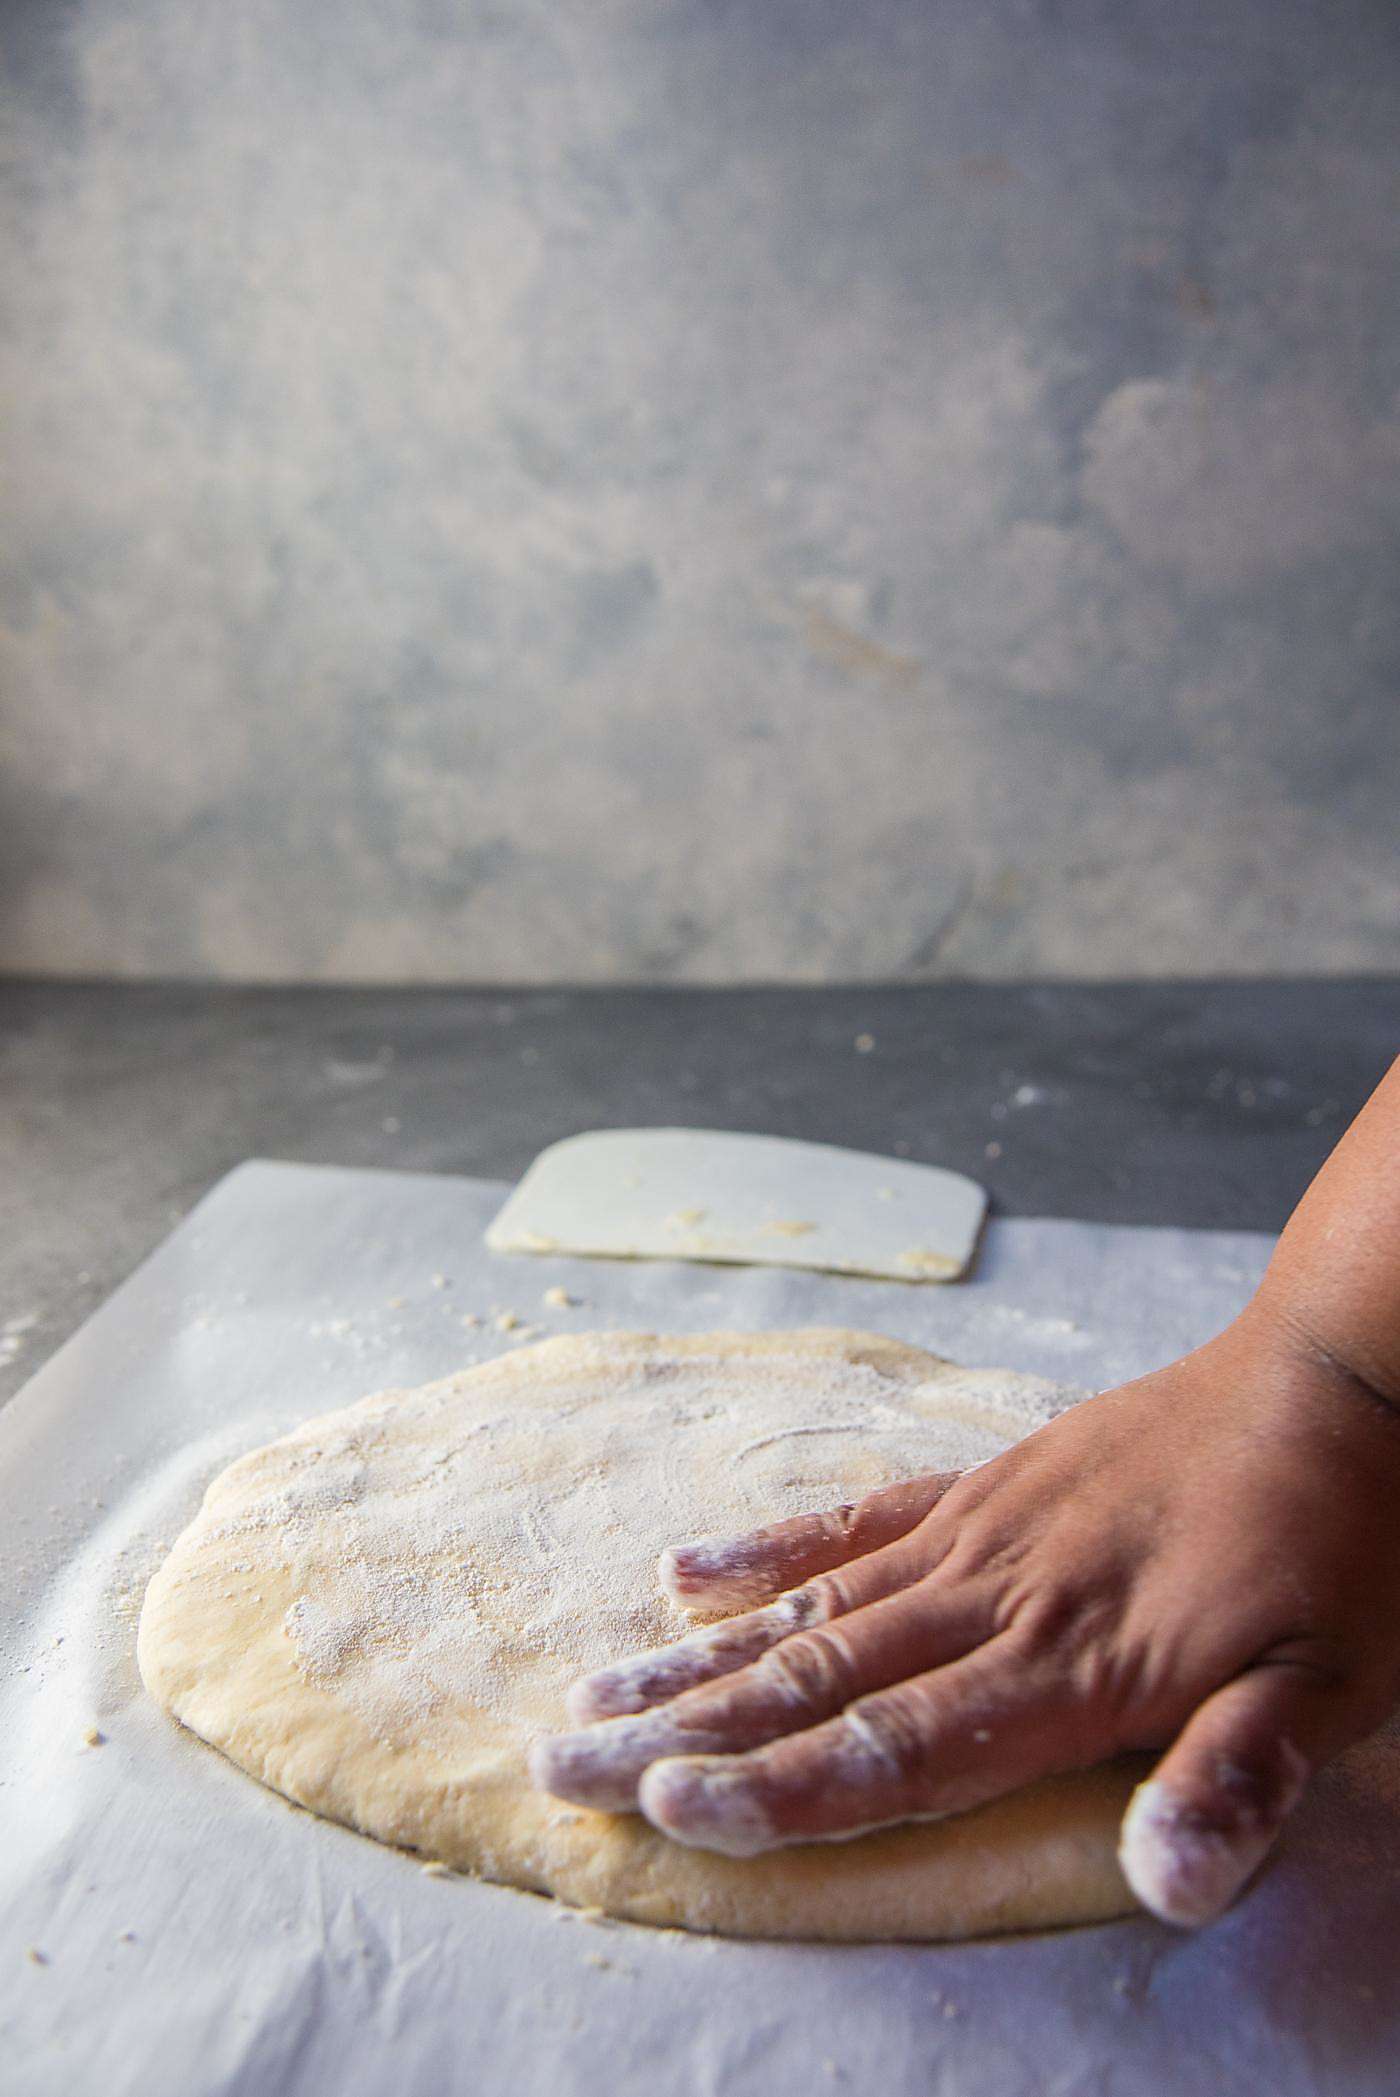
Cold ingredients. All the flour, butter and cream for this buttery cream scones recipe must be nice and cold. It’s important to keep little pieces of butter in the dough to help create more of that lovely flakiness. Handle the dough as little as possible. Do not over-mix the dough. The butter is rubbed into (or cut into) the flour, just like you would with shortcrust pastry. To create layers, the dough is folded, just like you would with puff pastry. However, to make it easier, I cut the dough and lay it on top of each other instead of folding it over.
All these techniques help form the soft flaky layers in a classic cream scone. Some scones recipes call for the addition of eggs. The classic scone is actually eggless. The crumbly scone dough is required to create the flakiness, and eggs are a binding agent that will reduce that flakiness. While there’s nothing wrong with adding eggs, for a classic, buttery, extra flaky scream scone, you shouldn’t add eggs. The other characteristic feature of classic cream scones (or any kind of scone) is the height.
How to achieve height in your buttery cream scones and other tips
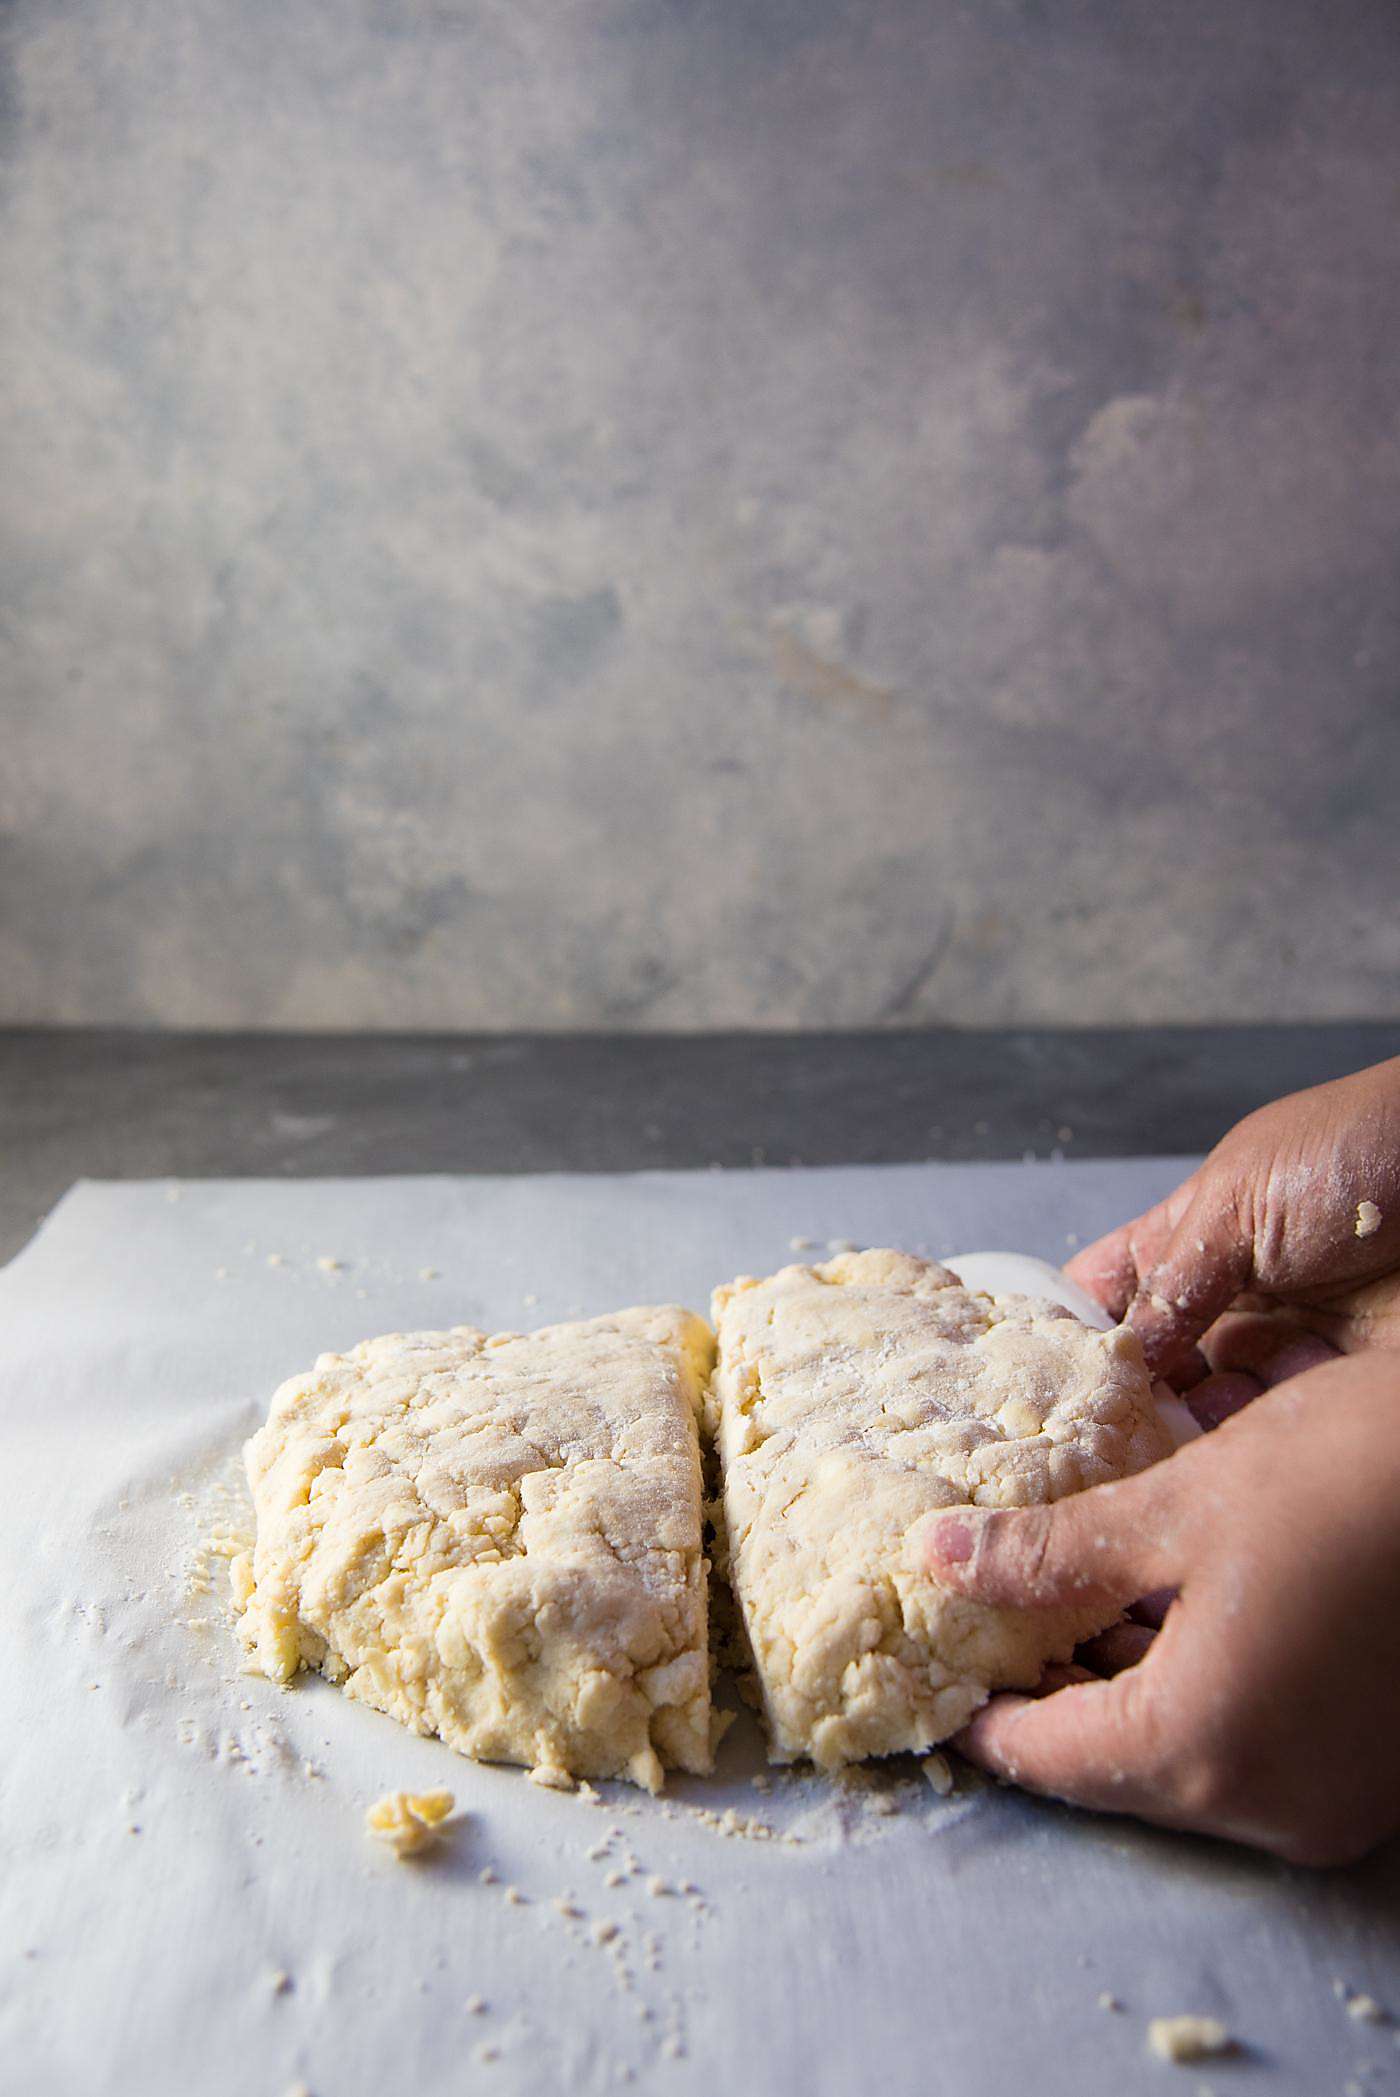
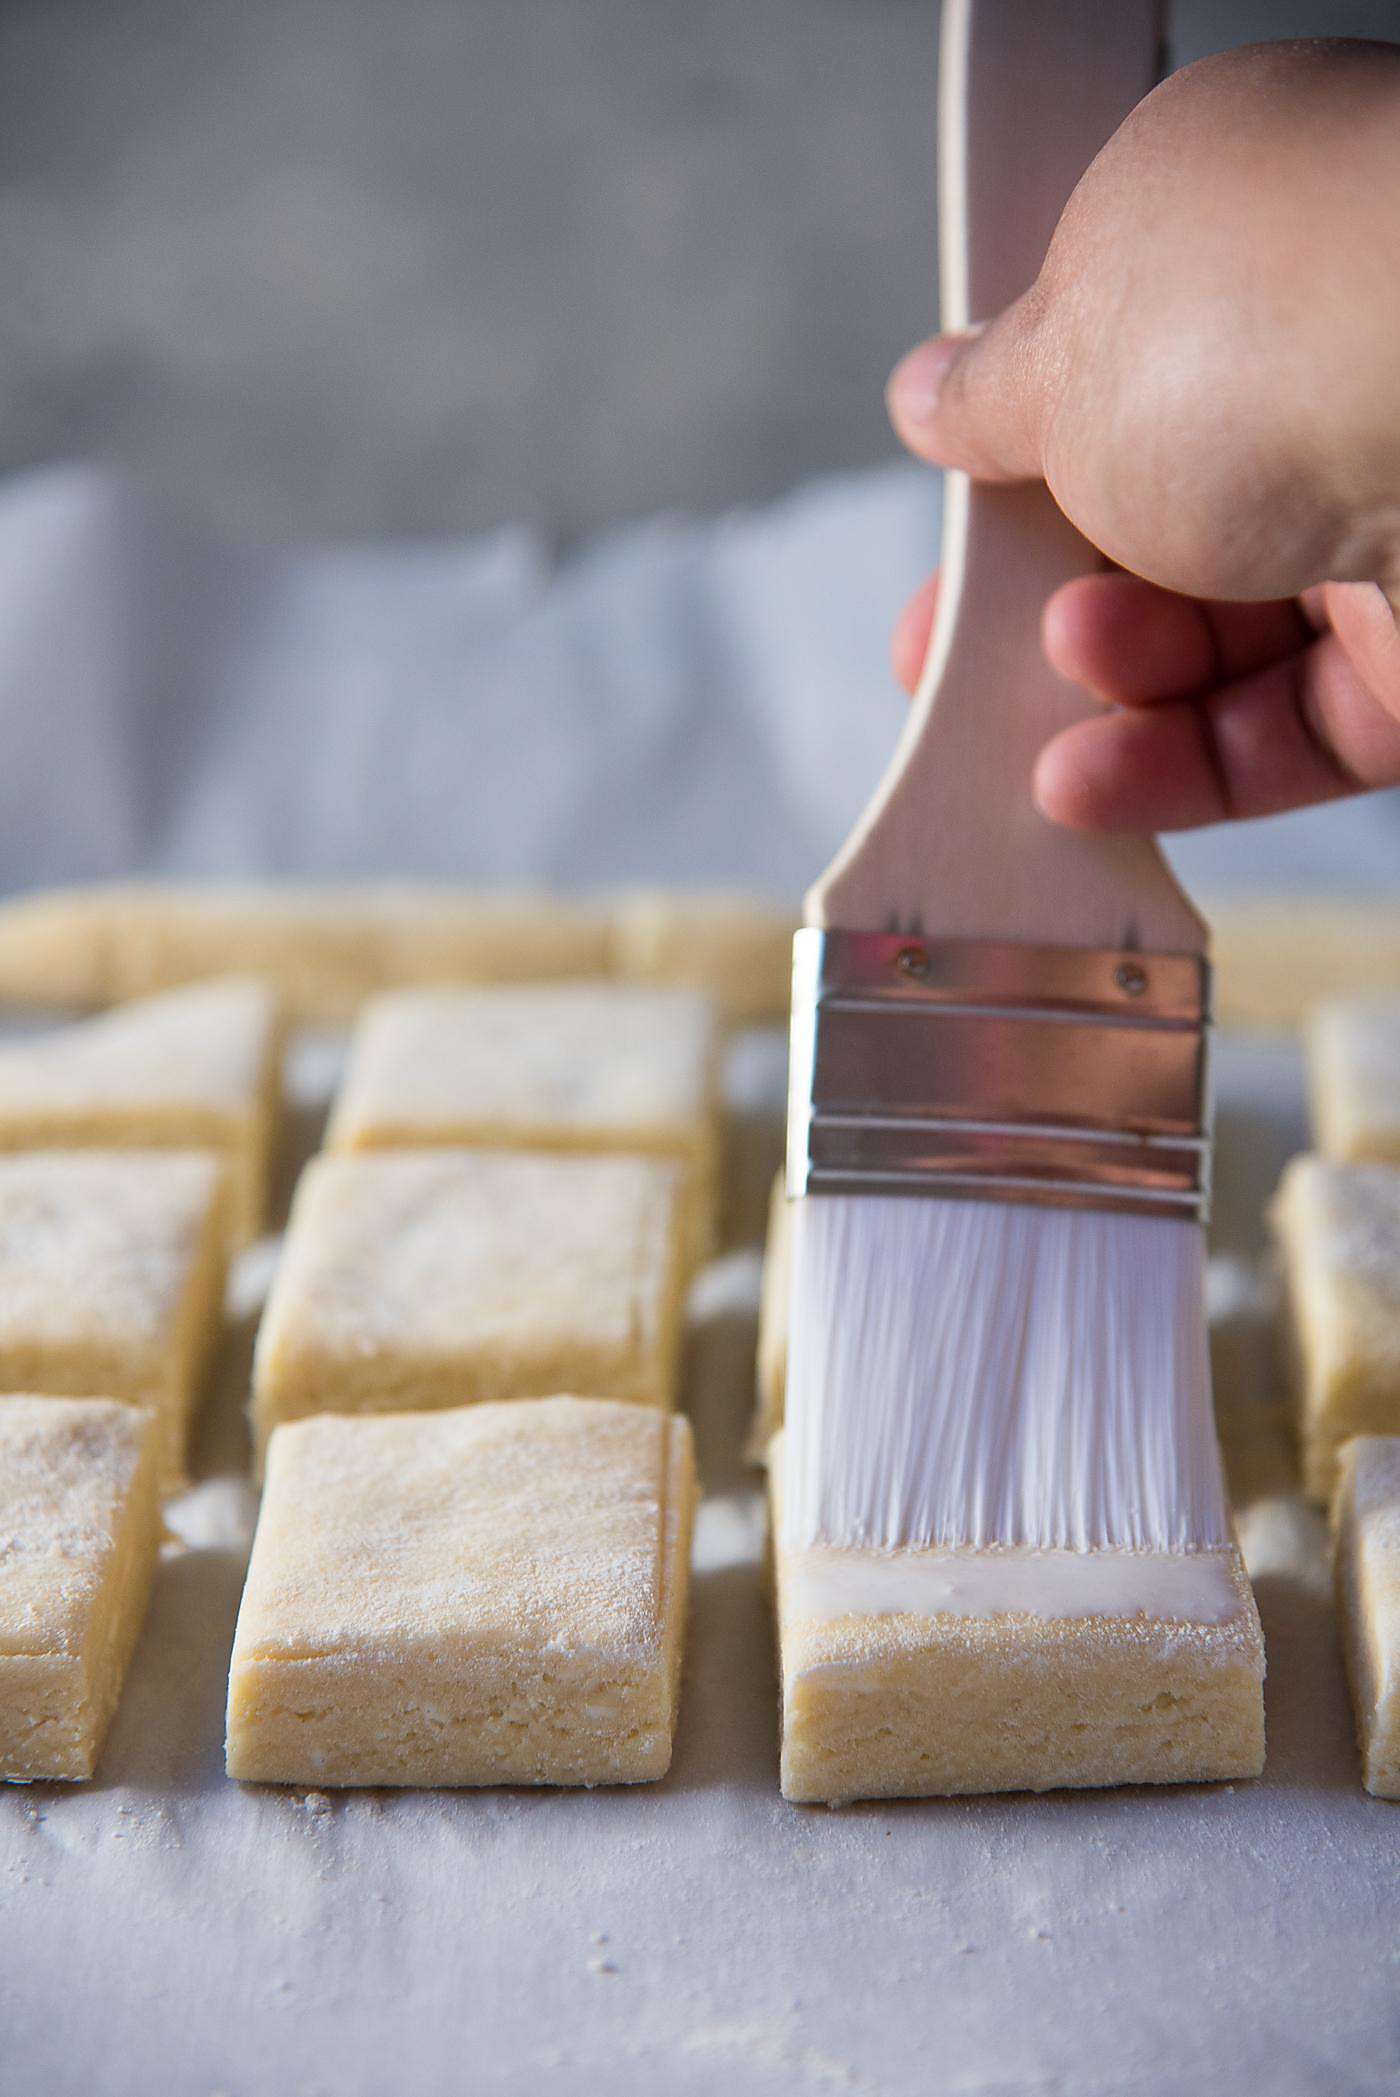
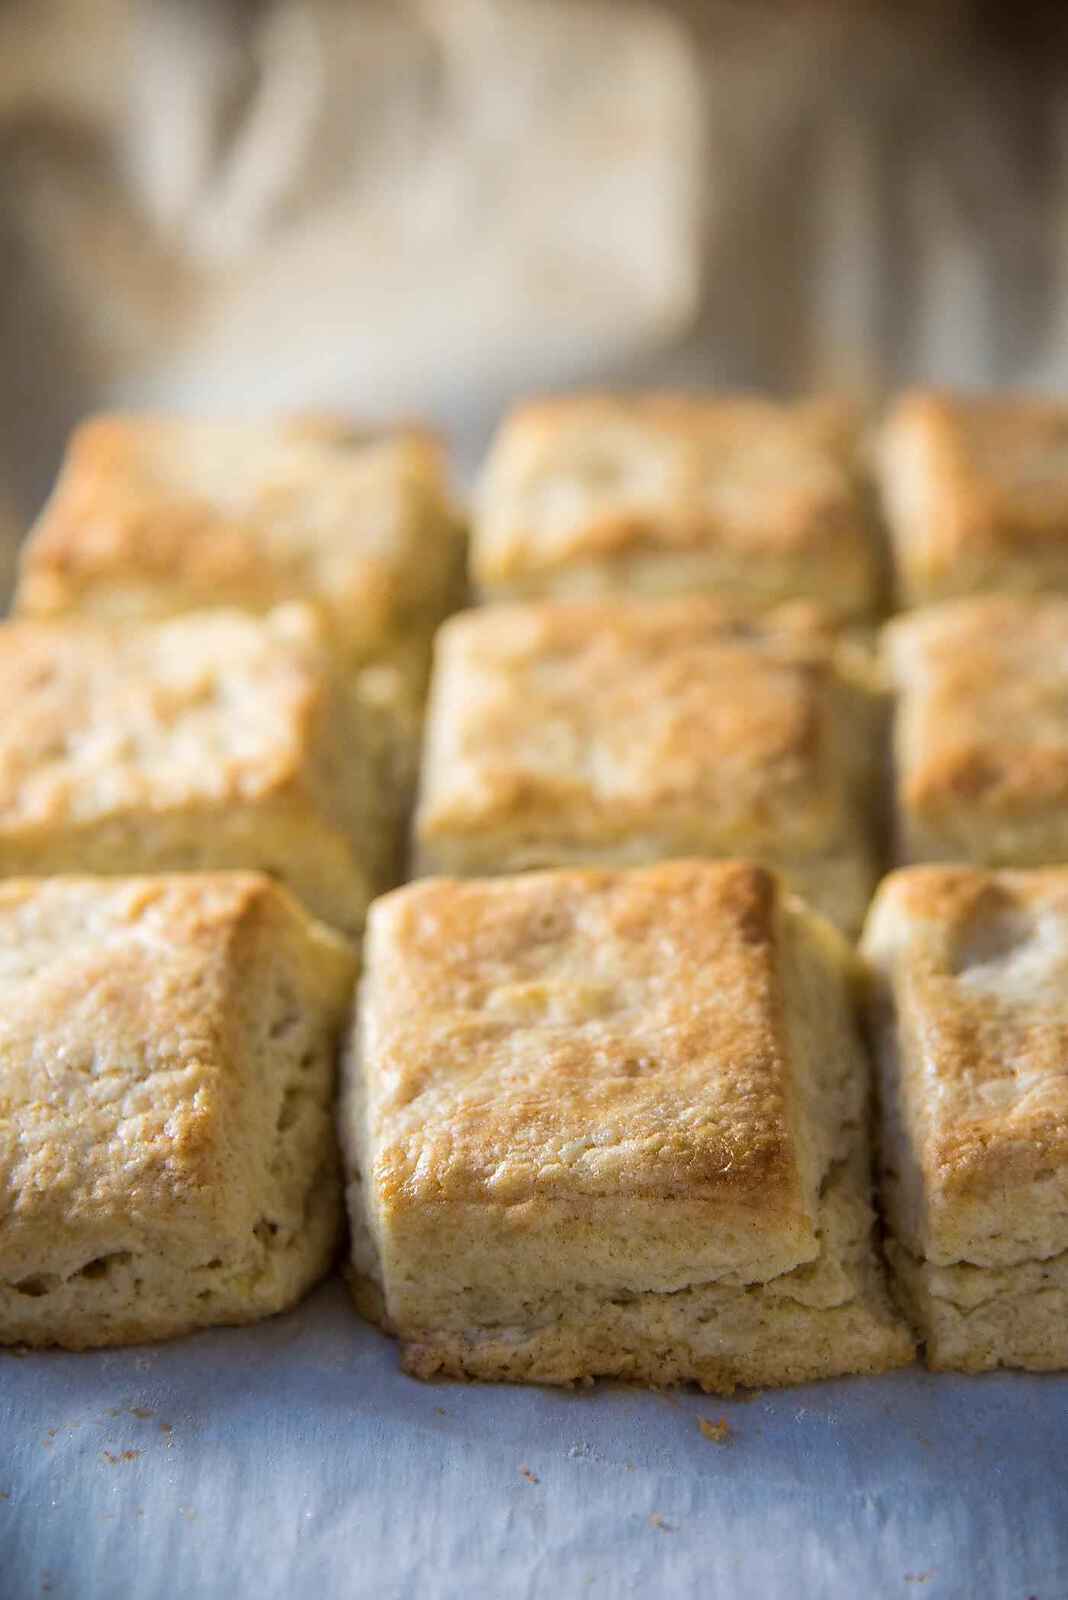
When the dough is rolled out to be cut, make sure it has a height of at least 1/2 inch, or up to 3/4 of an inch. After baking, each scone will rise to about twice that initial height. Cut the scones with a clean knife or cutter. Clean edges help define the layers that will rise better (and taller). Wipe the cutter or knife after each cut, and dust it lightly with some flour for best results. Cut round scones, triangle scones or square scones. The shape is up to you. I prefer squares simply because it’s easier. Plus, I don’t have to “re-roll” the leftovers like you’d have to after cutting round scones. Freeze the scones for a few minutes before baking. For soft scone edges/sides – bake the scones with the sides touching each other. This will result in taller scones because they HAVE to rise up, but they will have soft sides. For crunchy, flaky edges/sides – bake the scones with at least 1.5 inches of space between each. This way the scones will bake with no interference from neighboring scones and have flaky, crunchy layers. For the best of both worlds – for soft and crunchy exteriors, I prefer to space them apart by just a little, about 1 to 1.5 cm. The scones will expand and touch each other at the base, giving soft edges at the bottom, but the top edges will be nice and crispy. Make sure to ONLY glaze the top. You don’t want any milk or egg wash to drip down the sides. It will interfere with the shape of the scones. Bake in a high heat oven. That initial high heat will cause the leavening agent to activate very quickly causing the scones to rise and expand quickly.
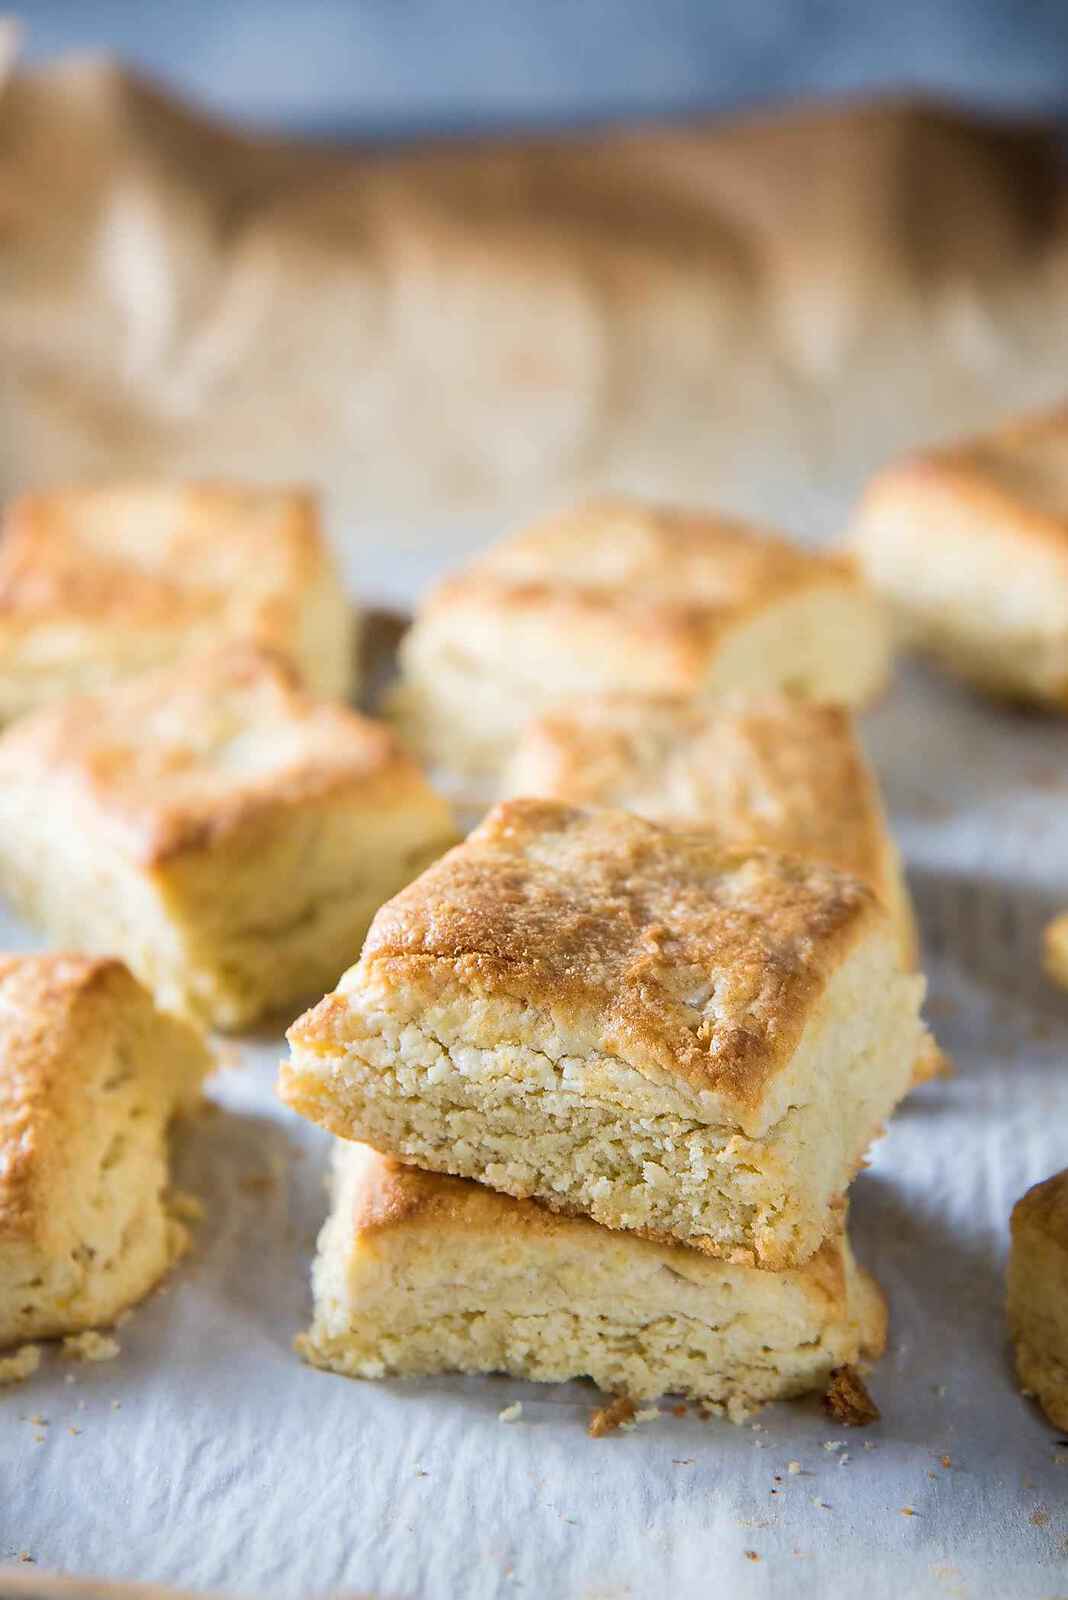
What you end up with are easily the most perfect cream scones ever. They taste best while warm, as this also prevents the scones from crumbling.
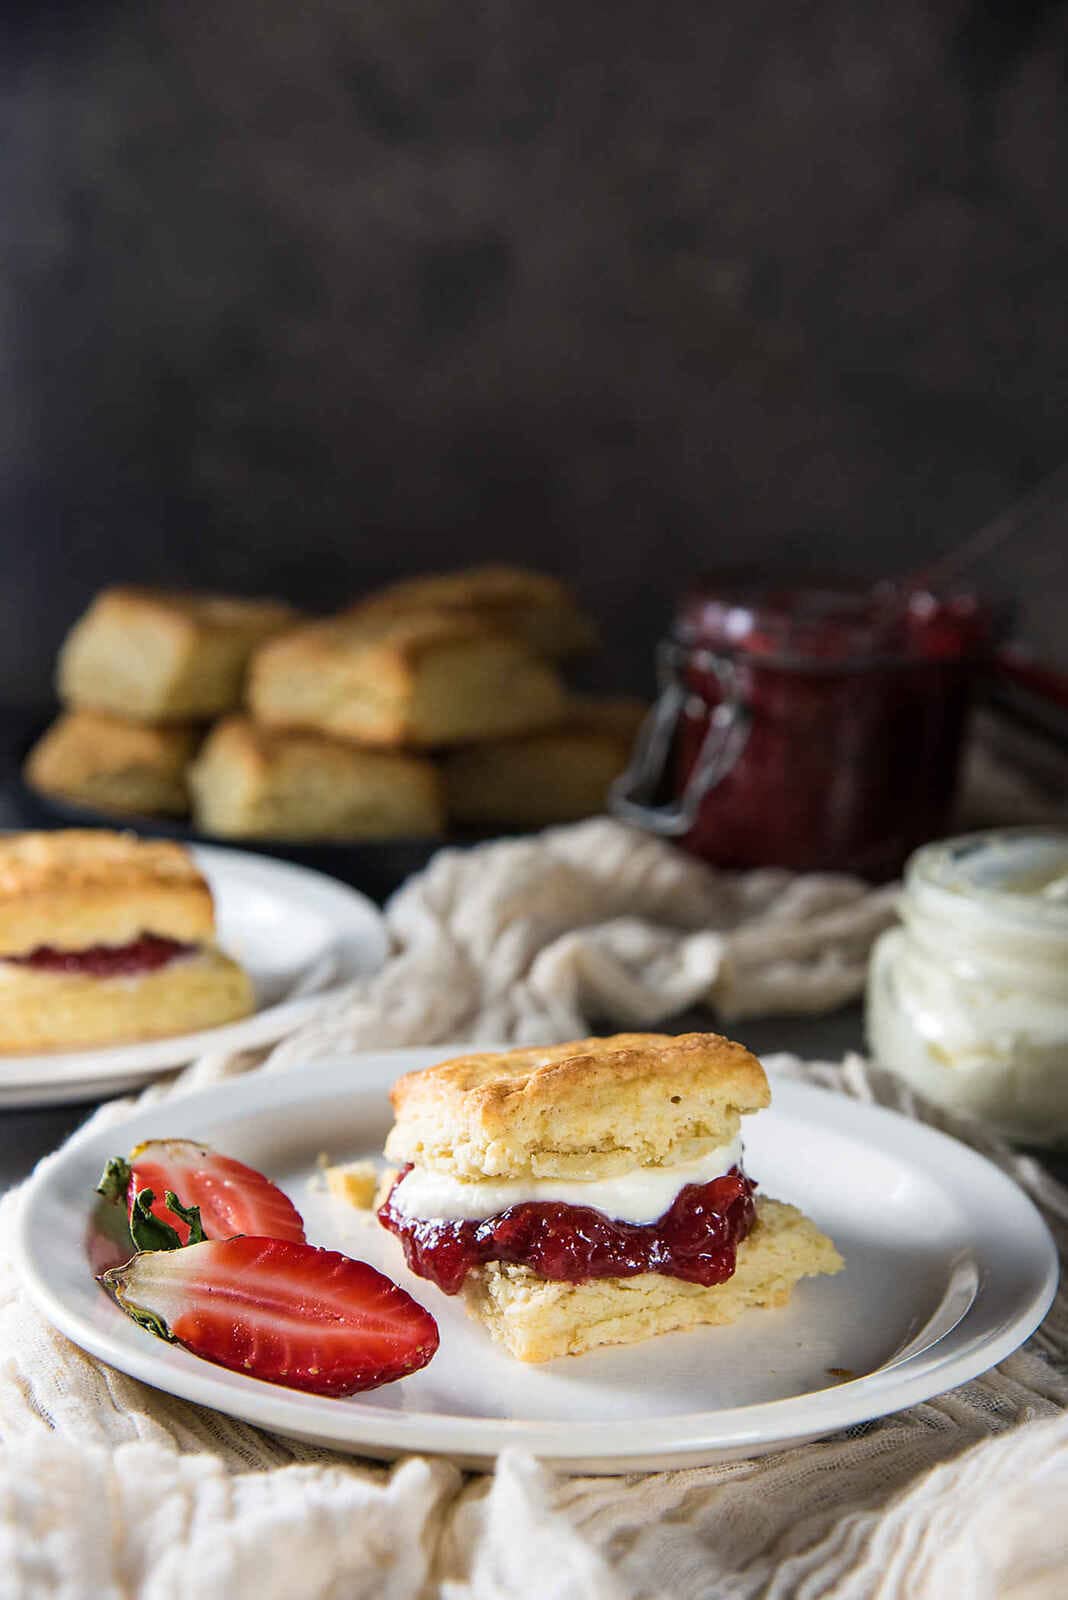
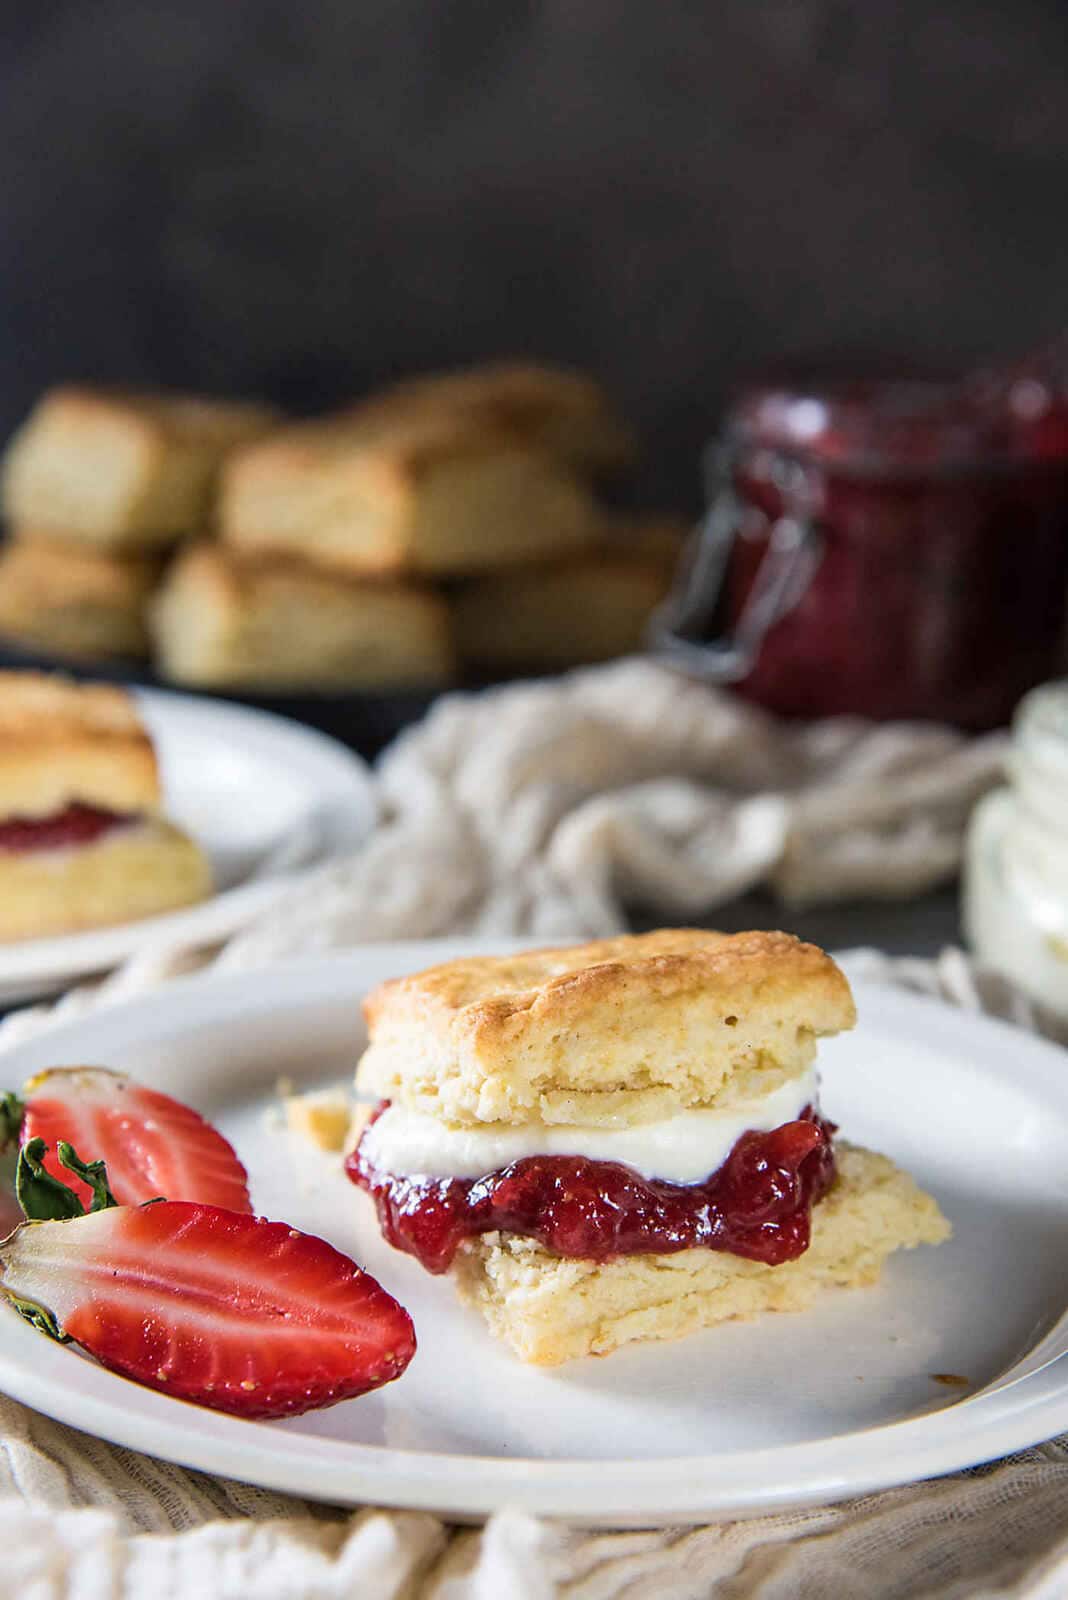
How to serve cream scones
If the scones have cooled down, just pop them in the microwave for about 20 – 30 seconds. Split open the scone and place a pat of butter and let it melt in the warmth of the scone. These scones can be eaten just like that… OR Add a generous dollop of jam and some clotted cream (or whipped cream or mascarpone) for added indulgence. That of course is my favorite way to enjoy these classic cream scones. 🙂 If you liked this classic cream scones (buttery cream scones) recipe, don’t forget to subscribe for new (and free) recipes by entering your email address on the side bar (and get all these recipes delivered straight to your inbox), so you don’t miss out on a thing. You can find me on FACEBOOK, INSTAGRAM, PINTEREST, YOU TUBE and GOOGLE-PLUS too.