This is one of my all-time favorite cake recipes, and it’s perfect as a birthday cake, as a Valentine’s day recipe, or for any special occasion. I still remember my first bite of red velvet cake, many years ago. Wanting to recreate that first memory, I followed a recipe I found in an old magazine to make my first red velvet cake. Many years and many red velvet cakes later, I have perfected this recipe for the most perfect, moist, soft, and flavorful red velvet cake. Along with the best cream cheese frosting recipe that perfectly complements this cake! It’s the same creamy, tangy frosting that goes so well with my carrot cake recipe. Fun fact – the first birthday cake that I ever made for my husband was a red velvet cake! I even made fondant Avengers characters to top the cake because we are big time Marvel fans. Red velvet cake is still one of our favorite cakes to make (and devour!), and it’s criminal that I haven’t shared my perfected, old fashioned red velvet cake until now. As a plus – it’s a SUPER easy recipe too!
Why should you try this recipe?
This recipe is based off of a really old classic red velvet cake recipe I got from an old magazine. Unfortunately, I can’t even remember the name of that magazine anymore, plus I have tweaked the recipe over the years to make it even better. It’s so easy to make! You don’t need a stand mixer for the red velvet cake (but you do for the frosting!), and it produces perfect results every single time. The combination of butter and oil in this recipe that produces the perfect balance of soft, velvety crumb and buttery flavor! The chocolate flavor is subtle, but the classic buttermilk flavor is strong! I even share tips on how to bake the most perfect red velvet cake AND the chemical reactions that make this cake taste truly fantastic.
What is a red velvet cake?
While most of the US and Canada are very familiar with red velvet cake, that may not be true for the rest of the world. While red velvet cake is particularly popular in the southern United States, this article from Southern Living explains how this delightfully red-hued cake was popular in many parts of the US and Canada in the pre-World War II era. Regardless of the murky origin story of red velvet cake, it is a uniquely delicious cake due to the use of buttermilk, which enhances the tangy flavor of the cake. While early renditions of this cake had a natural red hue to the pairing of acidic elements such as vinegar with cocoa, the advent of food coloring resulted in the strikingly red cake that we know and love today. It’s an incredibly soft, moist cake, with a lovely tangy buttermilk flavor, and typically paired with a delicious and creamy cream cheese frosting. What’s not to love?
Is it just a chocolate cake?
Nope. Since cocoa powder is one of the ingredients, some assume that this is just a red colored classic chocolate cake. However, there is very little cocoa powder in the batter, and it doesn’t really yield much of a chocolate flavor either. The cocoa powder flavor is very subtle here.
So what does cocoa powder do in this recipe?
It’s important to note that the cocoa powder used here is NATURAL cocoa powder and not dutch cocoa powder. If you’d like to learn more about the difference, you can check out my baking basics article on Dutch process vs natural cocoa powder. This is one of those recipes where you absolutely cannot substitute the natural cocoa powder with other types of cocoa powder. Historically, cocoa powder was used in cake recipes because cocoa powder helped break down flour in the cake, which used to be very coarse. The result was that cakes that contained cocoa powder were softer and had a smooth and “velvet-like” texture. So, cakes that were called “velvet cakes” contained some form of cocoa powder because it resulted in soft, smooth cakes.
Where does the “red” come from?
Cocoa powder that is acidic ALSO interacts with the baking soda in the recipe to create a reddish brown hue, thus making this a red velvet cake! Especially the cocoa powder that was available back then was very heavy with anthocyanins which turn a brownish-red during the chemical reactions in the cake. This is why we still use natural cocoa powder in classic red velvet cake recipes. The original red velvet cake recipes from the previous century did not contain red food coloring at all, and it was the natural cocoa powder that caused the red hue due to the chemical reactions in the cake. But, now of course, food coloring is used to enhance this red color. Beet juice was also used in red velvet cake recipes during the WW II era and later, when food coloring was still quite new and harder to find.
Ingredients to make red velvet cake
All purpose Flour – AP flour is much easier to find and produces amazing results. You can also use cake flour if you like. Baking soda – The chemical leavener that reacts with the acidity in the cake and produces CO2 to create a fluffy, light, tender crumb. Natural cocoa powder – Natural cocoa powder has not had any alkalizing treatments and retains the natural acidity. The anthocyanins in natural cocoa powder react with the baking soda to enhance and deepen the red color in this cake. You can use any supermarket natural cocoa powder, but for added richness, you can use a high fat natural cocoa powder too. But this is not necessary. Butter – Adds flavor! Oil – Oil helps to keep a soft crumb in the red velvet cake. An all butter red velvet cake will have a more dense crumb. White sugar – Adds sweetness, moisture, and softness to the cake. White sugar doesn’t interfere with the flavor or the color of the cake. Eggs – Adds flavor and structure to the cake. The egg yolks also provide fat that keep the cake moist. Buttermilk – A crucial ingredients in red velvet cake! The acidity in the buttermilk also reacts with the baking soda to make the cake light. Buttermilk also adds flavor to the cake. Vinegar – A tiny bit of white vinegar to give the cake extra acidity. Vanilla and salt – For added depth of flavor. Red food coloring – For the color!
Substitutions
Cocoa powder substitutes – I do not recommend using any cocoa powder substitutes for this recipe. If you only have dutch cocoa powder, you can use it, but do note that it will interfere with the color of the final cake. I would also increase the vinegar slightly to compensate for the loss of acidity. Dutched cocoa powder is darker in color and less acidic, so it won’t contribute to the reddish hue. Substitute for buttermilk – Traditionally, you can substitute 1 cup of buttermilk with 1 tbsp vinegar + up to 1 cup milk. This substitution will work well to provide the acidity required for this recipe. However, the flavor of the buttermilk will be lost with this substitution. Substituting oil or butter – You can use all oil, or all butter in the recipe. The cake texture will change accordingly. Oil produces a lighter crumb and butter produces a denser crumb. Food coloring – You can use water-based food coloring or gel food coloring for this recipe. If you’re using water based liquid food coloring, you may need to use a lot to get the same saturation of red color. With gel food coloring, you will need much less. HOWEVER, gel food coloring doesn’t always spread well in the cake. So, I like to dissolve the food coloring in a little hot water before adding it to the batter.
Tools and cake pan sizes
This recipe makes a 2 layer cake, with 9 inch round pans OR 8 inch pans. The 9 inch pan produces cake layers that are just over 1 inch tall, and the 8 inch pan produces cakes that are about 1.5 inches in height. Take a little bit of the batter into a bowl and add the gel food coloring to this. Mix it well to dissolve the food coloring and then add it back to the rest of the batter and gently fold it in (especially if you have already added the flour). You can also use my cake pan conversion chart to determine how to use any other cake pans you have to make this red velvet cake. For example, this cake can be baked as a 9 inch square cake (with 1 layer). But since it will be a little taller, make sure to bake it a little longer. You can also use easy bake strips around your cake pans to create softer cake sides.
How to make red velvet cake
Step one – Measure all the ingredients and prepare cake pans
As always measure all the ingredients so that it’s easy to make the batter. Also make sure everything is at room temperature for best results. Grease two 9 inch pans with butter. Line the bottom with parchment paper and dust the sides with flour. This is my preferred method, because it releases the cake more easily. You can also grease and dust the whole pan with flour. Preheat your oven to 350 F / 180 C.
Step two – Prepare the dry ingredients
It’s really important to sift the dry ingredients together for this recipe. Natural cocoa powder has a tendency to form lumps, and sifting will ensure there are no lumps.
Place the flour, baking soda, and cocoa powder and sift well. Stir to combine and set aside.
Step three – Mix the wet ingredients
First, melt the butter and let it cool down slightly. Add the butter, oil, salt, sugar, buttermilk, eggs, vinegar and vanilla into a large bowl. Then whisk to combine. In a small bowl, dissolve the red gel food coloring with about 2 tbsp of hot water. If you’re using food-based liquid red food coloring, then measure out 2 tbsp of red food coloring. Add this to the wet ingredients and whisk well to mix.
Step four – Fold in the dry ingredients
Add the dry ingredients in 2 – 3 additions. You can use the whisk to mix the ingredients, but mix them gently and ensure there are no lumps as well.
Step five – Pour the batter into the cake pans and bake
It’s very important to evenly divide the batter between the cake pans to get nice and even cake layers. You can do this in two ways. Then, smoothen out the batter evenly in the cake pan using an offset spatula. And transfer the cake pans to the oven to bake.
Step six – Cool down baked cake layers
The cake layers are baked through when a toothpick inserted into the middle of the cake comes out clean. Or even better, if there’s just a couple of dry cake crumbs attached to the toothpick. The top of the cake should be springy to the touch. Remove the cake pans from the oven and let them cool for a few minutes. Then turn out the cake layers onto a wire rack while they’re still a little warm. Let them cool completely. Once cooled, you can use them immediately. But I like to wrap the cakes in plastic wrap and then let them chill in the fridge. This makes it easier to handle the soft cake layers!
Step seven – Make the frosting, and fill and frost the cake
Make your favorite frosting for red velvet cake! Mine is a classic cream cheese frosting. These cakes are usually fairly flat on top, but if you have any domes on top, the cake layers can be evened out by slicing the top of the cake with a serrated knife. This will ensure that you have an even cake layer with a flat top and bottom. A chilled cake is much easier to cut as well. Then place one of the cake layers on a cake turntable and spread a layer of frosting evenly on top. Place the second and final cake layer on top, and then frost the cake! I like to crumb coat the cake first, and then let the cake chill.
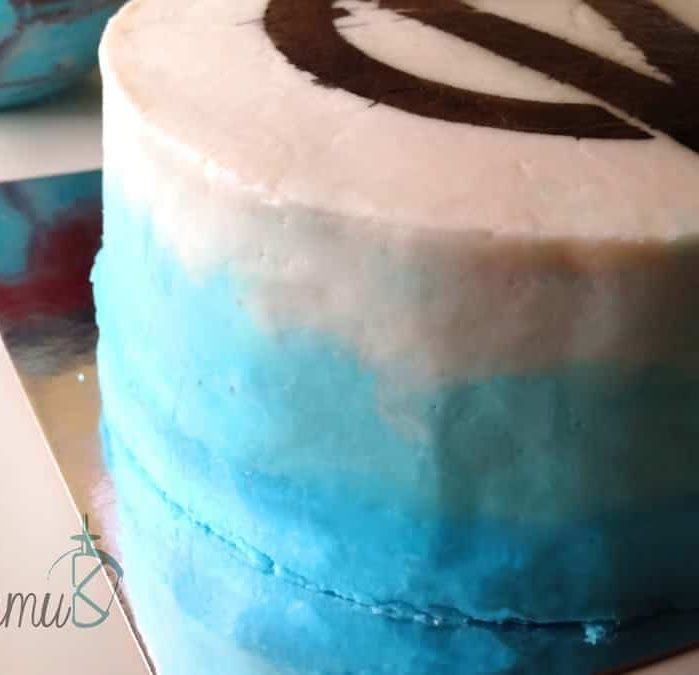
Step eight – Decorate the cake
There are many ways to decorate your red velvet cake! You can spread a final layer of frosting over the crumb coating – either both on the sides and top, or just the top. Make the frosting smooth, or create swirls for a lovely rustic look like I did here with my carrot cake. You can also use a fork to create a pattern too! Then decorate the top of the cake with more frosting swirls (like I’ve done with my devil’s food cake, classic white cake, butter pecan cake, or this lemon raspberry cake). If you had to slice the top of the cake off, these cake crumbs can be used to decorate the cake too!
Final step – Serve!
Refrigerate the cake until you’re ready to serve. When serving the cake, use a warm sharp knife to cut slices. This will ensure that you get nice clean cuts, for neat pieces!
Frosting for red velvet cake
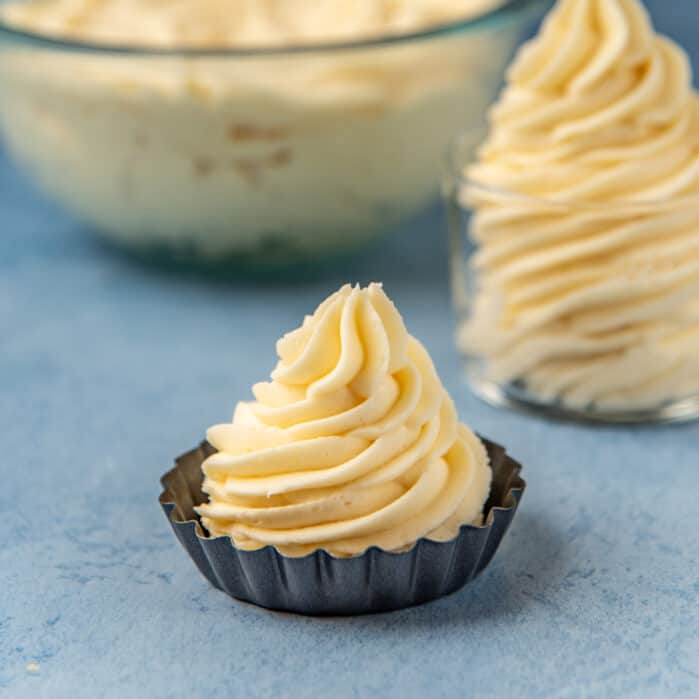
A classic red velvet cake is frosted and filled with a classic cream cheese frosting! Cream cheese frosting is tangy, creamy, and just a little sweet, making it the perfect accompaniment to the soft, sweet, slightly tangy, subtly chocolatey red velvet cake! The same reason why it pairs so perfectly with my easy carrot cake recipe too. My classic cream cheese frosting ticks all the boxes because it’s not to sweet, lots of cream cheese flavor, and can even be pipeable! The secret to my cream cheese frosting is,
Whipping the butter very well for an airy buttercream base. Using cold cream cheese, and whipping just enough to combine everything (to avoid over-whipping). Adding cream cheese powder or milk powder to help with the flavor and texture of the cream cheese frosting.
But you don’t have to stick with the classics either. You can absolutely change the frosting to something you like too!
7 minute frosting is a great light and fluffy frosting for red velvet cake! Ermine frosting or boiled milk frosting – Another old fashioned frosting that will go so well with red velvet cake. American vanilla buttercream frosting or chocolate buttercream frosting. Swiss meringue buttercream (or chocolate Swiss meringue buttercream). For easier swiss meringue options, you can try my cheat’s versions of easy swiss meringue buttercream (or easy chocolate swiss meringue buttercream).
Recipe tips for success
This is my favorite red velvet cake recipe and I’ve been making this cake for so long. I’ve adapted the recipe slowly over the years to get the best flavor and texture. Let me share all the tips for making the most perfect red velvet cake!
Use a combination of butter and oil for the best balance of texture and flavor! Use a kitchen scale to measure the ingredients, for consistently amazing results. Sift the cocoa powder well to ensure there are no lumps. Use natural cocoa powder, and not dutched cocoa powder. Do not skip the buttermilk and vinegar, since these help with the rise and flavor of the cake. You can use gel food coloring or liquid food coloring for this recipe, but remember to mix the gel food coloring with water so that it mixes in well with the batter. Do not overmix the batter once you add the dry ingredients. This prevents tunneling and a rubbery texture in your cake. Chill the cake layers before frosting. This red velvet cake is super soft, so it’ll be easier to handle and frost when it’s chilled. Use my cream cheese frosting recipe. If you like a not too sweet cream cheese frosting that is big on tangy cream cheese flavor and is still pipeable – then my recipe for cream cheese frosting is the only recipe you will need!
Frequently asked questions