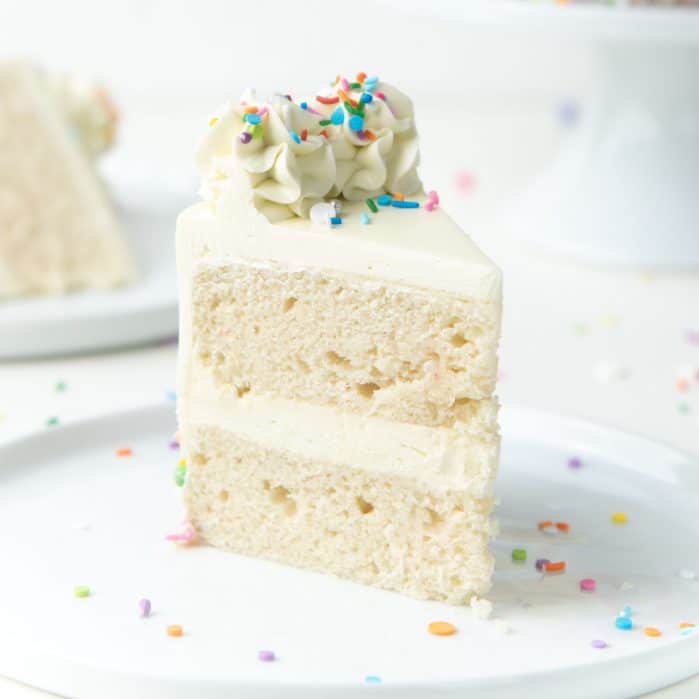
Learn how to make the BEST vanilla swiss roll!
I developed this recipe for vanilla swiss roll cake because I was never happy with store-bought ones, or the countless other online recipes I’ve tried in the past. So here it is. The best damn swiss roll cake recipe you’ll ever try! 🙂
Ingredients needed to make this vanilla swiss roll cake
The ingredients as well as the techniques for making swiss roll are important for consistent success. It’s best to understand the purpose of all the ingredients and techniques so that you get foolproof results.
Large eggs
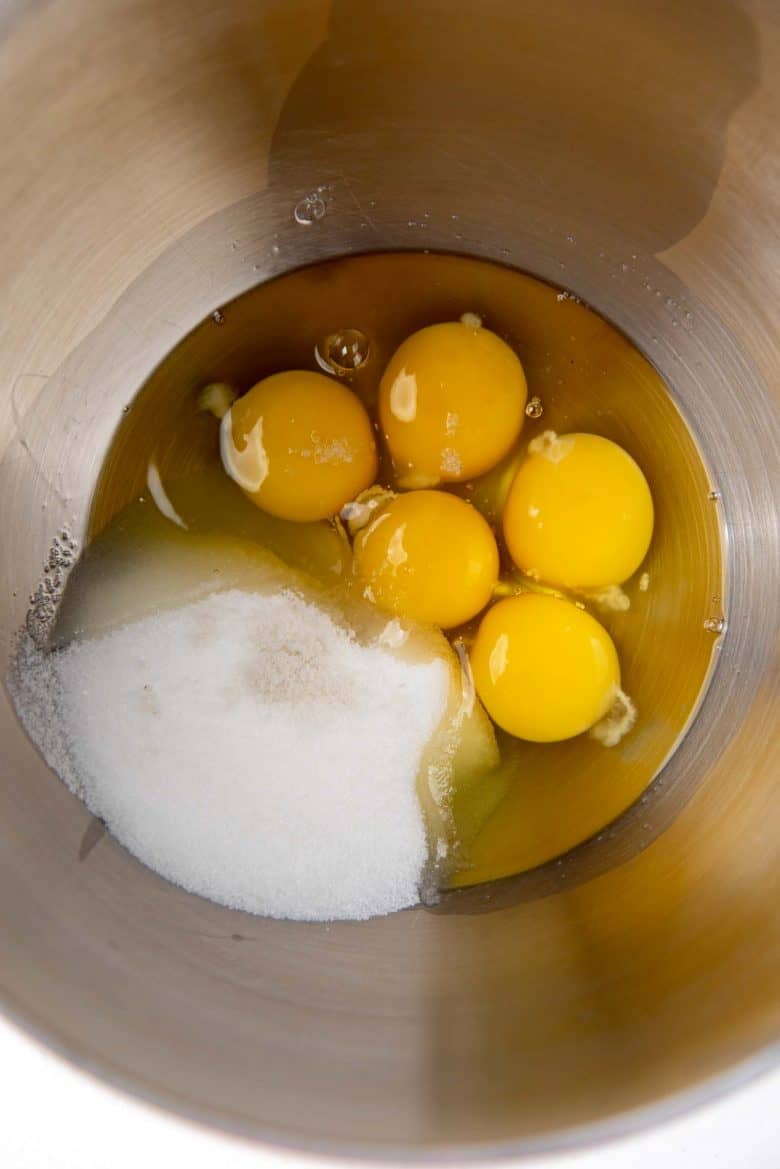
This swiss roll recipe uses a combination of whole eggs and yolks. Each egg weighs approximately 2 oz (with the shell). The eggs can be cold or at room temperature. That’s because you’ll be warming up the eggs prior to whisking them anyway. So you can use eggs straight from the the fridge if you prefer. Unlike other swiss roll recipes online, you will NOT be separating egg whites and egg yolks here. So you’re not going to have two steps of whisking parts of the egg in this recipe. Whole eggs will be whisked until foamy and this will provide volume to the cake. Do not skip the step of heating the eggs, since this will help add volume to the whole eggs that are being whisked, AND it will also keep the egg foam more stable.
Sugar
White sugar is the best option for a classic vanilla swiss roll. You can use granulated white sugar or caster sugar. Since the sugar will be dissolved with the eggs, you can use either one without an issue. Absolutely. You can substitute brown sugar 1:1 in the recipe. The taste will be more molassey and the cake will have a light brown color as well. I haven’t tried this recipe with artificial sugar, so I’m not sure how well the recipe will turn out in that case. But if you do try it, let me know!
Flour
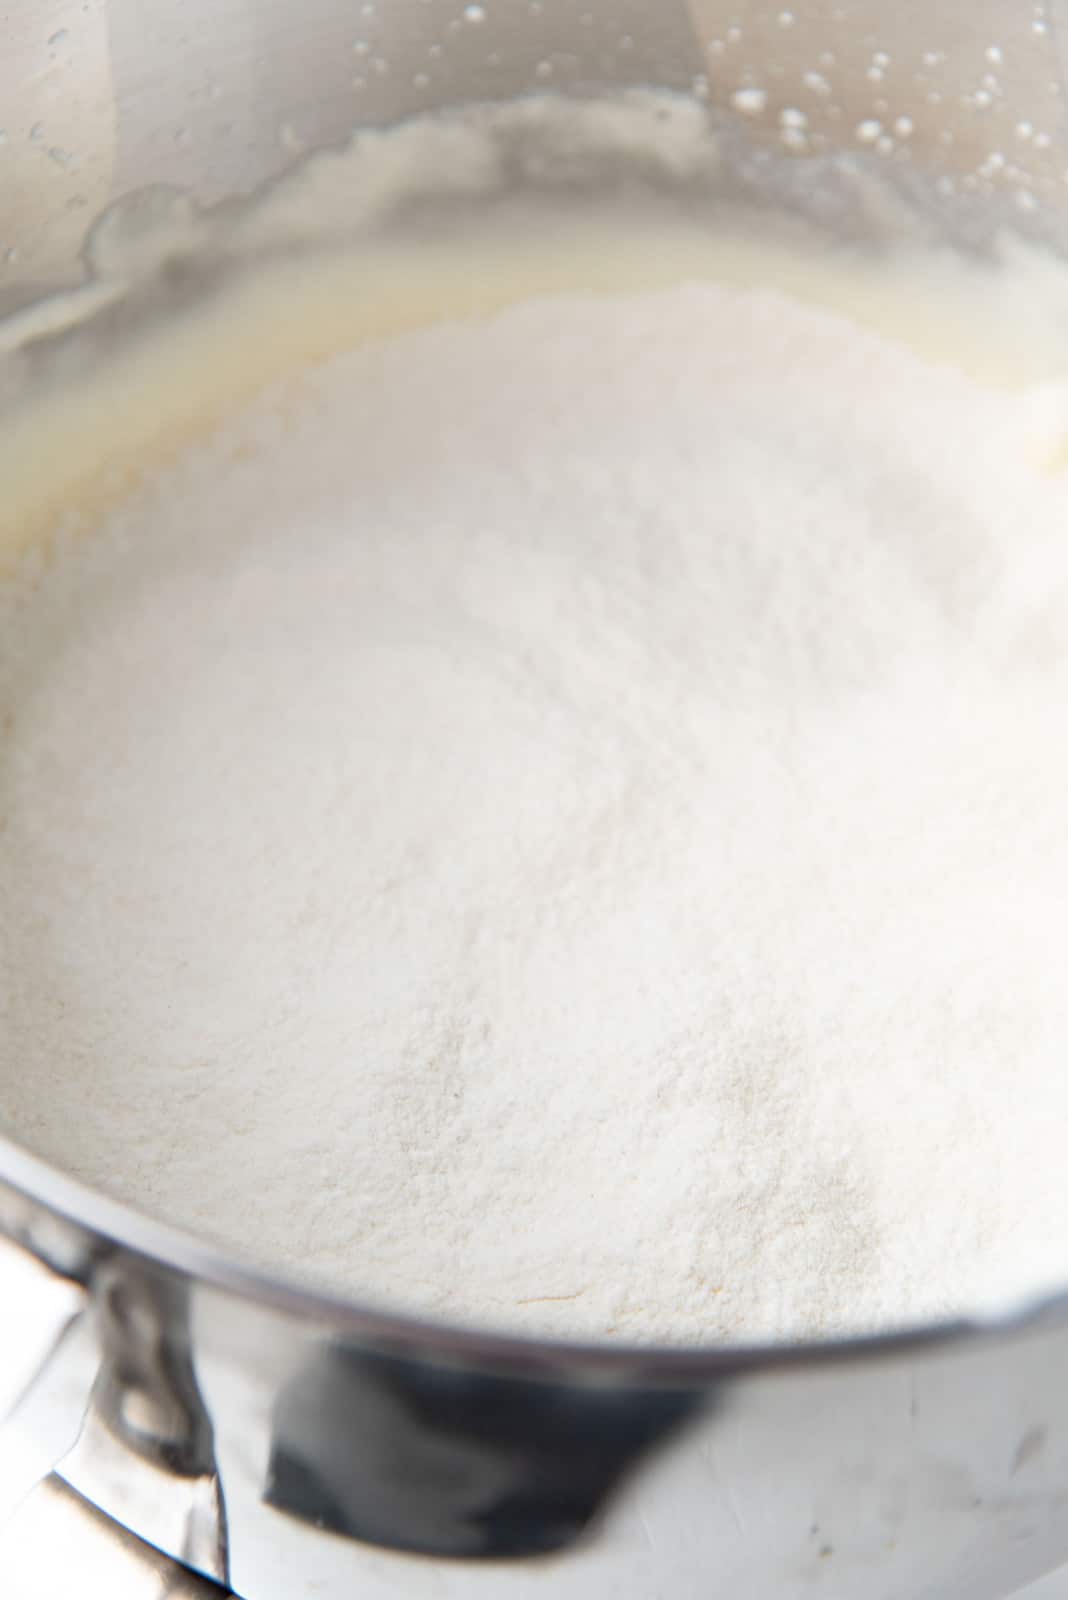
I use AP flour in this recipe. However, I also combine it with some cornstarch to keep the swiss roll batter light. I experimented with different amounts of flour and different types of flour, until I settled with the recipe that I’m sharing here. It yields the best result of a soft, springy cake, but with good structure that can withstand the rolling and unravelling of the cake.
Cornstarch
Cornstarch is also known as cornflour in some countries. Not to be confused with corn flour (two words), which is finely ground maize. Cornstarch adds structure to the vanilla swiss roll, without weighing down the batter. It’s perfect to keep the batter light for a soft cake.
Baking powder
I also add a little bit of baking powder to the batter along with the flour. This is not a traditional addition to genoise sponge cake. But I add this because it ensures foolproof results in my experience. Even if the batter deflates slightly, the baking powder will make sure that the cake still rises during the baking process.
Clarified butter or brown butter
We only add a small amount of clarified butter to this vanilla swiss roll cake. The addition of fat adds moisture. I like to use brown butter to maximize the flavor as well. The good news is that if you have no butter, or want to keep the swiss roll recipe dairy free, you can also add olive oil or a neutral oil (such as vegetable oil or canola oil). You can also add melted vegan butter. Clarified butter is just the fat from butter. The butter is heated to separate the butterfat from the milk solids. As the butter is heated, it foams up and subsides and the milk solids settle to the bottom of the pan. When this happens, the clarified butter can be poured into a bowl, leaving behind the milk solids. If you continue to keep cooking the butter, the milk solids will caramelize and you will end up with brown butter. The butterfat from browned butter will have a nuttier taste, and can be used instead of the clarified butter.
Vanilla extract
I use a good quality vanilla extract, so that the cake roll has a sweet vanilla flavor. I avoid using vanilla essence, which is also known as imitation vanilla. This can add a bitterness to the cake if you use too much. So if you only have vanilla essence, use half the amount stated in the recipe to avoid a bitter aftertaste.
Step by step recipe for vanilla swiss roll
This swiss roll recipe involves the sponge cake method, specifically the whole egg sponge cake or genoise sponge cake. This technique might seem daunting at first, but I promise it’s not. I was making over 4 swiss rolls per day when I was perfecting this recipe – that’s how easy it is. Just follow my tips and tricks to simplify the method, and to make it foolproof.
Prep the baking tray.
For this recipe, I’m using a 10 x 15 inch swiss roll pan (or jelly roll pan). Use the pan to cut a piece of parchment paper to fit inside the baking pan. You can keep an overhang of parchment paper along the short edge of the baking pan. This will make it easy to roll up the cake once the cake is baked, as explained below. Alternatively, you can just line the bottom of the cake pan as well, but I highly recommend leaving the overhang along the short edges (you will see why shortly). Prep the baking tray by applying a very light layer of butter all over the tray. Stick the parchment paper on the baking tray, making sure there are no wrinkles. Flour the sides that are not covered by the parchment paper to prevent the cake from sticking to the pan.
Get all the ingredients ready.
The key to making this vanilla swiss roll easy is to have everything ready before you start.
First make the clarified butter and weigh it out into a bowl. Add the vanilla and set aside. Add some water to a saucepan (a few inches) and bring it to a simmer.Next, weigh the flour and cornstarch, and sift them with the baking powder into a small bowl.Into a mixing bowl, add the eggs and the egg yolk. Weigh the sugar into the bowl with the eggs and add a pinch of salt as well. Whisk this mixture to break up the eggs and to mix the sugar.Preheat the oven to 350 F / 180 C.
Step by step method to making the batter
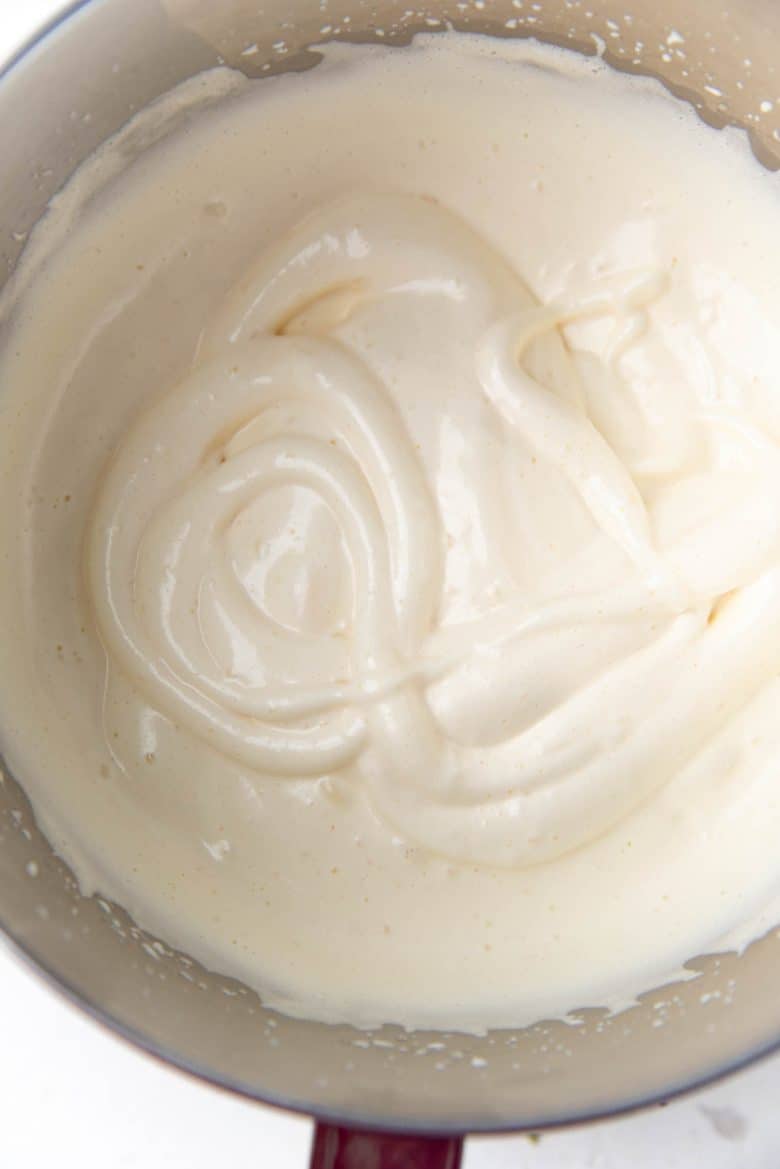
To make the vanilla swiss roll, it’s important to warm the eggs first. Warm eggs incorporate more air and create more foam. Plus, I’ve found that it makes a more stable foam that doesn’t deflate as easily.
Place the mixing bowl over the simmering pot of water and whisk the egg mixture for about 3 – 4 minutes until the eggs are warm to the touch (110 – 120 F / 43 – 48 C).
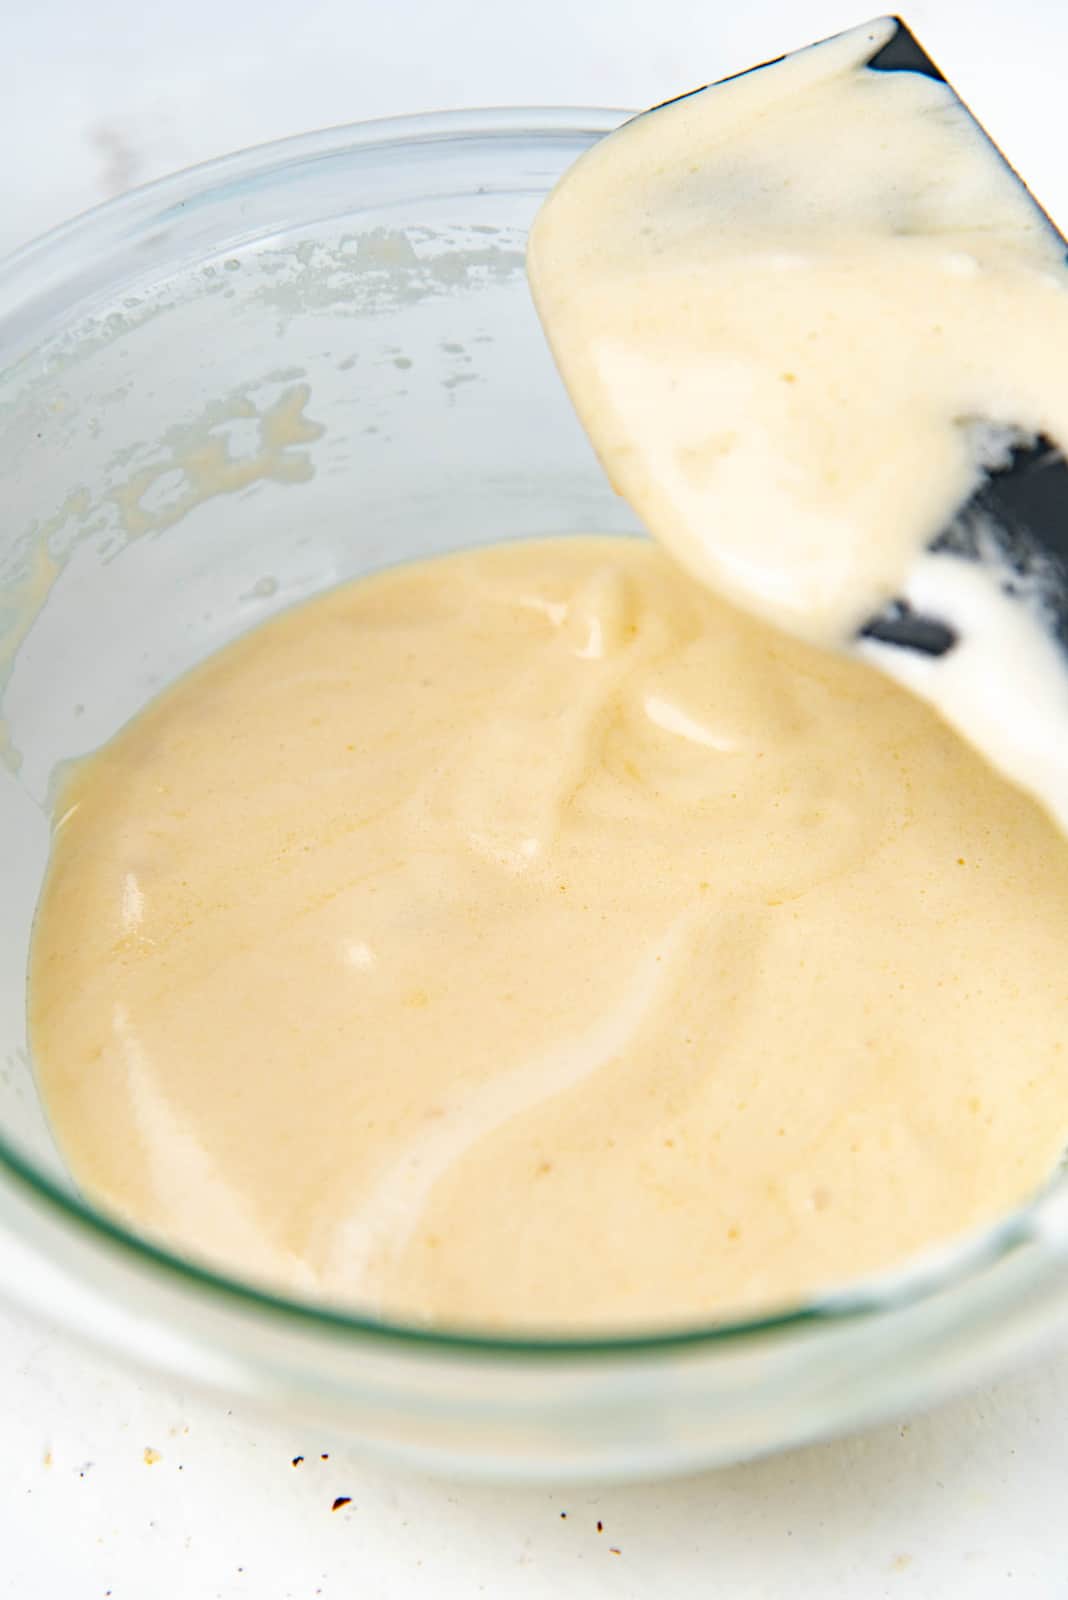
When the eggs are warm, they’re ready to whipped. Place the bowl in your stand mixer with the whisk attachment. Whisk on high speed for 5 – 6 minutes until the egg mixture has tripled in size and is stable.
You know that the egg mixture is ready when you create a “ribbon” on the surface with the egg mixture and the ribbon doesn’t disappear into the egg mixture. This step is crucial for the swiss roll recipe, because the foam creates the texture for the cake.
If you use a hand mixer, the whisking time can increase depending on the speed and the way you whisk the eggs.
It’s important to sift the dry ingredients before adding them to break up any lumps and to keep it light.
I also like to use a sieve to sift the dry ingredients evenly over the surface of the egg foam. You want to avoid sifting all the flour onto one spot, which will be too heavy for the foam, and it will then sink to the bottom.
Using the largest flat spatula you have, gently fold in the dry ingredients into the egg foam. Make sure to rotate the bowl with every fold, and scrape the the bottom of the bowl to avoid any dry spots in the bowl. Dry flour pockets will form lumps in the baked vanilla swiss roll cake.
It’s also very important to not deflate the batter. So, I never exceed 15 folds.
Just before mixing in the butter vanilla mix, you need to warm it up. You can either microwave the mixture for a few seconds OR keep the bowl in warm water.
With your spatula, transfer approximately 1 cup of the batter into the butter mixture. Just eyeball a cup, no need to be precise.
Stir the butter and the batter well until the butter has emulsified into the batter mixture. There should be no oily / buttery streaks.
Gently pour this batter butter mixture over the remaining vanilla swiss roll cake batter. Make sure to pour it over the surface as evenly as possible so that it doesn’t all collect at one spot and sink to the bottom. I like to use my spatula to break the flow while pouring it into the cake batter.
Fold in the butter mixture using a spatula in the same way you folded in the flour. This shouldn’t take more than 8 folds (preferably less). The butter will deflate the batter, so be gentle to prevent this.
The batter is now ready.
Baking the vanilla swiss roll sponge
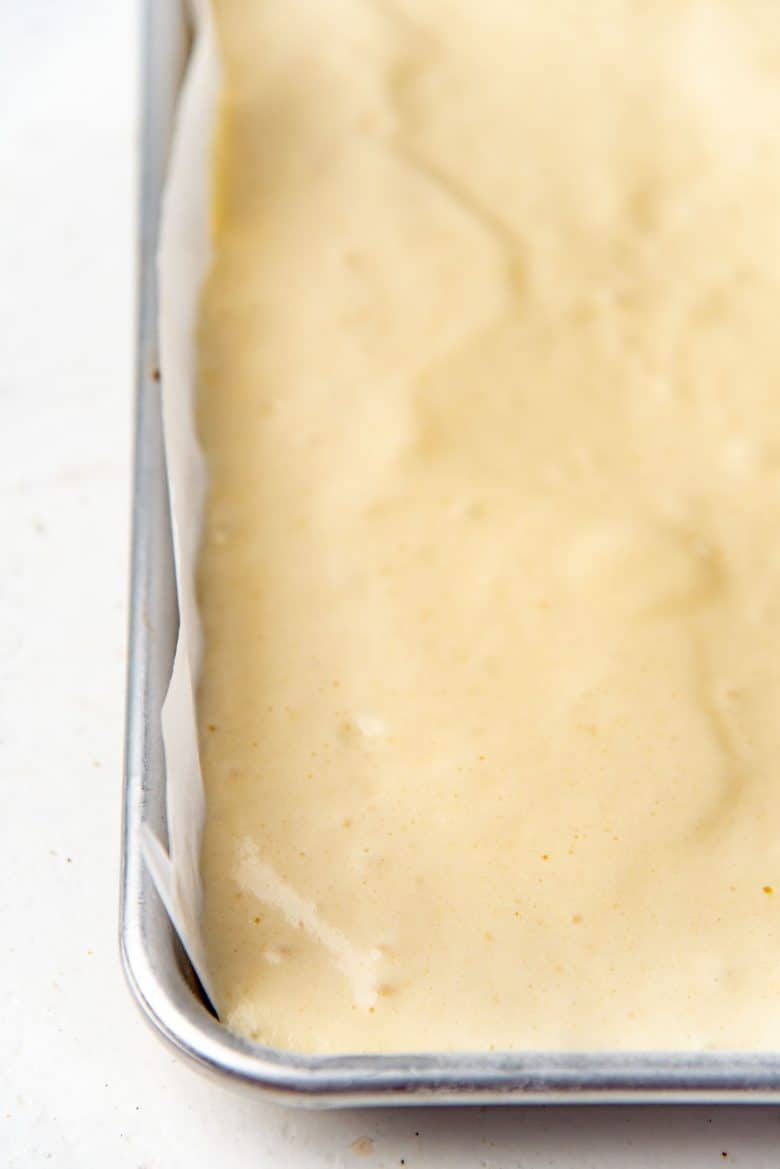
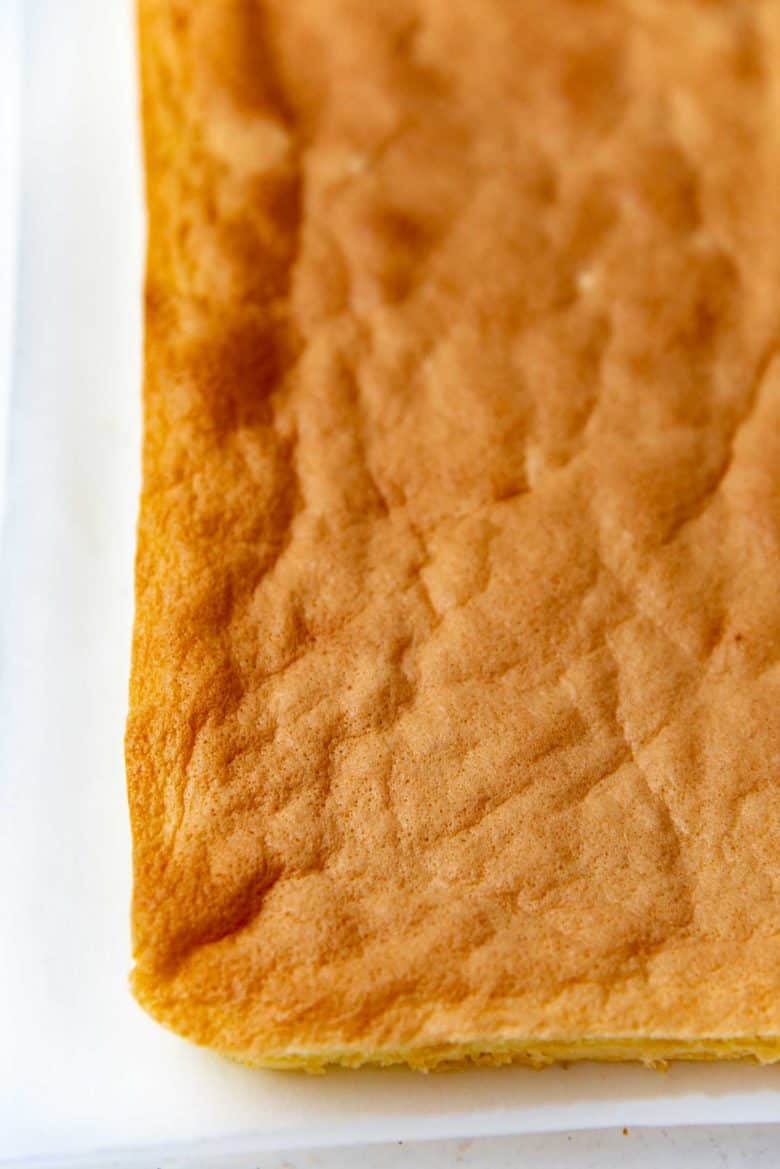
Pour the batter into the prepared swiss roll cake pan. Again, make sure to pour it evenly into the cake pan. Using an offset spatula, spread the batter evenly to the corners and edges of the pan. Knock the baking tray on the countertop about 3 times to remove any large air bubbles. But don’t knock it too hard or too much, which would deflate the batter. Shake the tray a little to make sure the batter is distributed evenly. Bake the cake in the preheated oven for about 10 – 15 minutes, until a toothpick inserted into the middle comes out clean. The surface of the cake should also feel a little springy to the touch. Remove the cake from the oven and let it cool just for a minute or two.
Rolling up the vanilla sponge cake roll
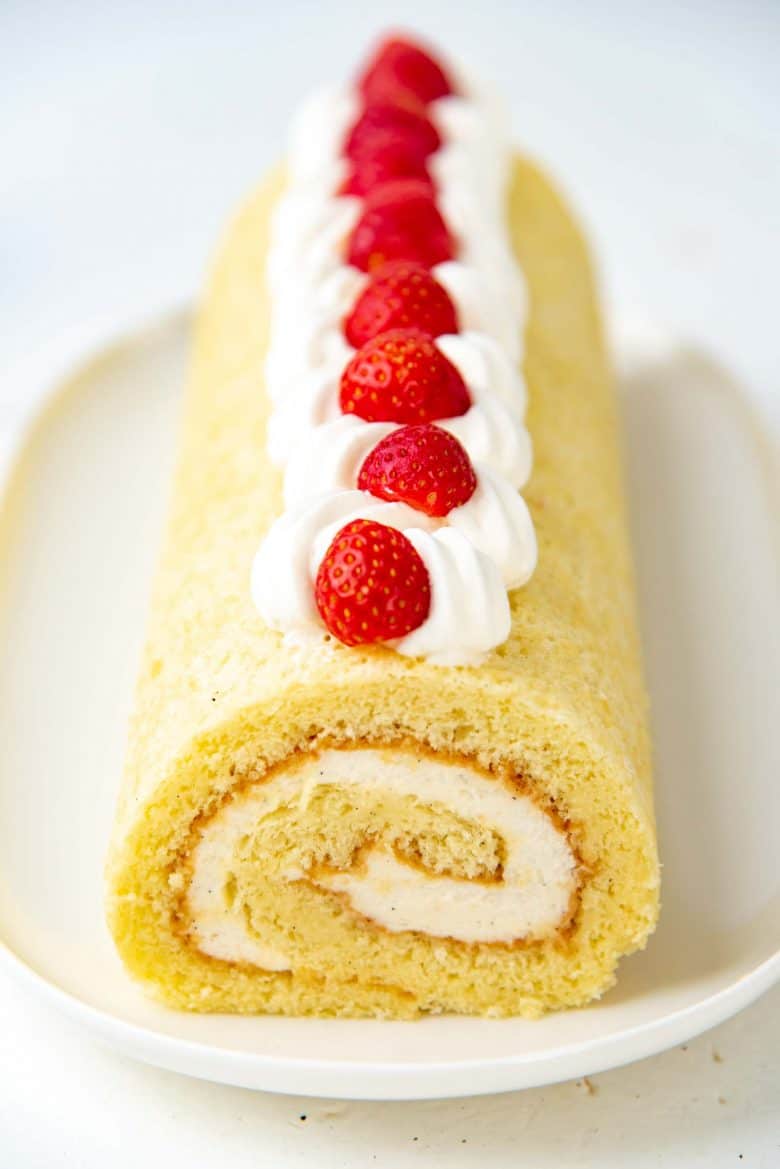
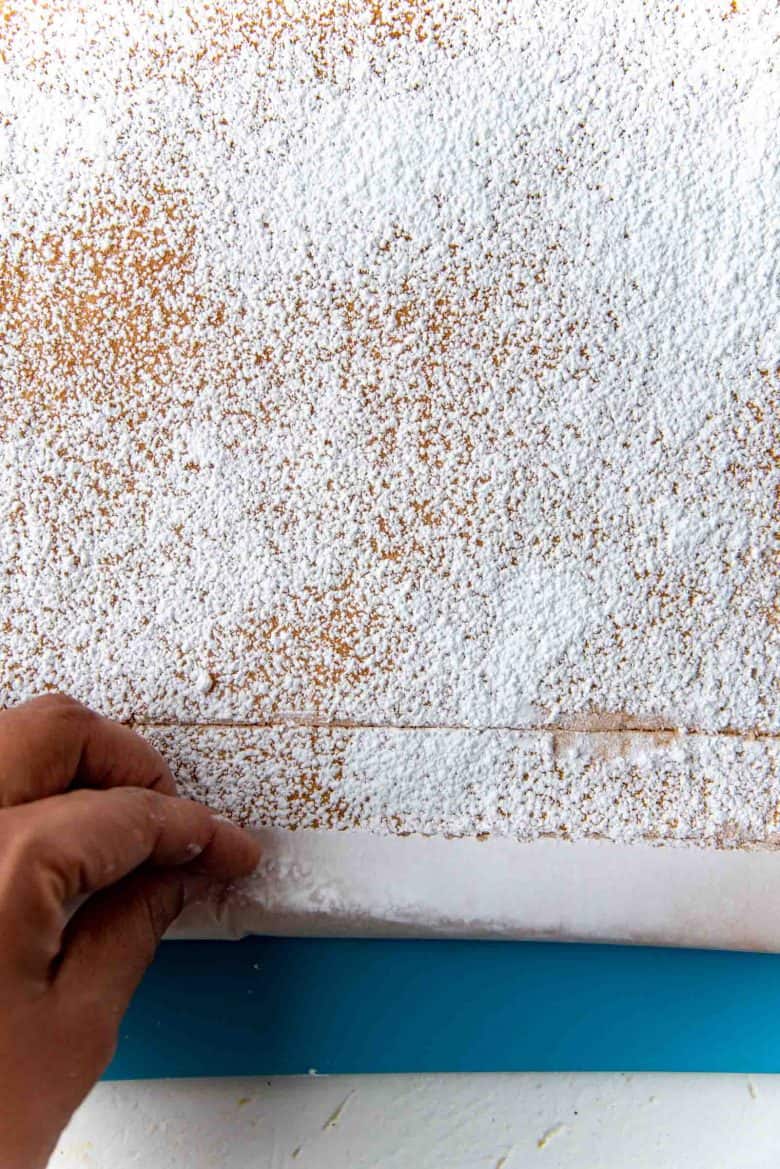
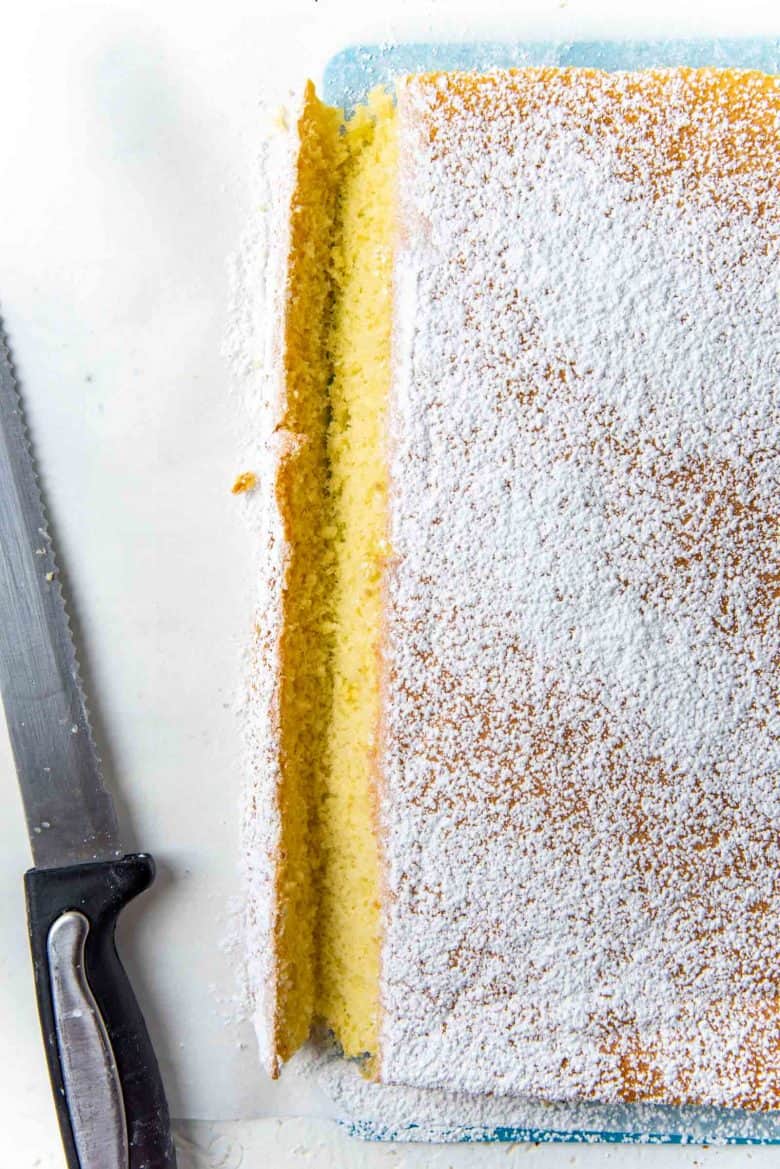
The bottom of the cake is the presentation side in the final swiss roll. So it’s important that the presentation side is at the bottom while rolling up the cake. The top of the cake will be there the filling is placed, so it should be facing up while rolling. Since the cake is really soft, you have to be very careful when lifting it out of the cake pan. I like to use a thin cutting board and slip it under the parchment paper and then lift the swiss roll cake out with it. Sift a thin layer of confectioner’s sugar over the surface of the cake. Fold about 1 inch of the parchment paper over one short edge of the cake, and start rolling it up (starting from that short edge) to form the vanilla swiss roll shape, using the parchment paper underneath. Don’t put too much pressure and squish the cake, but make sure it’s not a loose spiral either. Once the cake is rolled up (with the parchment paper), roll it up in another parchment paper or kitchen towel, so that it keeps its shape while cooling down. Make sure to store it with the seam side down. Allow the rolled up swiss roll sponge to cool down in this shape. It makes the cake more pliable. You will need to make two shallow cuts (2 mm deep) close to one of the short ends of the cake, parallel to the edge. The first cut is 1 inch from the end, and the second cut is another 1 inch from the first cut. Make two shallow cuts parallel to the short edge. The cuts should not be more than 2 mm deep. This is the end you’ll be starting to roll up the cake from, and this technique will prevent the cake from squishing too much during the roll up (please see pictures in the post). Next, on the opposite short end, make a diagonal cut at the edge, starting 1 inch away from the edge (please see the picture below). This diagonal cut will ensure a smooth seal for the rolled up cake.
Frosting and decorating the swiss roll
You can choose any filling you like for the vanilla swiss roll. Whipped cream is an easy option. However, vanilla buttercream, chocolate buttercream, vanilla swiss meringue buttercream, or chocolate swiss meringue buttercream are all richer, sweeter alternatives that are especially great for special occasions.
You can make the filling any flavor you like as well. From chocolate to strawberry, and anything else you fancy.
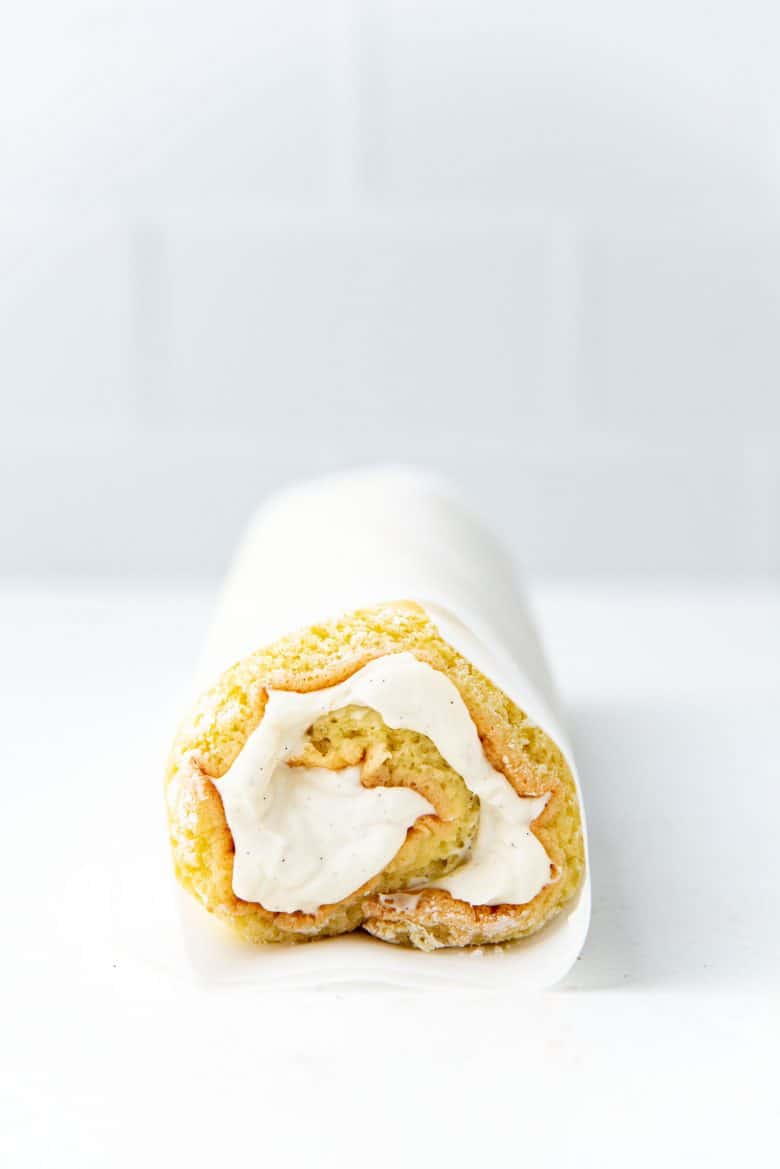
Once the cake is cooled, carefully unravel the cake. Spread a layer of frosting all over the surface of the cake, leaving a 1 inch border at the seam edge (the end where you made the diagonal cut). The frosting should be about 1 cm (1/2 inch) thick.
Next, loosen the parchment paper from the bottom of the cake as you start rolling it up again. The cake should be firmly rolled up, but not too tightly that you squeeze out the frosting / filling.
Once the cake is rolled up, wrap the parchment paper or cloth napkin around the cake so that the vanilla swiss roll cake will hold its shape firmly. Let it chill for about an hour while wrapped, so that it’ll be easier to trim the edges of the cake roll later.
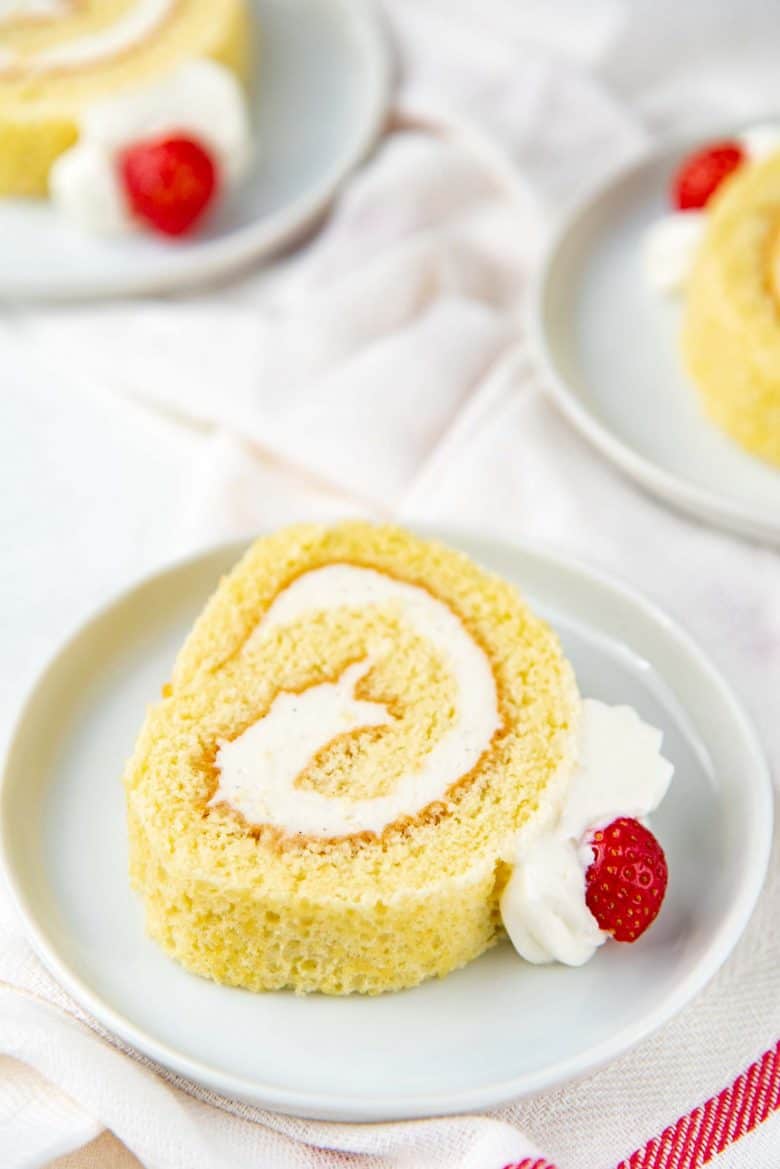
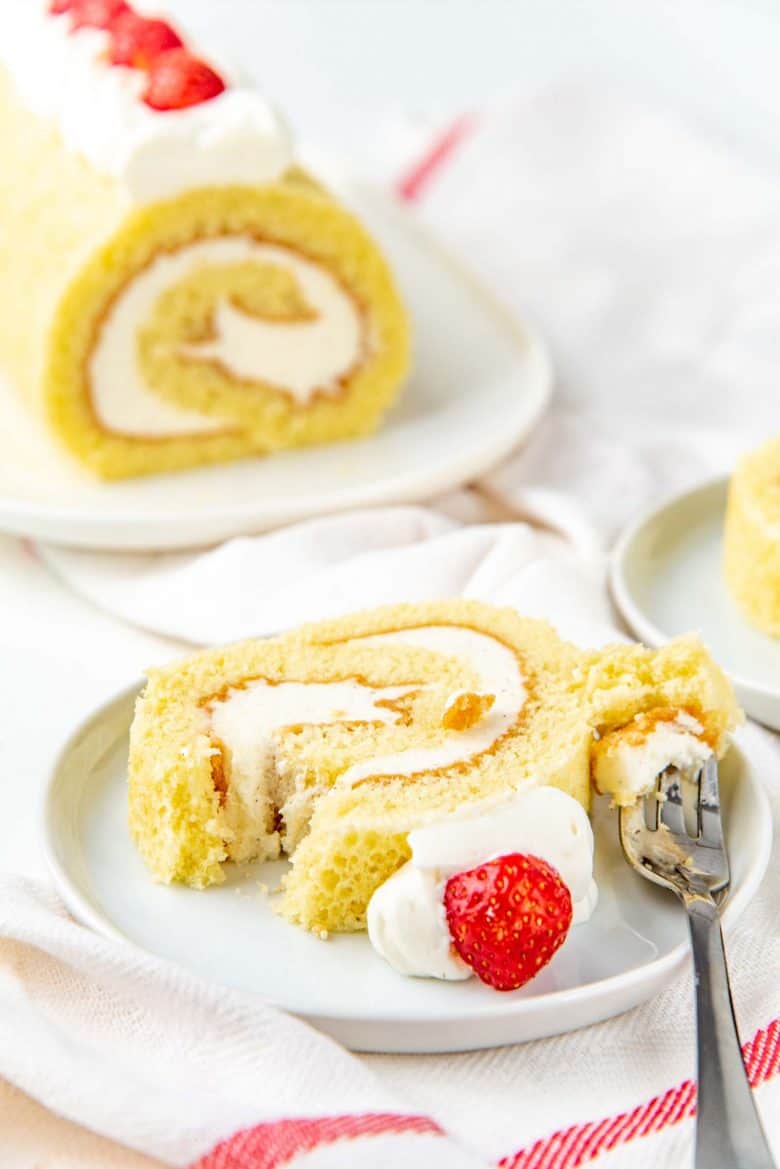
Then trim the edges to make the ends neat. Now the cake is ready to be served!
Dust the surface with confectioner’s sugar,Pipe some whipped cream on top and decorate with fresh fruits,Spread or pipe some buttercream on top,Drizzle chocolate ganache or salted caramel on top.
Storing the cake roll
This vanilla swiss roll can be stored in an air tight container and then in the fridge for up to 5 days. But it’s best if eaten within a few days. If it has fruits, then it’ll keep for less time since the fruits can go bad. An unfilled cake can be wrapped well with plastic wrap, and then foil, and stored in an air tight container in the freezer for up to 2 months. Allow the cake to thaw to room temperature before unrolling and filling.
Other variations of vanilla swiss roll
Jelly roll – Spread strawberry jam on the cake and roll it up for a jelly roll cake. Strawberry and cream roll cake – Spread jam and cream on the cake and roll it up for a strawberry cream swiss roll. Vanilla swiss roll with chocolate – Add some cocoa powder to the whipped cream for a chocolate whipped cream filling.
Why this recipe is perfect
The cake roll is so soft. The sponge cake is incredibly soft, light, and airy. Not heavy or gummy at all.Perfectly sweet. This swiss roll has just the right amount of sweetness, with a nice vanilla flavor. As a result, the cake isn’t too sticky either.Foolproof recipe. There are a few extra steps in this recipe compared to others, but they all contribute towards making this recipe absolutely foolproof. Step by step simplified recipe. I’ve explained every step in detail and shared how to make the process easy for you. So make sure to read the recipe and the tips first so that you understand the recipe method.No need to separate the eggs for perfect results. This recipe uses whole eggs to create foam to make the sponge cake. Also known as genoise sponge. So there’s no need to separate the egg yolks and whites like with other recipes.
Troubleshooting questions
This cake is so damn fiiiine! It’s so light and soft, with the perfect amount of sweetness and a delicious vanilla flavor. Whenever I make this cake, it’s always gone within a couple of days because it’s an absolute favorite for everyone. It’s delicious with fresh fruits, or just on its own. I guarantee you wouldn’t want another vanilla swiss roll recipe once you’ve tried this!