My secret? Unlike most recipes, I use a cooked filling for this lemon meringue pie which takes all the guesswork out of baking the pie! No overcooking or undercooking to worry about, the filling is never runny or watery, and the pie crust will always remain flaky and crisp without ever getting soggy!
What to expect from my perfect lemon meringue pie recipe
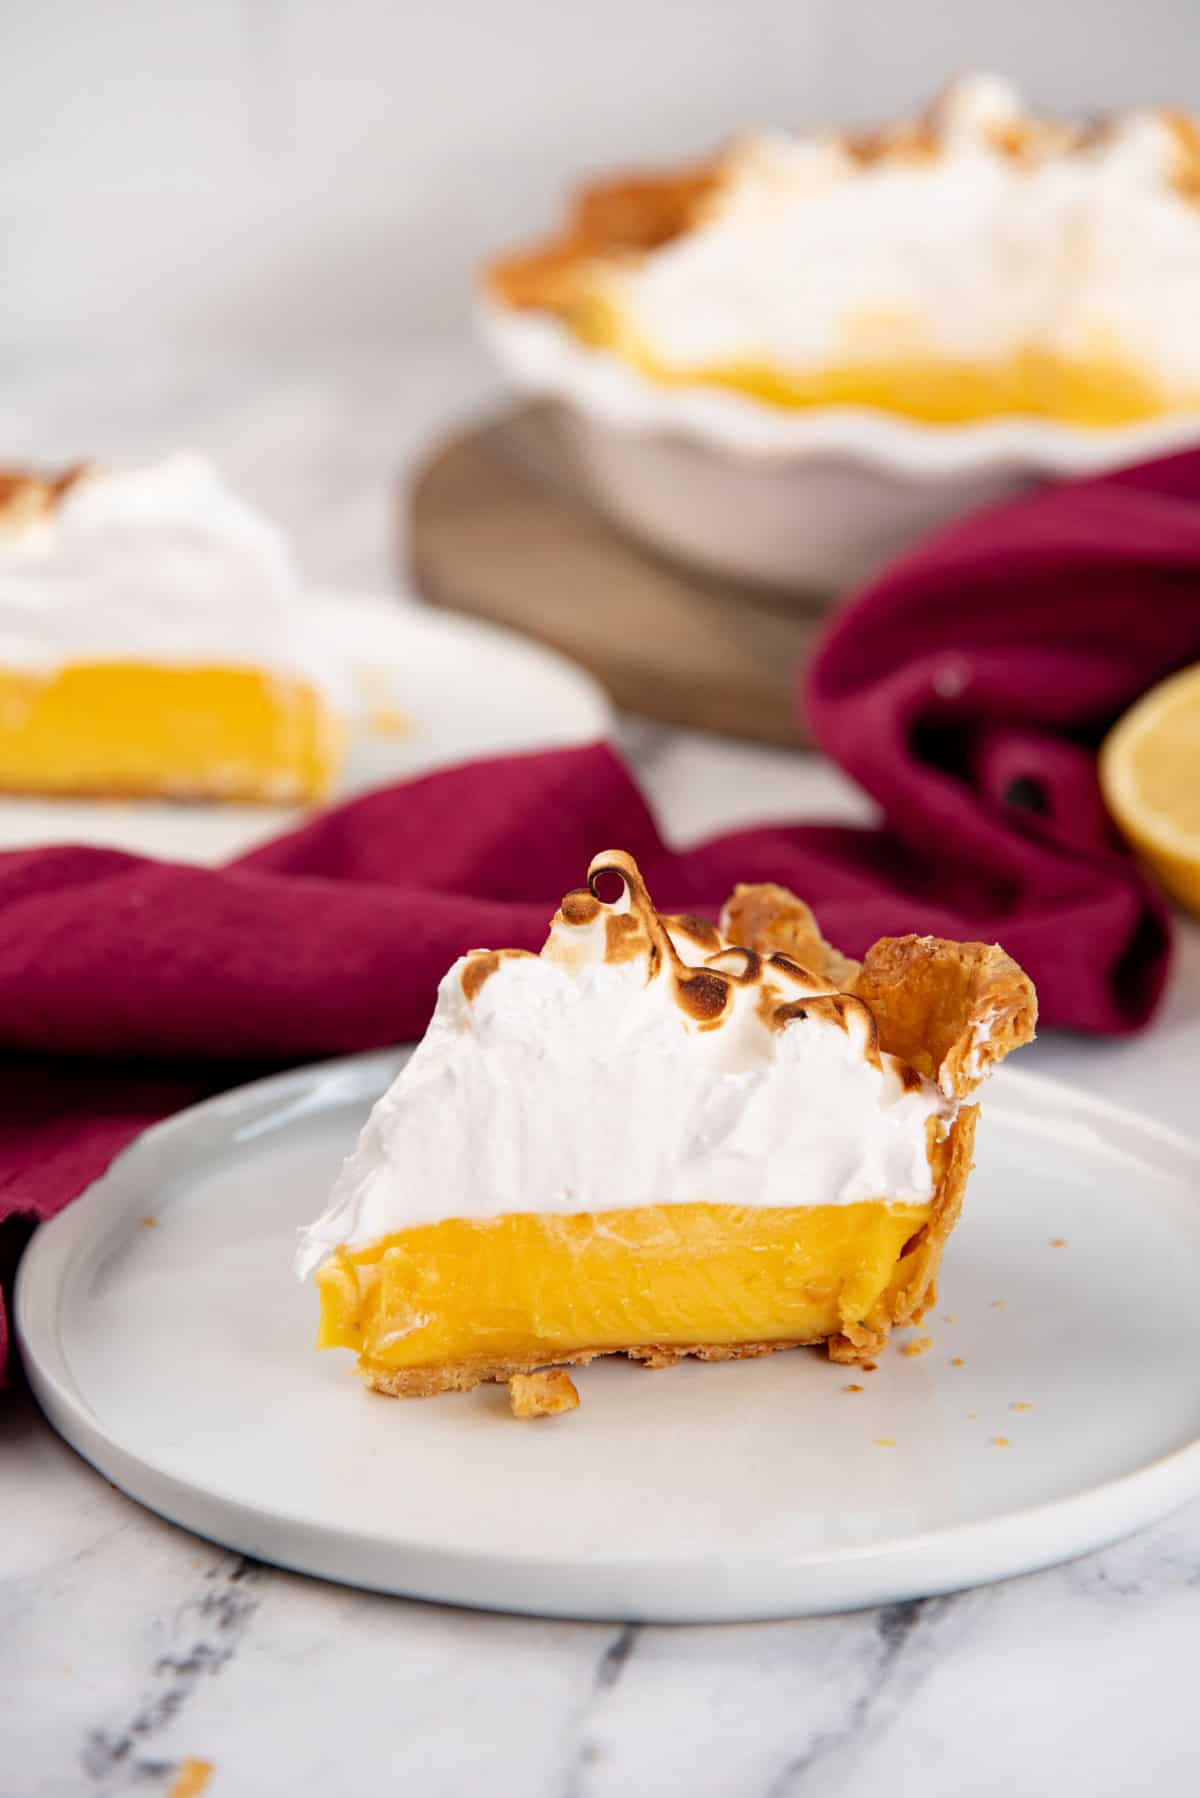
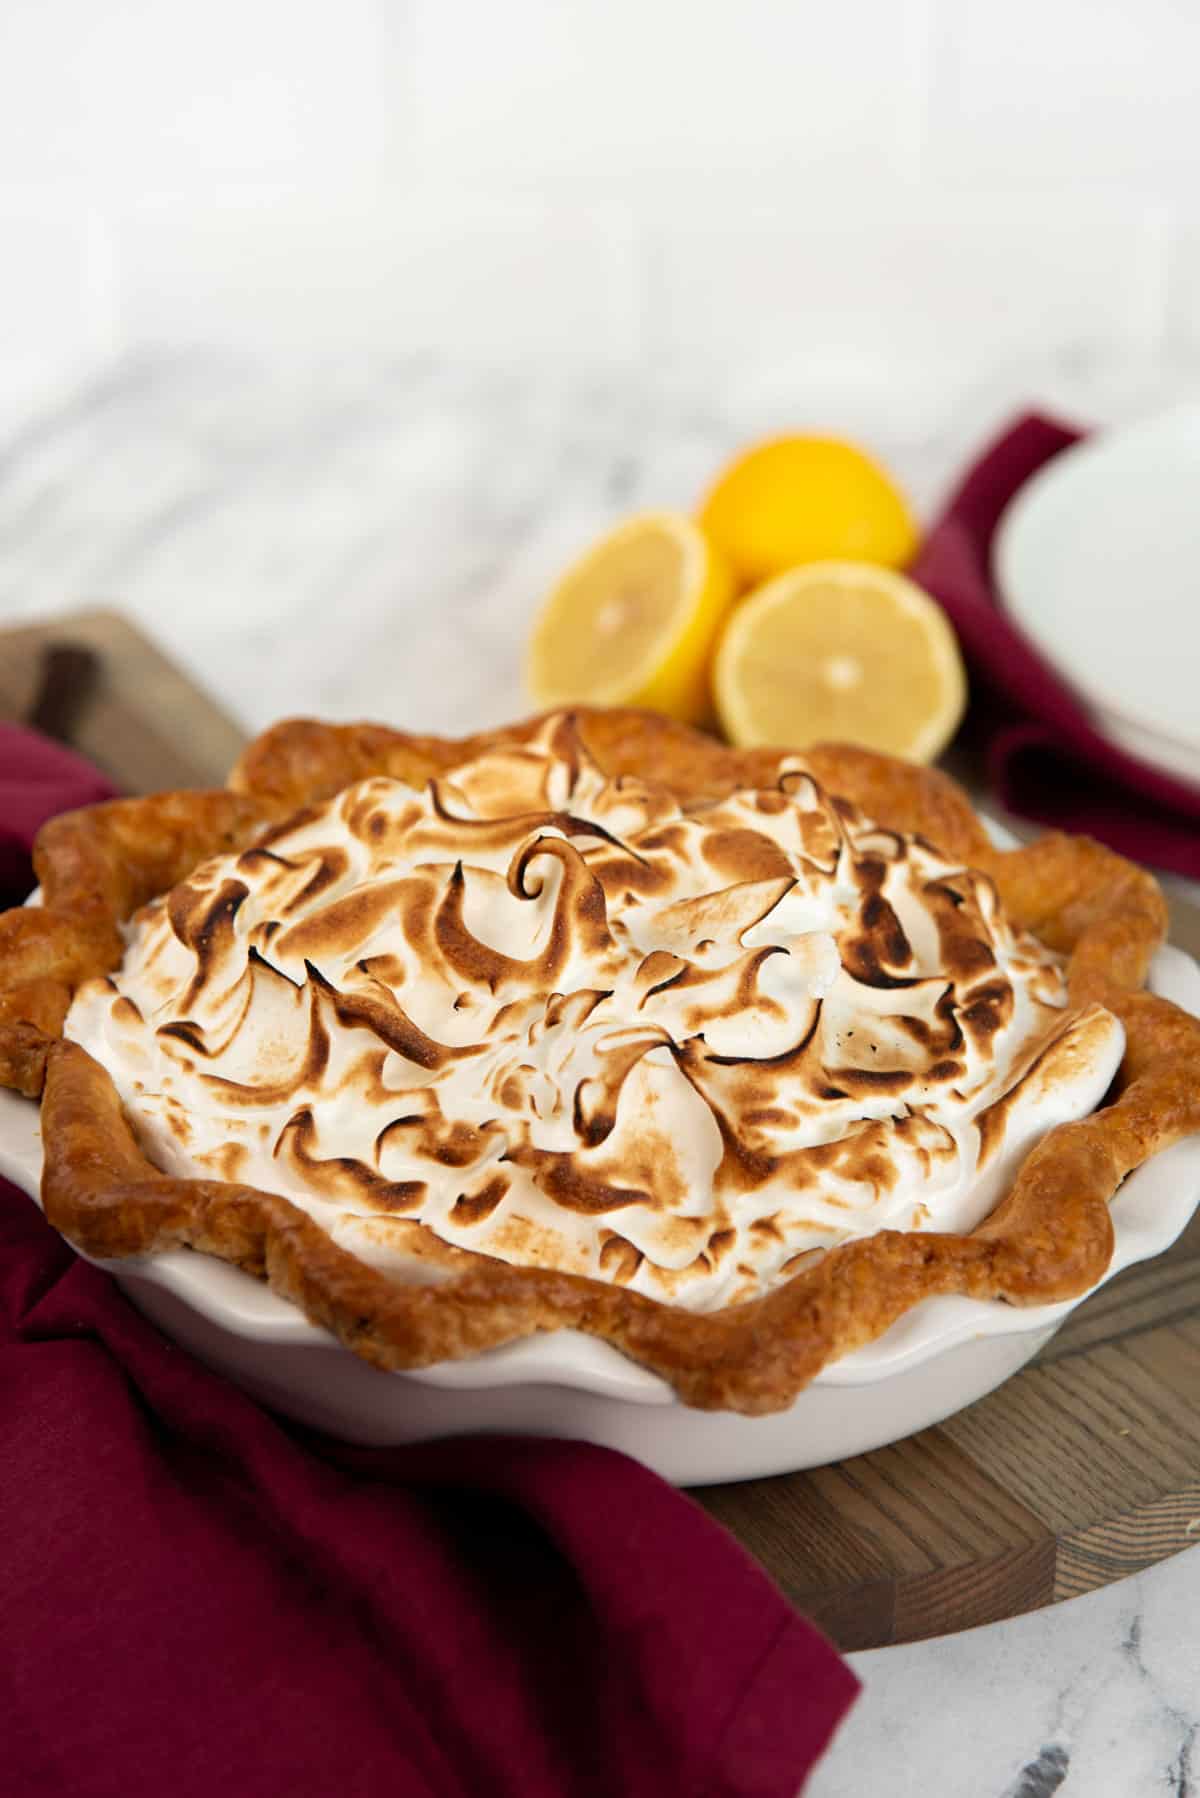
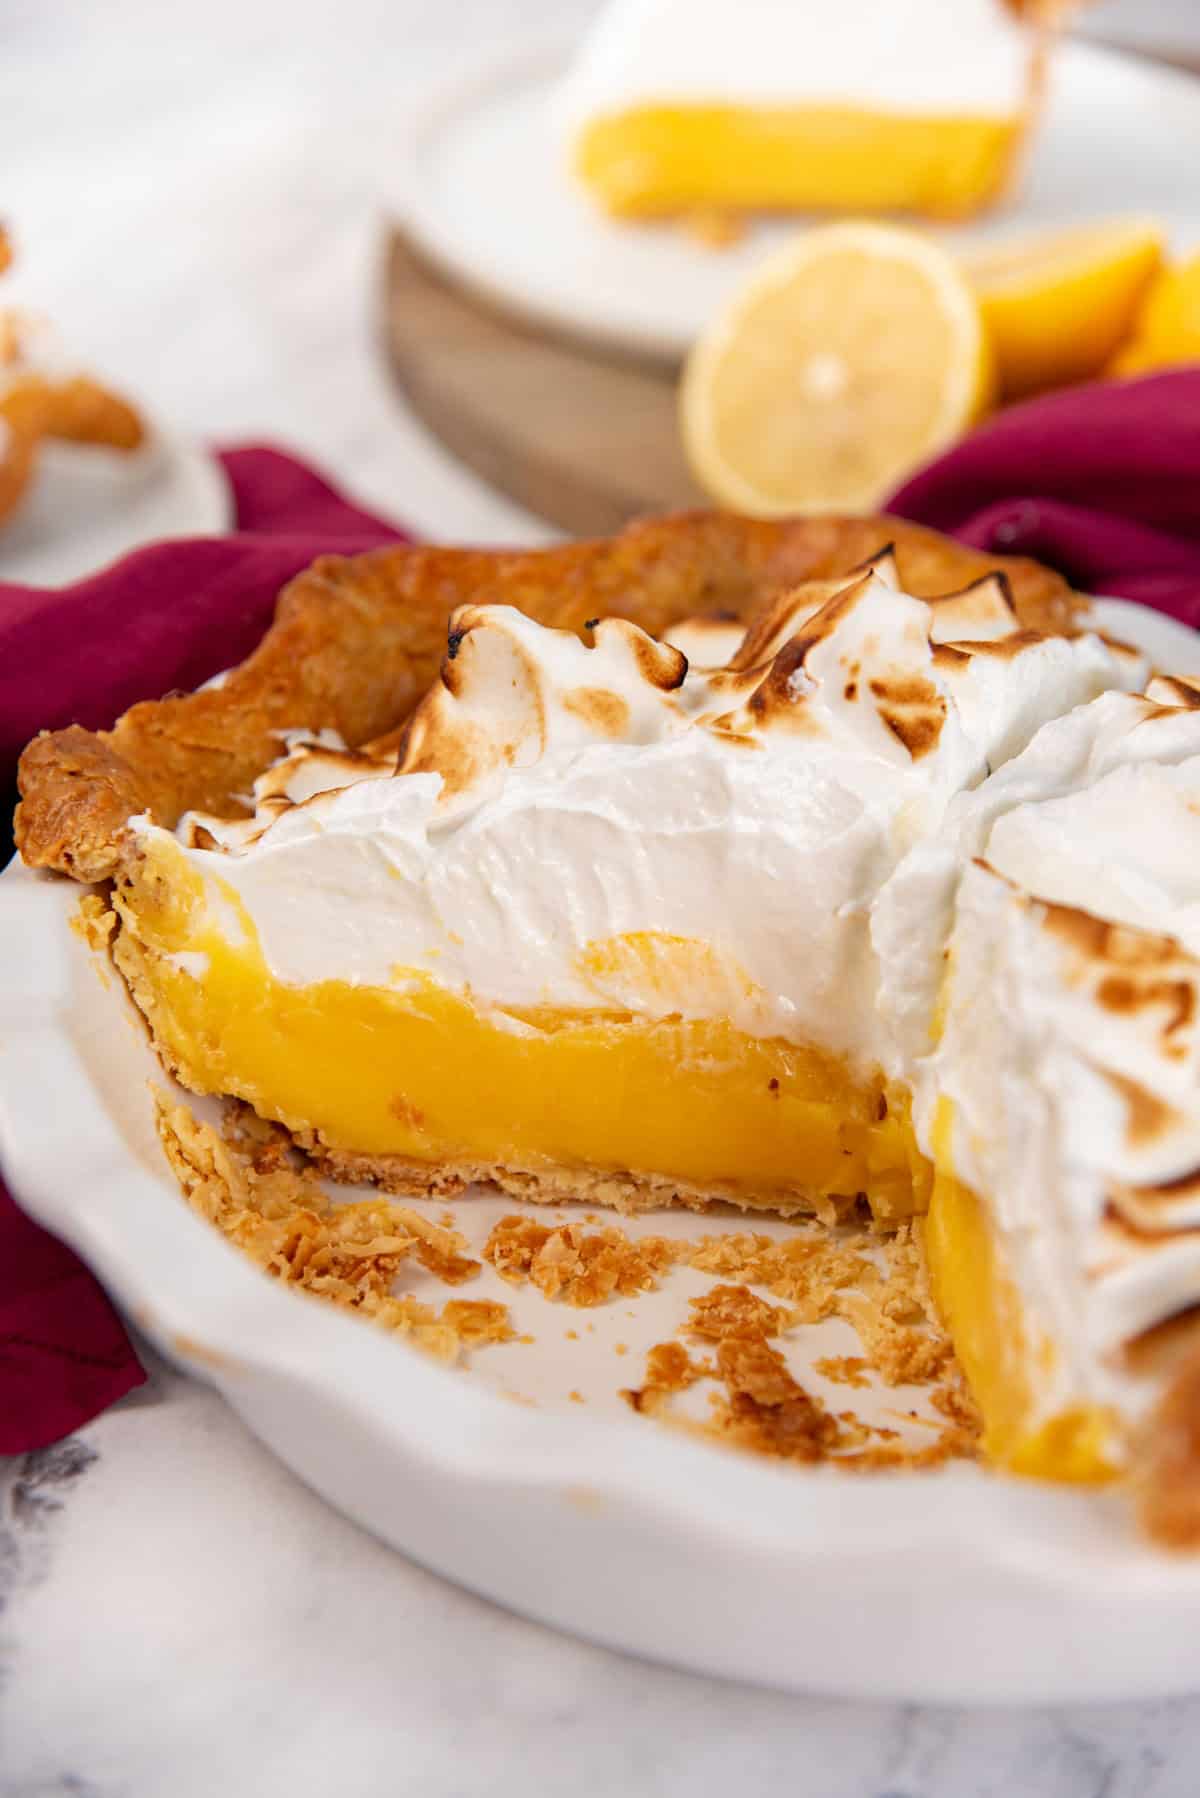
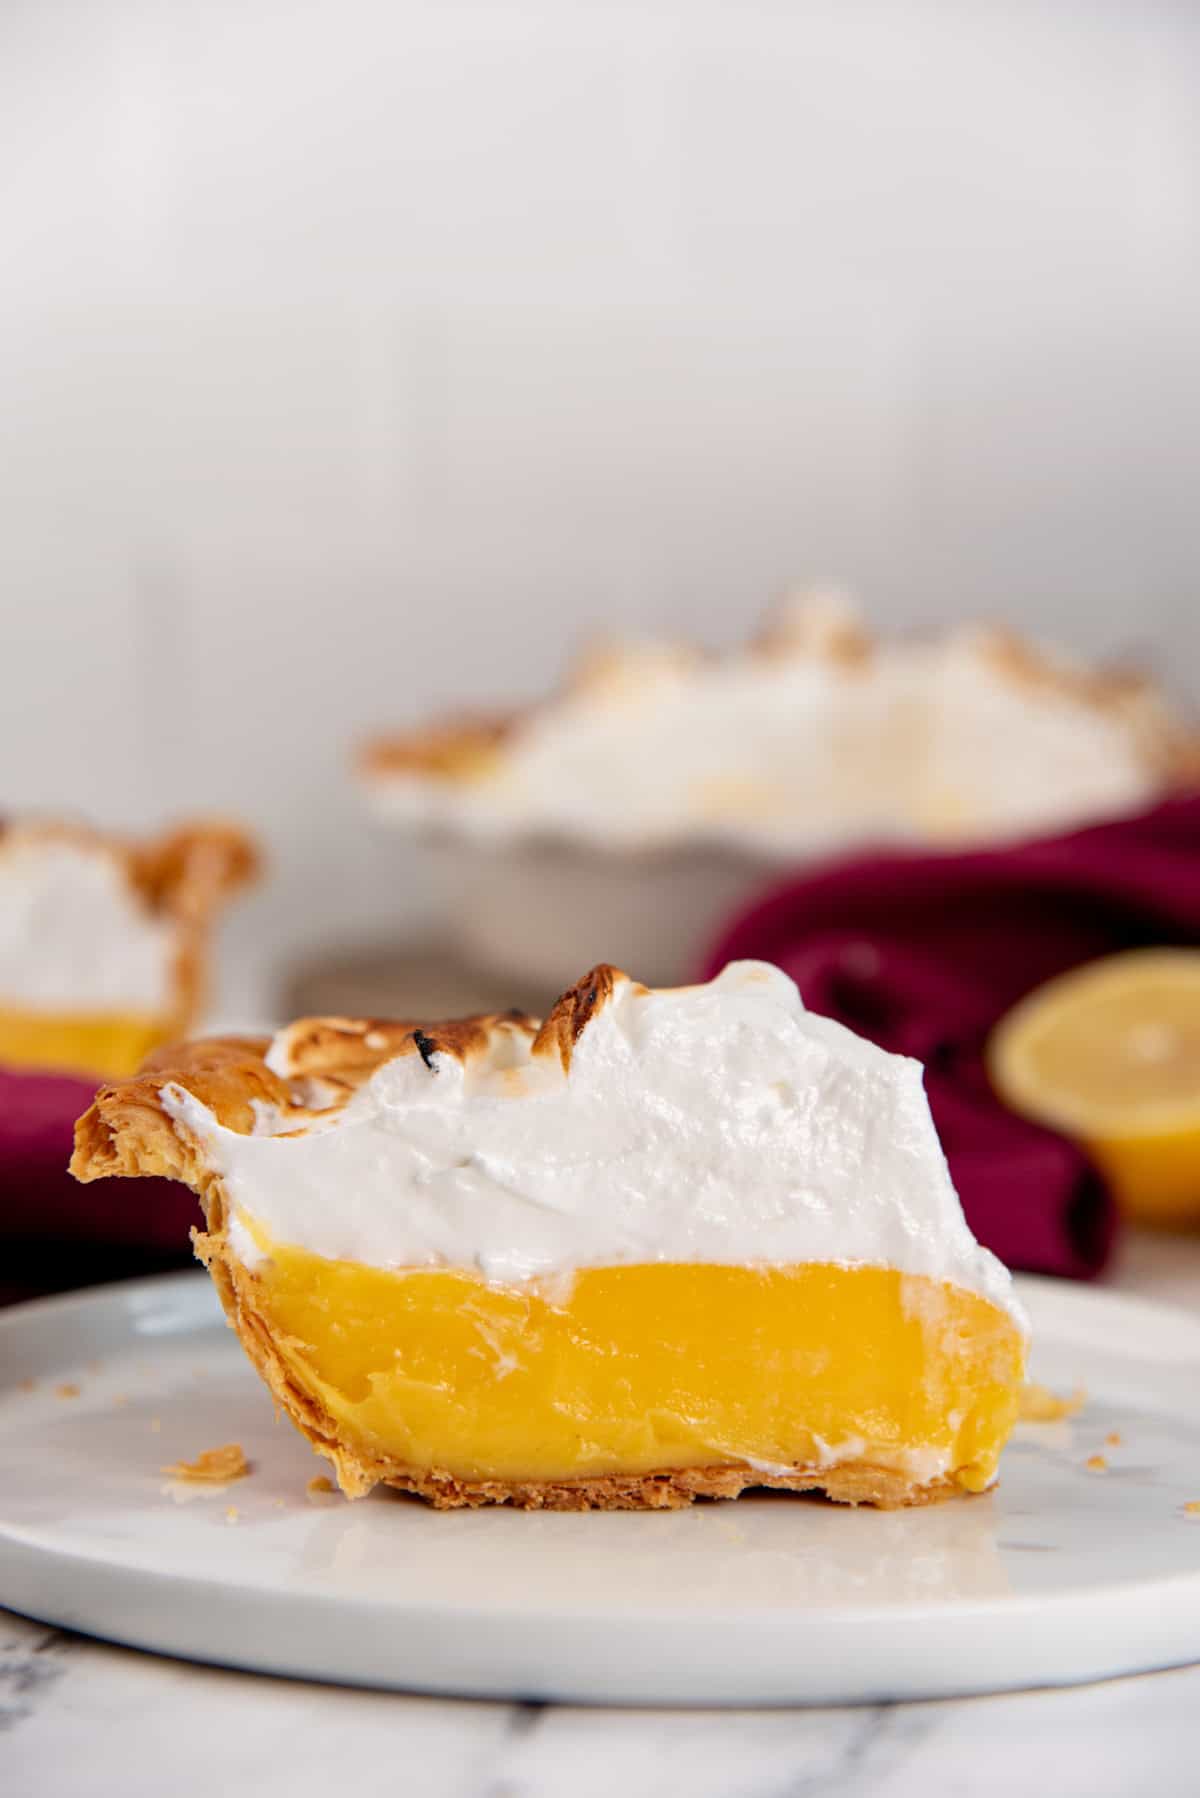
If you’re like me, then you don’t want a lemon meringue pie that is super sweet. You’re looking for a lemon meringue pie that is really tangy, with a big punch of lemon flavor, with just enough sweetness! All lemon meringue pies that I’ve eaten in the past were just too sweet for me, and were missing that big burst of tangy, tart lemony flavor. That tangy lemon pie filling, balanced with the pillowy, marshmallow-like meringue topping, and a buttery, flaky pie crust is what makes the best lemon meringue pie recipe. And it’s one of my favorite dessert pie recipes. And I like it so much so that I even make a lemon meringue pie cocktail, complete with swiss meringue and oatmeal lace cookies. That’s why you too will love this recipe! This recipe is,
Made with lemon juice and no added water. So, the lemon flavor is BOLD! Just perfectly sweetened, and does not overpower the lemon flavor. Buttery, lemon filling that tastes rich and creamy! The lemon meringue pie filling is cooked on the stove top, so you don’t have to bake it again (much like how I make my passion fruit pie). It sets to a firm but creamy filling with a buttery, sweet, and extra lemony flavor! There’s no guesswork with baking and hoping the filling sets either. Perfect, flaky pie crust that complements the lemon meringue pie in every way. Topped with a meringue topping that is stable, with no weeping, and can be caramelized in the oven or with a kitchen torch / butane torch.
Ingredients for lemon meringue pie
Pie crust
One pie crust to line a 9 – 9.5 inch deep pie pan. I use my perfect, flaky pie crust recipe! The recipe makes 2 crusts, but you can halve it and make just one crust. The ingredients are,
Flour Butter Salt Chilled water and vodka (optional)
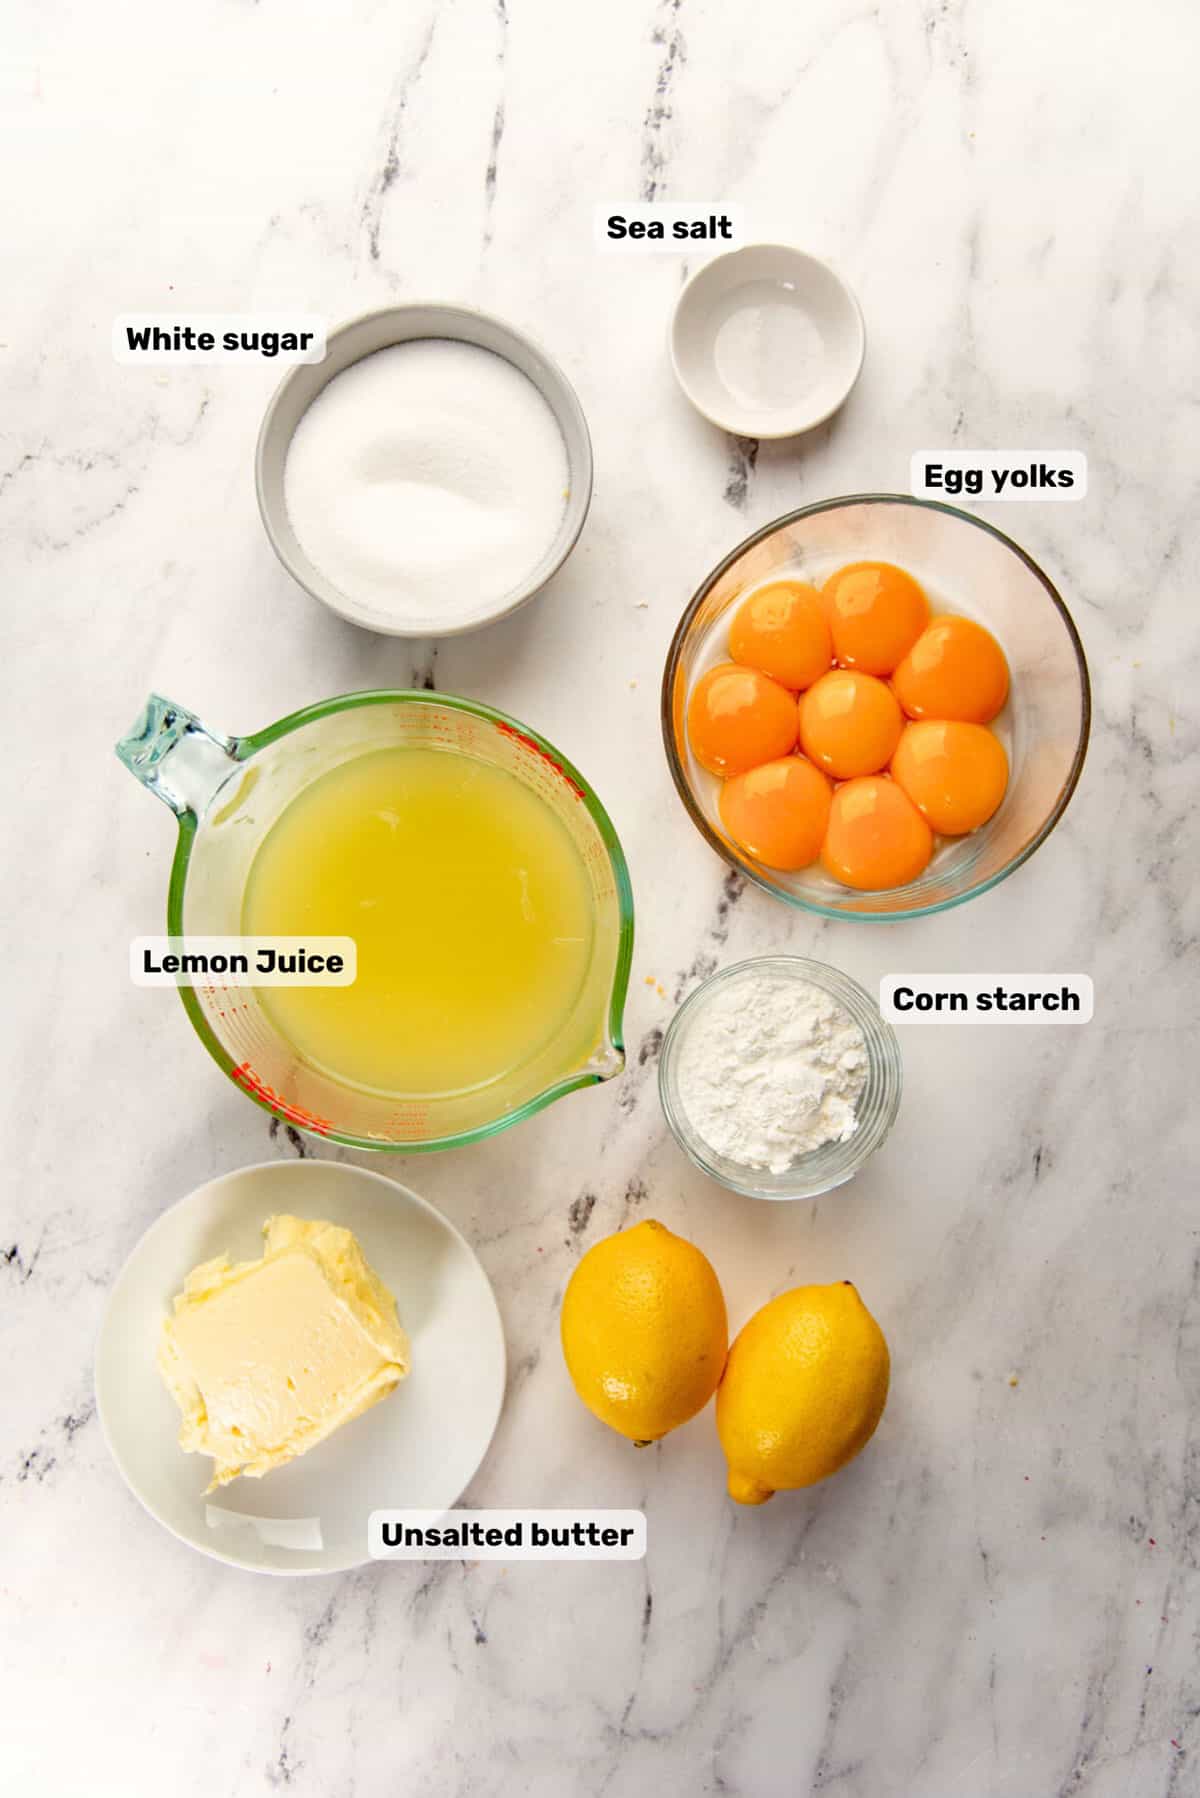
Lemon filling
Lemon juice Egg yolks Cornstarch Sugar Salt Butter
Lemon meringue pie fillings are usually made two ways. Baked filling – Where the lemon filling ingredients are mixed (and might be cooked halfway through), poured into the crust and then baked until the filling thickens and sets. Like a baked custard. This method is great and the filling usually looks smoother and is softer. But the pie crust must only be parbaked, and it isn’t always easy to tell exactly when the filling will be cooked. If it’s overcooked, it becomes too “scrambled”, and if it’s undercooked, then the filling is runny and doesn’t hold its shape. Cooked filling – The lemon filling is cooked on the stove top and is like a lemon curd. This is how I make the filling for this pie. This method gives the baker more control, as you can thicken it on the stove and then pour it into the crust. Once refrigerated, the filling will be set. Some of the cooked fillings can use gelatin as a setting agent, or use starch as a thickener. I use a combination of starch and butter to help thicken and set the filling. Because the butter not only thickens and helps set the filling, but also adds a lot more flavor to the lemon filling!
Meringue topping
Water Sugar Egg whites Cream of tartar Lemon zest (optional)
How to make lemon meringue pie
There are 3 components to this easy recipe
How to make the pie crust
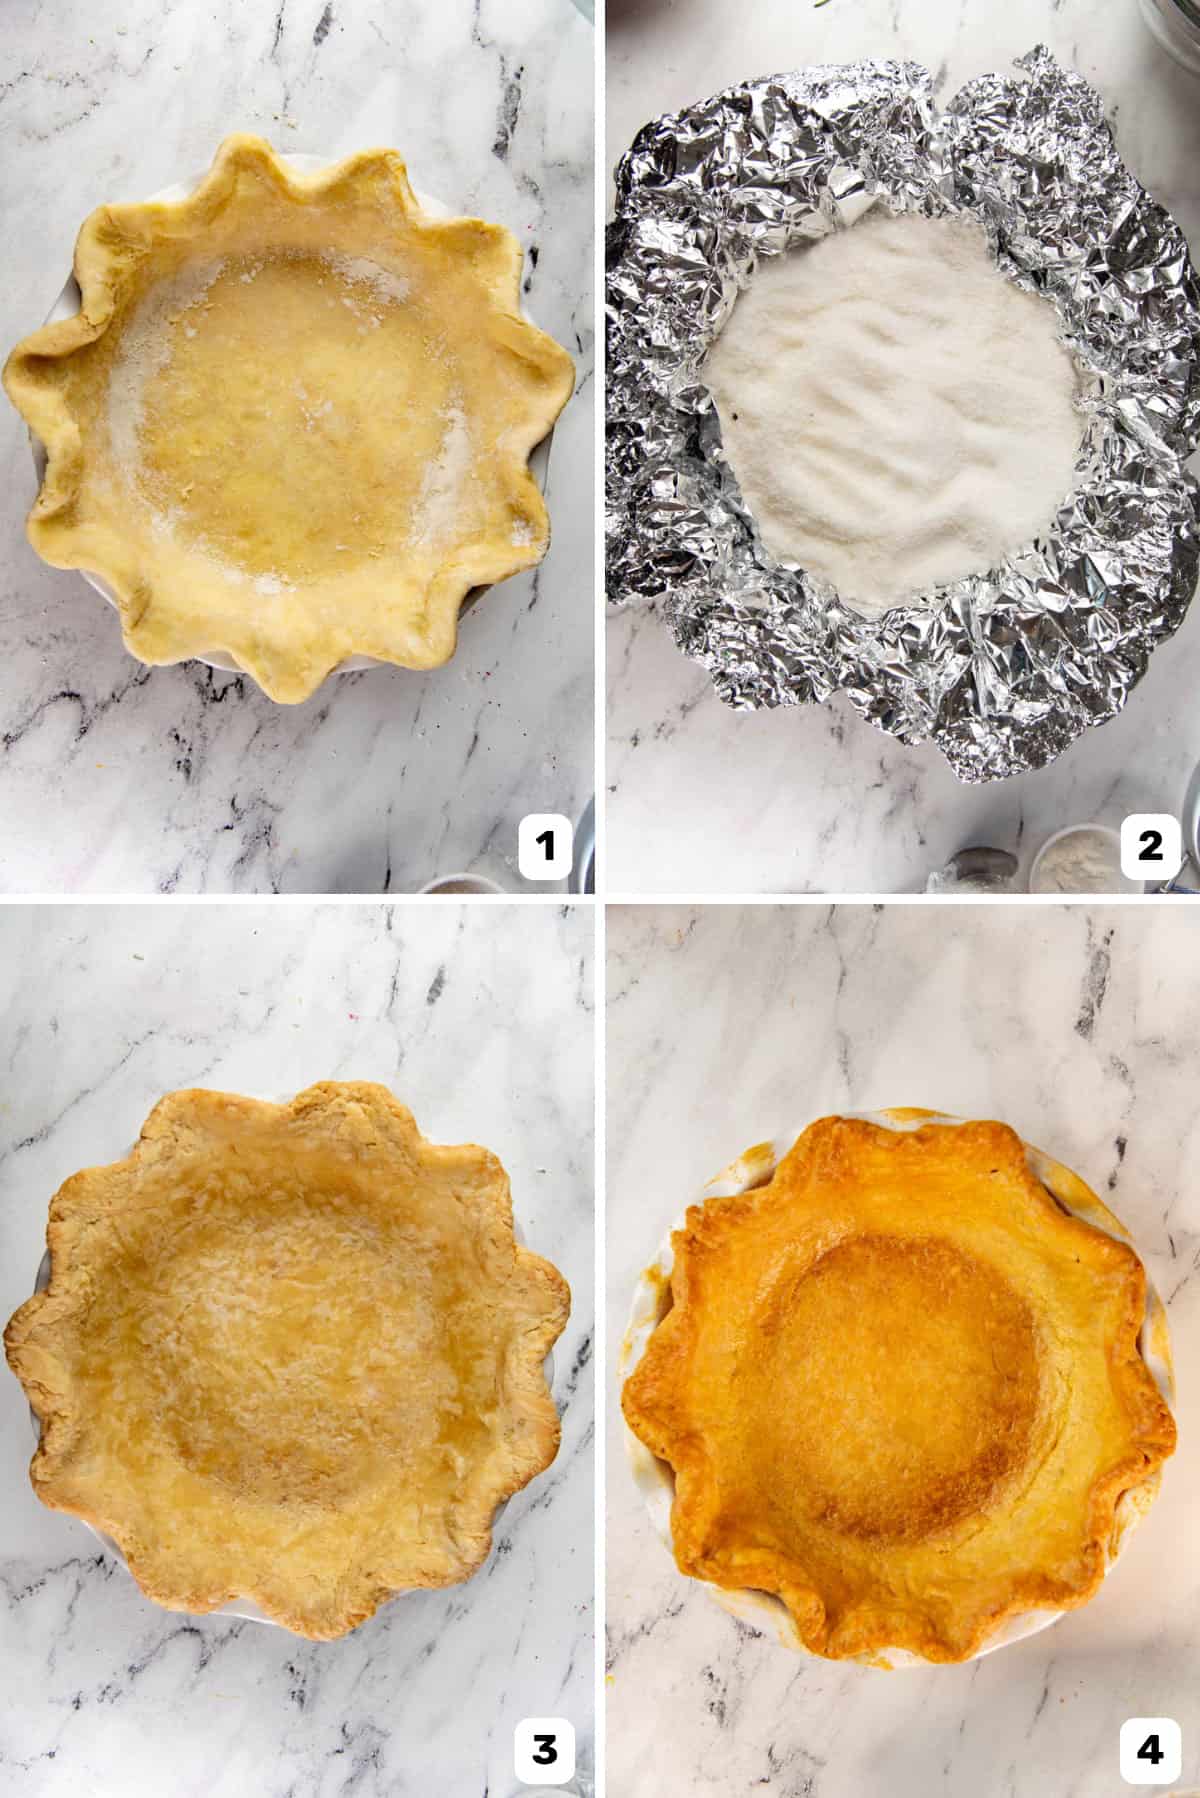
You can totally use store-bought pie crust for convenience. However, I absolutely love my homemade flaky butter pie crust instead. The buttery flavor is so much better in this homemade crust, and the flakiness pairs perfectly with the rich filling! I have a very detailed pie crust recipe that will walk you through the process of making the best pie crust. So even if you’re not familiar with making pie crust, my recipe will make you feel confident! To make this, chilled butter is cut into flour to form large flour coated butter lumps. The flour-butter mixture is mixed with just enough chilled water (and vodka) to form a dough that still has dry spots. The dough is cut into 4 and stacked and flattened to form a dough disc. This makes the pie dough even MORE flaky (similar to how I make classic cream scones)! Then let the dough rest in the fridge. Roll out the rested dough and line your pie plate with the dough (image 1). Then blind bake the pie crust in the oven. Unlike other recipes, I like to blind bake my pie crust at a lower oven temperature of 350 F / 180 C, with rice or sugar as pie weights (image 2). This lower but longer bake time has several advantages,
The pie crust sides will not slip down the sides of the pie plate. There will be very little shrinking of the dough, as the bake time is slow and low. Even browning of the bottom of the crust while creating lovely flaky layers!
Once the pie crust is fully blind baked (image 3), I brush the inside of the crust with an egg wash during the last 5 minutes of baking. This will,
Prevent the filling from making the pie crust soggy. Give the pie crust a beautiful golden brown sheen (image 4).
Lemon filling
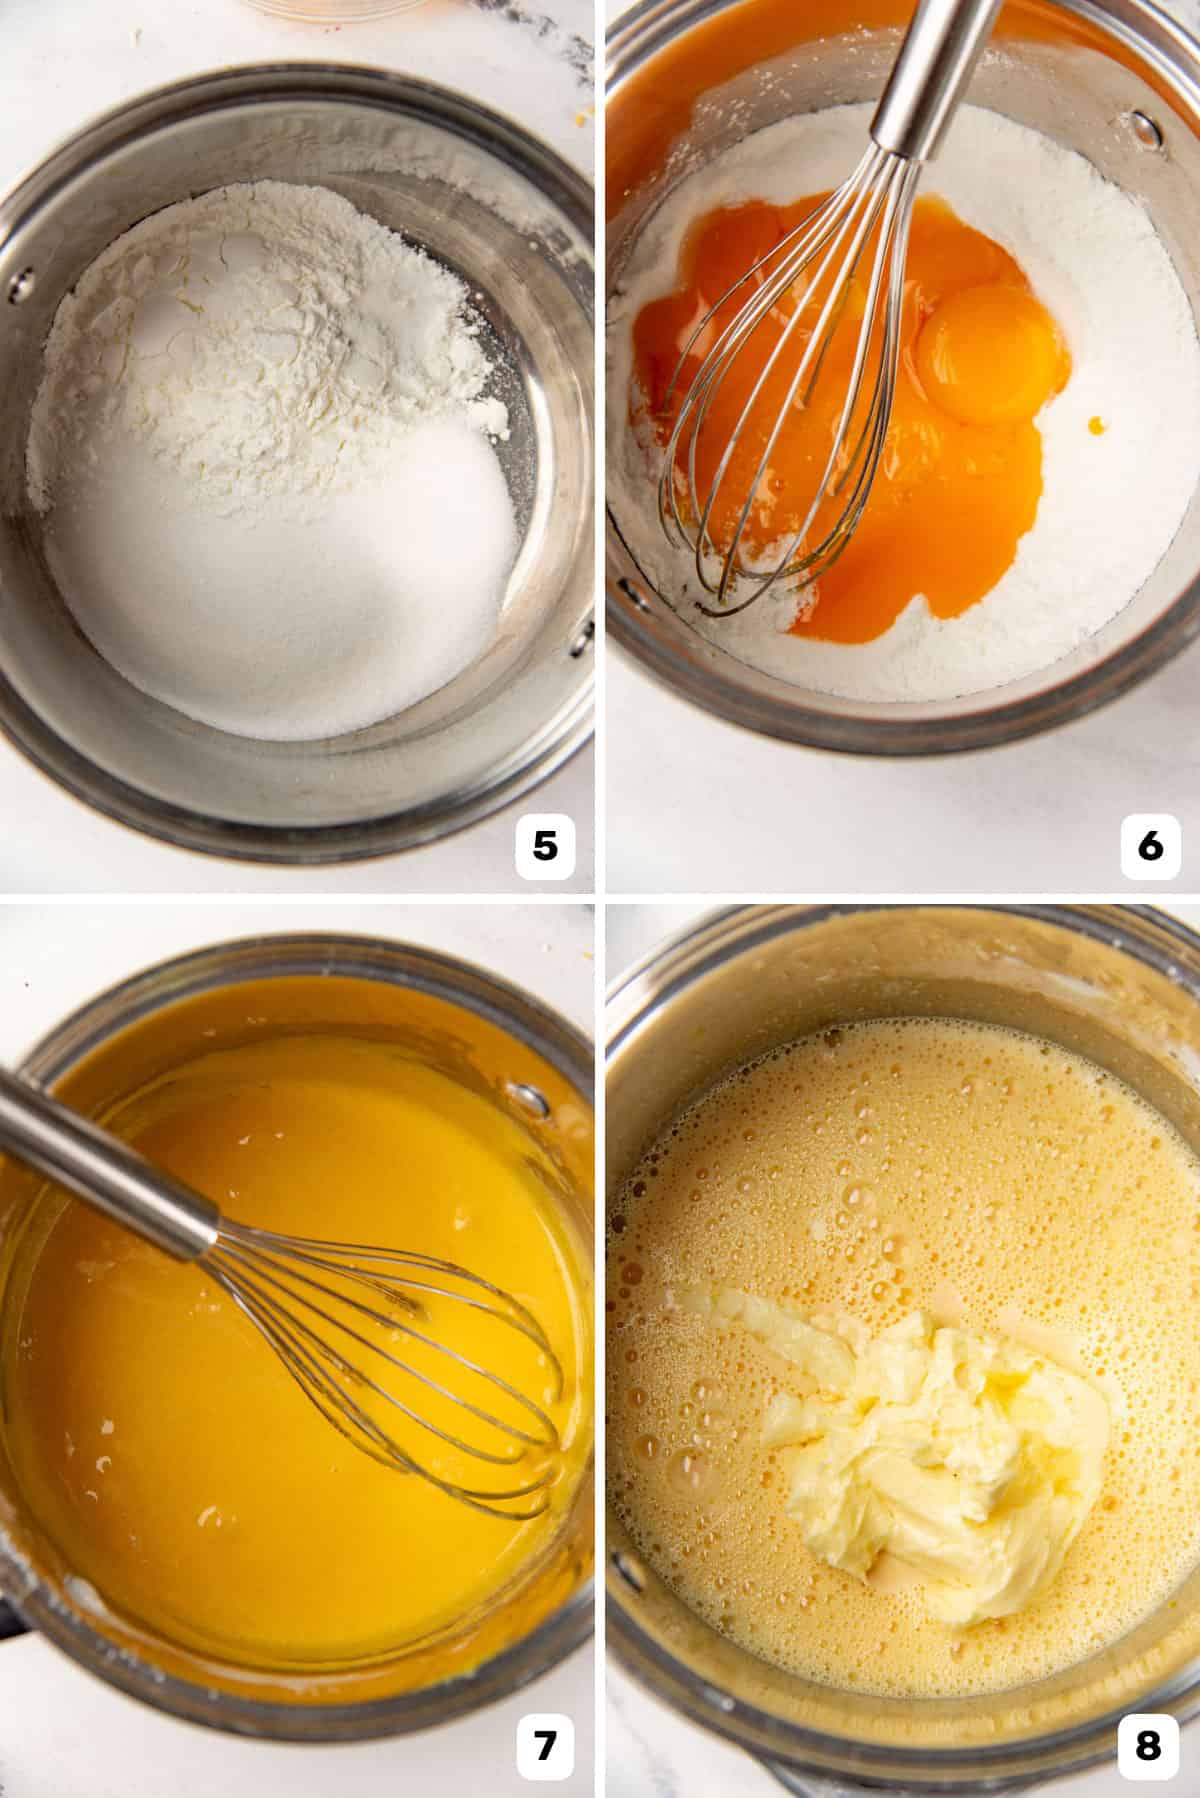
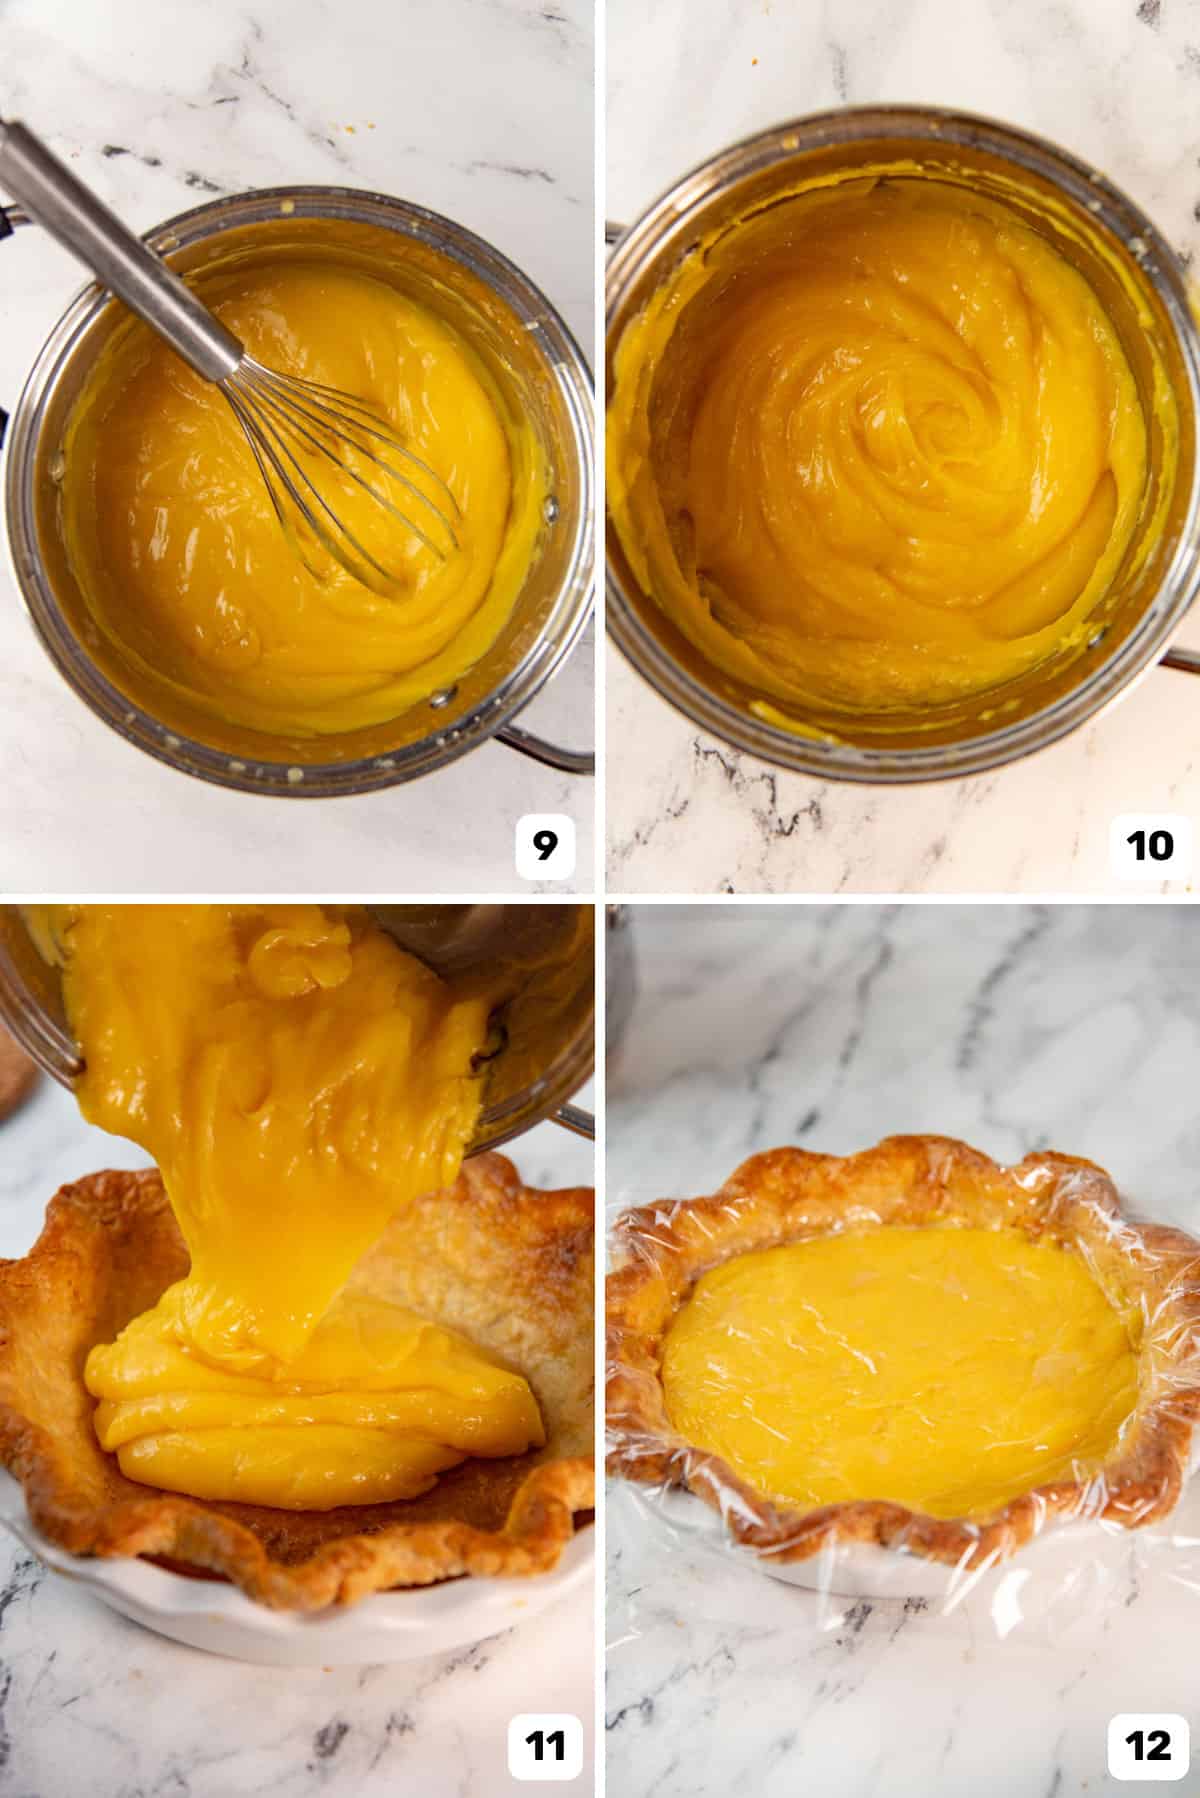
Whisk the cornstarch and sugar together in a pot (image 5). To this, the egg yolks are added and whisked in until pale in color (images 6 and 7). Then you whisk in the lemon juice. Then the butter is placed in the saucepan (it does not need to be melted prior to adding it) (image 8). Now, it’s time to cook the filling. Cook the filling while whisking. The whisking will keep the liquid moving, which will evenly distribute the heat in the mixture, and also help prevent the egg yolks from scrambling. Keep cooking the mixture until the liquid starts to come to a boil. Boiling the mixture is important because the cornstarch’s ability to fully thicken the filling will only be activated when it’s heated to the boiling point. When the mixture comes to a boil, lower the heat slightly and keep cooking the filling while whisking for a further 3 – 5 minutes. It’s absolutely crucial for the mixture to be cooked further once it comes to a boil. After cooking the filling, on low heat after it came to a boil, the mixture should be thick, shiny, and spreadable (image 9). Remove from the heat and pass the mixture through a sieve. You can also use a stick blender and blend the mixture. This is an optional step. Let the creamy lemon filling slightly cool down (image 10), and while still warm, pour it into the cooled down pie crust (image 11). Use a palette knife to spread and smoothen the surface of the tart lemon filling. Cover the entire surface with plastic wrap and refrigerate until the filling is set and cooled down (image 12).
Meringue topping
There are three ways to make the meringue topping.
French meringue – Whisking sugar and egg whites together. This is the technique used to make pavlova for instance. Swiss meringue – Heating the egg white and sugar together and then whisking it. Italian meringue – Making a sugar syrup (high concentration) and then whisking egg whites while adding the sugar syrup.
While many recipes use Swiss meringue to make this dessert, I use Italian meringue, because it’s the most stable out of the three, and still ensures a deliciously billowy meringue. Place water and sugar in a pot and heat to bring to a boil. Swirl the pot to help dissolve the sugar in the water. Avoid stirring it because this can recrystallize the sugar and seize the syrup. Heat the syrup until it reaches 240 F / 116 C. This is at the starting point of the firm ball stage. You can read more about sugar syrup / candy stages in my cooked sugar stages (candy temperature chart) post. Once it reaches 240 – 242 F, it’s ready to be added to the egg whites. While the sugar syrup is heating, place the egg whites in a clean mixing bowl, and make sure there are no fatty residues in the bowl. Add salt and the cream of tartar into the egg whites and whisk until the mixture becomes frothy. Firm ball stage can be tested by dropping a few drop of the sugar syrup into a small bowl with cold water. This is the cold water test. The sugar syrup will form a ball in the water and then if you pick it up, the ball will retain its shape mostly, but will be malleable if you press it with your fingers. Add the hot sugar syrup into the egg whites while whisking on medium high speed. Once all the sugar syrup is added, whisk on high speed until the meringue forms stiff peaks and it’s only warm to the touch. The fluffy meringue topping is now ready (image 14). You can either spread it on top, or use a piping bag to pipe a pattern over the lemon filling.
Final step
Once the lemon filling is chilled and set in the fridge, remove the plastic wrap from the surface (image 13). Make sure the surface of the filling has no moisture. Place the meringue in a piping bag with a piping tip, IF you want to pipe the meringue in a pattern. OR, you can just spread the meringue directly on top (image 15). Use a spatula to spread the meringue (image 16), making sure it’s spread from edge to edge while creating a nice mound of meringue, so that the center is higher than the edges. If you have a kitchen blow torch, carefully torch the meringue to caramelize it. However, if you don’t have a blow torch, use the broiler function in the oven to caramelize the meringue. Make sure the meringue is closer to the middle of the oven, so that it doesn’t caramelize too quickly and burn. Place the pie in the fridge to cool down the meringue before serving.
My best tips (and why this recipe works!)
When blind baking the pie crust, bake low and slow! This will help prevent shrinking and slipping of the pie crust. When baking the pie crust, make sure to brush the interior of the crust with an egg wash or egg white wash during the last 5 minutes of blind baking. This will act as a barrier betwen the filling and pie crust, keeping the crust crisp and flaky. Use freshly squeezed lemon. The lemons should be fresh as well. Old lemons lose their flavor as they go stale. Whisk the filling as you’re cooking it. This will prevent the eggs from scrambling, and result in a smooth, rich lemon filling. Instead of cornstarch, you can also use instant clearjel or cook type clearjel. If you plan on freezing this lemon meringue pie, then use instant clearjel as this holds up to freezing and thawing the best. Spread the filling while it’s warm in the cooled down crust. This will make it easier to spread it smoothly. If you’re not sure if the mixing bowl is free from fat to make meringue, lightly soak a paper towel with white vinegar and rub this all over the inside of the bowl. Use a candy thermometer to get the temperature of the sugar syrup right. If you don’t have a thermometer, then use the cold water test (explained above) to check when the syrup is heated to firm ball stage.
Tips on how to cut clean slices
Use a very sharp kitchen knife or cake knife. Warm the blade by dipping it in hot water and then wipe it dry. The warm blade won’t stick to the filling and will slide right out. Guide the knife into the pie, starting from the middle, and then slowly lower it until you get to the crust. Firmly and gently cut through the crust. Once you get to the bottom of the pie, press down the knife blade firmly to cut through the crust. Remove the slice using an angled palette knife or pie server. It does often help to cut a very thin sliver of the pie first to create a gap in the pie dish. This first “slice” will be thin, and messy, but will allow you to cut more neatly and remove slices easily.
How to store lemon meringue pie
Make ahead tips
The lemon meringue pie without the meringue will last in the fridge for up to 5 days. But this homemade pie is best served within the first 2 days. The longer the pie is stored, the more the crust will become stale and soggy as well. Once you cover the top of the pie with the meringue, the pie is best served the same day. But, the whole pie can be stored for up to 12 hours as well. That’s because of the Italian meringue that I use here, which is the most stable meringue. That being said, the meringue will still start to lose volume and will interact with the filling as more time passes by. This will result in the meringue weeping and sliding off the pie. So if you want to make this ahead of time, the lemon pie can be made up to 2 days ahead of time, but the meringue must be made on the day you plan to serve it. You can also freeze the lemon meringue pie without the meringue, ONLY IF you use instant clearjel in the filling. Let it thaw out in the fridge overnight. The crust will lose some of its crispness though.
Storing leftovers
You can store leftovers in the fridge in an airtight container. However, we don’t keep leftovers for longer than an extra day, because of the meringue topping.
Commonly asked questions
More delicious pies and lemony desserts
Apple pie Banana cream pie Passion fruit pie Classic pumpkin pie Crustless pumpkin pie Mixed berry pie No bake lemon cheesecake bars Lemon raspberry cake Lemon ice cream