This is truly the only Swiss meringue buttercream guide you will need! Check out the chocolate swiss meringue buttercream recipe for the chocolate counterpart. And for even easier cheat’s versions, see my easy swiss meringue buttercream recipe and easy chocolate swiss meringue buttercream.
What is Swiss meringue buttercream?
Here I’m going to share how to make my favorite Swiss meringue buttercream recipe. It’s my absolute favorite type of frosting recipe, followed closely by classic buttercream, and French buttercream. There are two types of meringue buttercream.
Swiss meringue buttercream Italian meringue buttercream
The difference between these two is the way the egg white meringue is “cooked”.
With Italian meringue buttercream, the egg whites are whisked in a bowl, while a hot sugar syrup is poured into it. The heat from the sugar syrup will cook the egg whites as it’s poured and whisked into a fluffy meringue.
With Swiss meringue buttercream, the egg whites and sugar are cooked over a double boiler until the sugar has dissolved and the egg whites are pasteurized. This is then beaten into a fluffy meringue.
Swiss meringue buttercream is a light, buttery, sweet buttercream and it’s like no other! It’s perfectly sweet (without being cloyingly sweet), and incredibly creamy and smooth.
I also prefer Swiss meringue buttercream over Italian meringue buttercream because I am 100% confident that the eggs have been pasteurized, and it’s absolutely safe to eat.
Why this Swiss meringue buttercream recipe is better
It’s stable – The egg white meringue base makes this buttercream stable. It’s great for piping patterns, flowers etc. Not too sweet – Compared to American buttercream frosting, this buttercream is less sweet, but more creamy. All thanks to that egg white meringue and butter. Much easier to store for later – American buttercream frosting forms a crust when stored, which isn’t great if you want to use the frosting the next day. But Swiss meringue buttercream can be kept at room temperature overnight and it’ll still be super creamy. Plus, it can be refrigerated and frozen for later too. Perfect, smooth frosting – Since this buttercream is so creamy and smooth, it’s perfect to frost those cakes for which you want to have a smooth frosting finish. I also love this recipe because it guarantees perfect buttercream every single time! Plus with all the tips I share here, you can adapt the recipe to your taste too. 🙂
In this post, you’ll learn
How to achieve a stable Swiss meringue buttercream. Step by step instructions on how to make the buttercream. Swiss meringue buttercream troubleshooting common mistakes. Tips for storing, and flavoring the buttercream.
I guarantee this will be the only guide you need to make Swiss meringue buttercream (SMBC) for all your cake and cupcake needs!
How to make Swiss meringue buttercream
Get the bowl and utensils ready
To remove any residual fat/grease in your bowl, first wash and dry the bowl, then rub a freshly cut slice of lemon on the inside, and wipe with a paper towel.
Get the egg whites ready
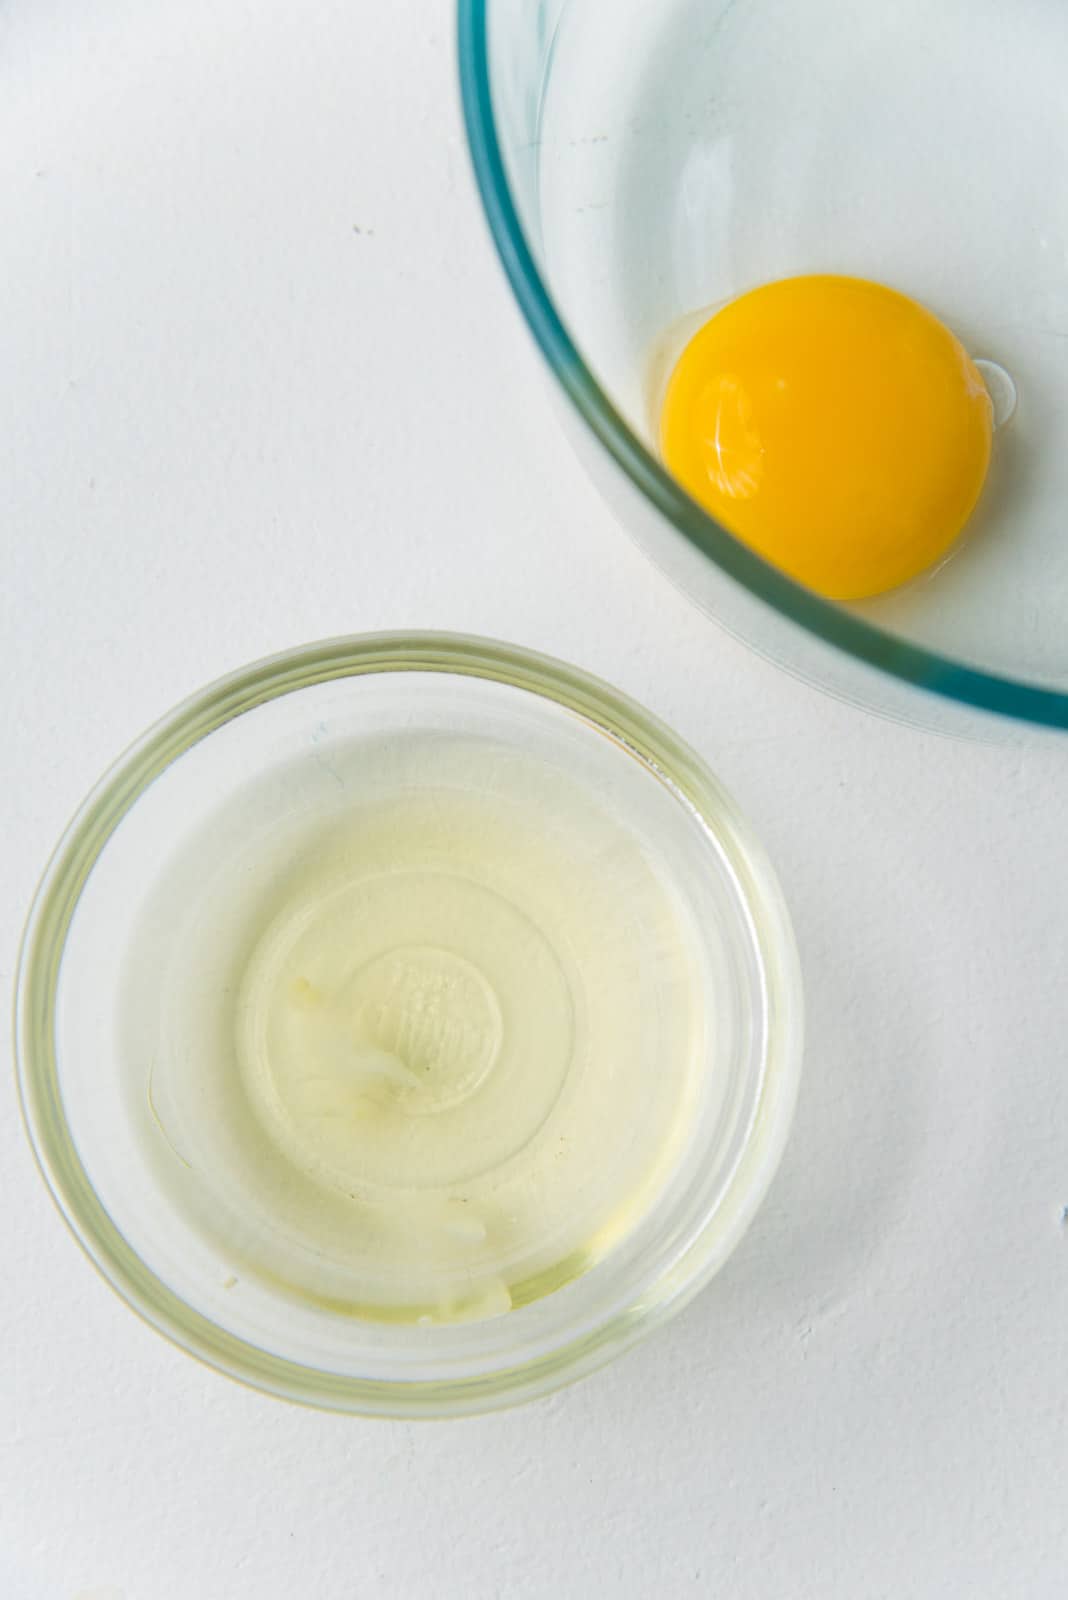
Egg whites are one of the two important components of a Swiss meringue buttercream recipe. It’s really important to separate the egg whites in clean, dry bowls without ANY egg yolk in them. I like to separate the egg whites into a smaller bowl, 1 egg at a time, to make sure that no egg yolks get into them. Once an egg white is separated, the egg white is transferred to a measuring jug or mixer bowl, and then repeat the process with each egg. The egg yolks are kept separate in another bowl.
How to separate egg whites from whole eggs
It’s very important to separate and remove all yolk/fat from your eggs for this recipe. This may seem like a very simple thing to do, but I’ve had this topic come up in conversation before, so I thought I’ll write it down. You can use the egg shell halves to move the egg yolk back and forth while separating out the egg white. Just make sure you’re being gentle enough to not break the egg yolk with any sharp edges of the shell. Alternatively, if you’re a beginner cook/baker, then you can use your hands. It is messy, but you’ll have better control and make sure the yolk doesn’t break either. Cup one CLEAN AND DRY hand. Make sure the fingers are slightly splayed. Then crack the egg into the cupped hand and allow the egg white to fall through your splayed fingers into the small bowl. Then place the yolk in a separate bowl and repeat with the rest of the eggs. If one of the egg yolks break, then you need to wash, clean and dry your hands thoroughly before breaking the next one. As you add the egg whites into your mixing bowl, make sure you’re weighing the amount of egg whites so you know how much sugar to add too. This will give you more accurate results. Egg whites are also easier to separate from the egg yolk if the egg is cold. You can start the recipe with the cold egg whites too. It will just take a little longer for the egg white and sugar to come to the right temperature when being heated.
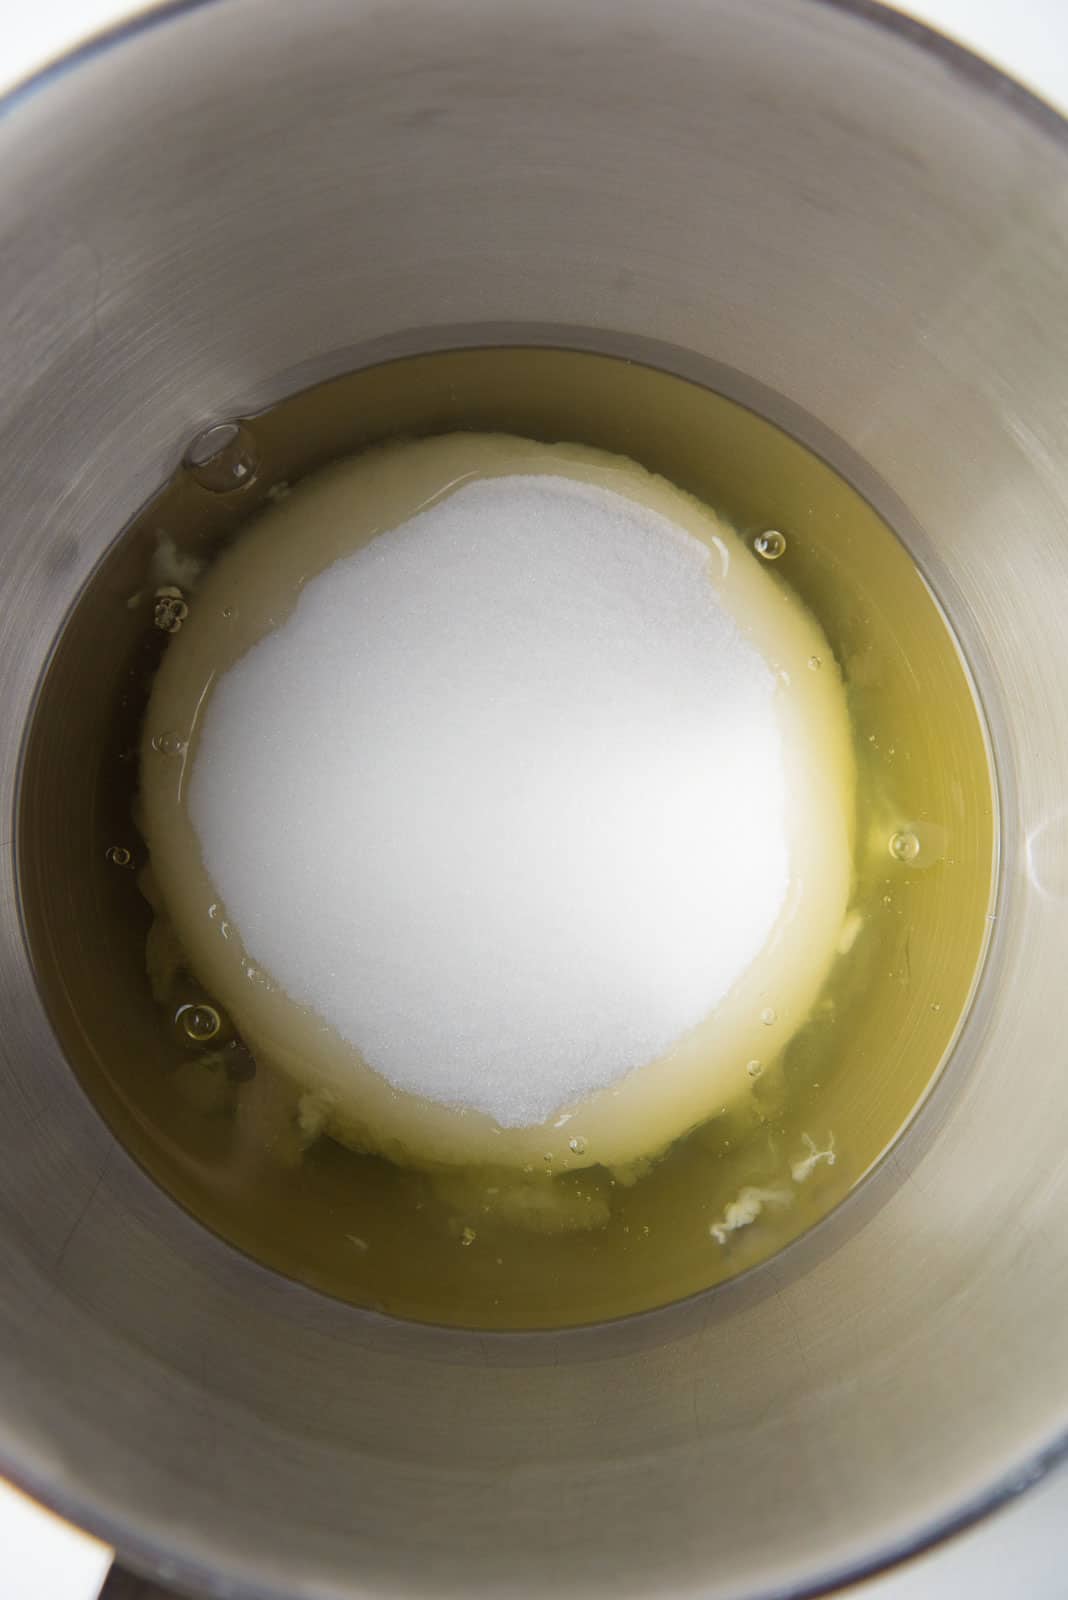
Adding the sugar
When the egg whites have been measured and added to the mixing bowl, it’s time to add the sugar. Granulated white sugar is used for classic Swiss meringue buttercream.
How much sugar to add?
I like to use a 1:2 ratio of egg whites to sugar. So, for 250 g of egg whites, I’ll be adding 500 g sugar. This also translates to about 62.5 g of sugar per 1 egg white (from a large egg). This is the perfect amount of sweetness for me, but if you like it less sweet, then you can add just 55 g of sugar per 1 egg white (1 : 1.75). Add the sugar to the egg whites and stir to mix it in.
Cooking the egg white sugar syrup
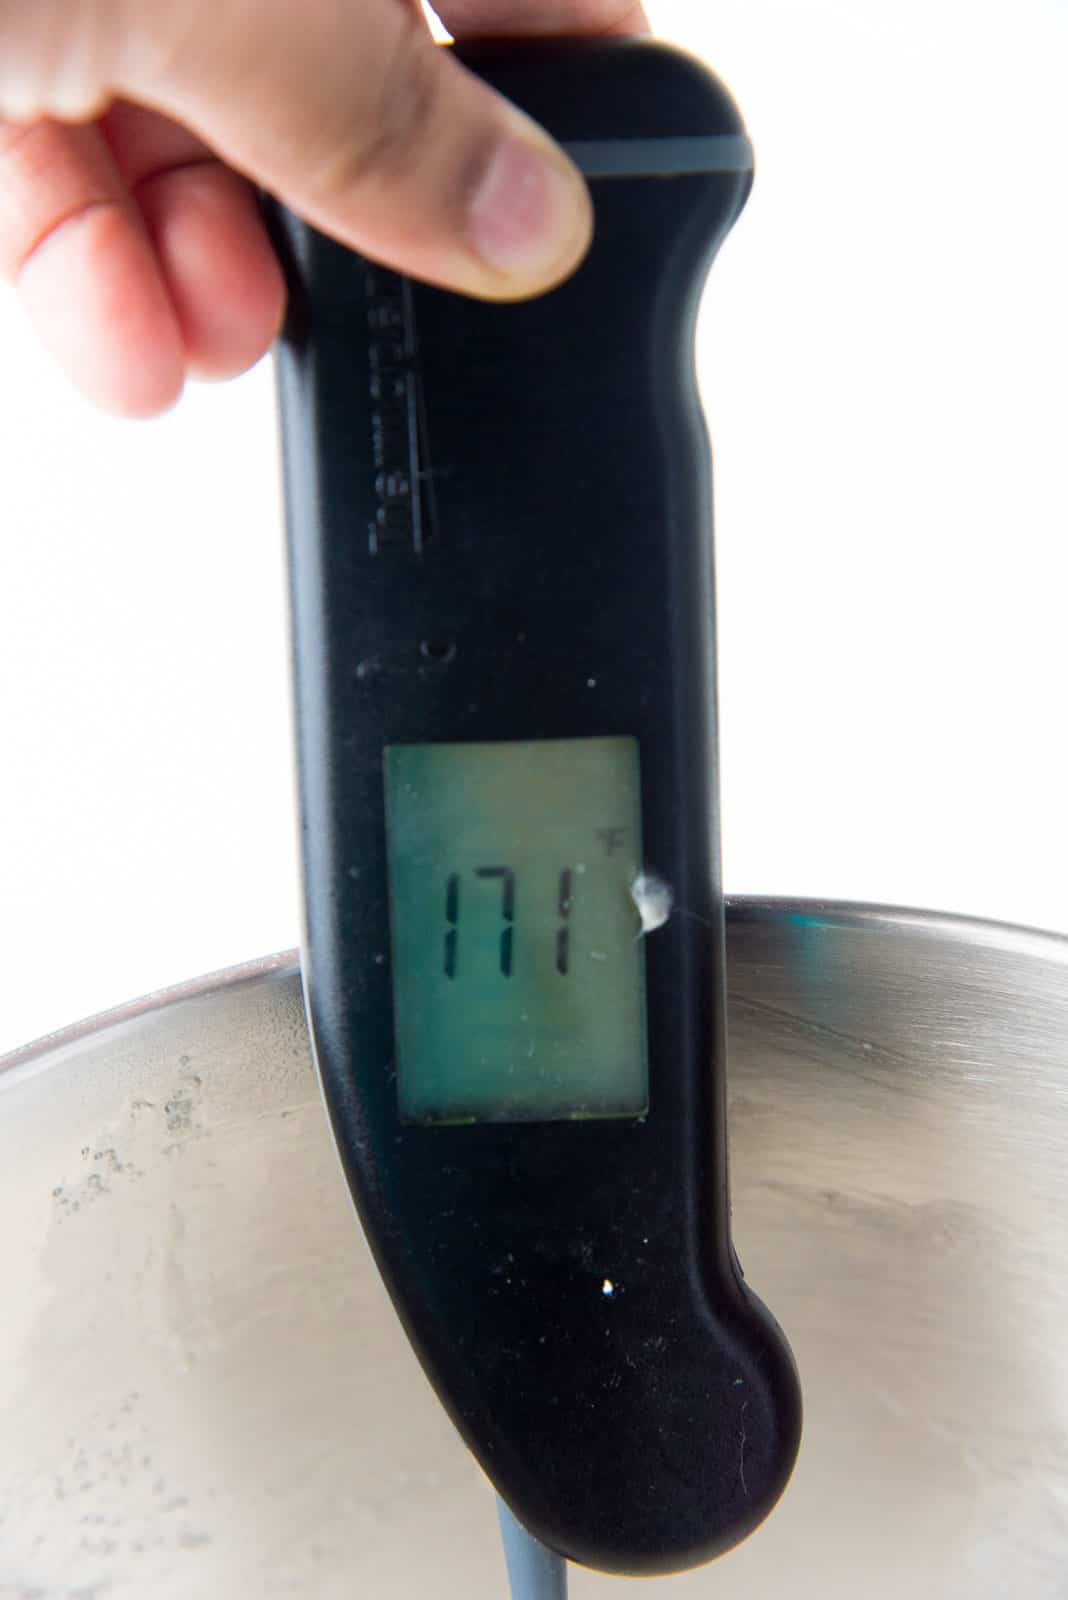
The egg whites are cooked over a bain-marie (or double boiler). Find a saucepan that would sit comfortably on your mixing bowl on top. You need to make sure the water boiling in the saucepan is not going to touch the bottom of the bowl. Bring about one inch of water to a boil in your saucepan. Lower the heat to a simmer and place your egg white-sugar mixture in a bowl, over the saucepan (i.e. double boiler). It’s important to keep the egg whites moving while being heated. This is to prevent the egg whites from coagulating. So don’t forget to gently stir or whisk constantly (with a whisk). We’re heating this to a temperature over 165°F, and the egg whites start to set at 145°F. So it’s really important to keep stirring to prevent scrambled eggs.
How long should I cook the egg whites?
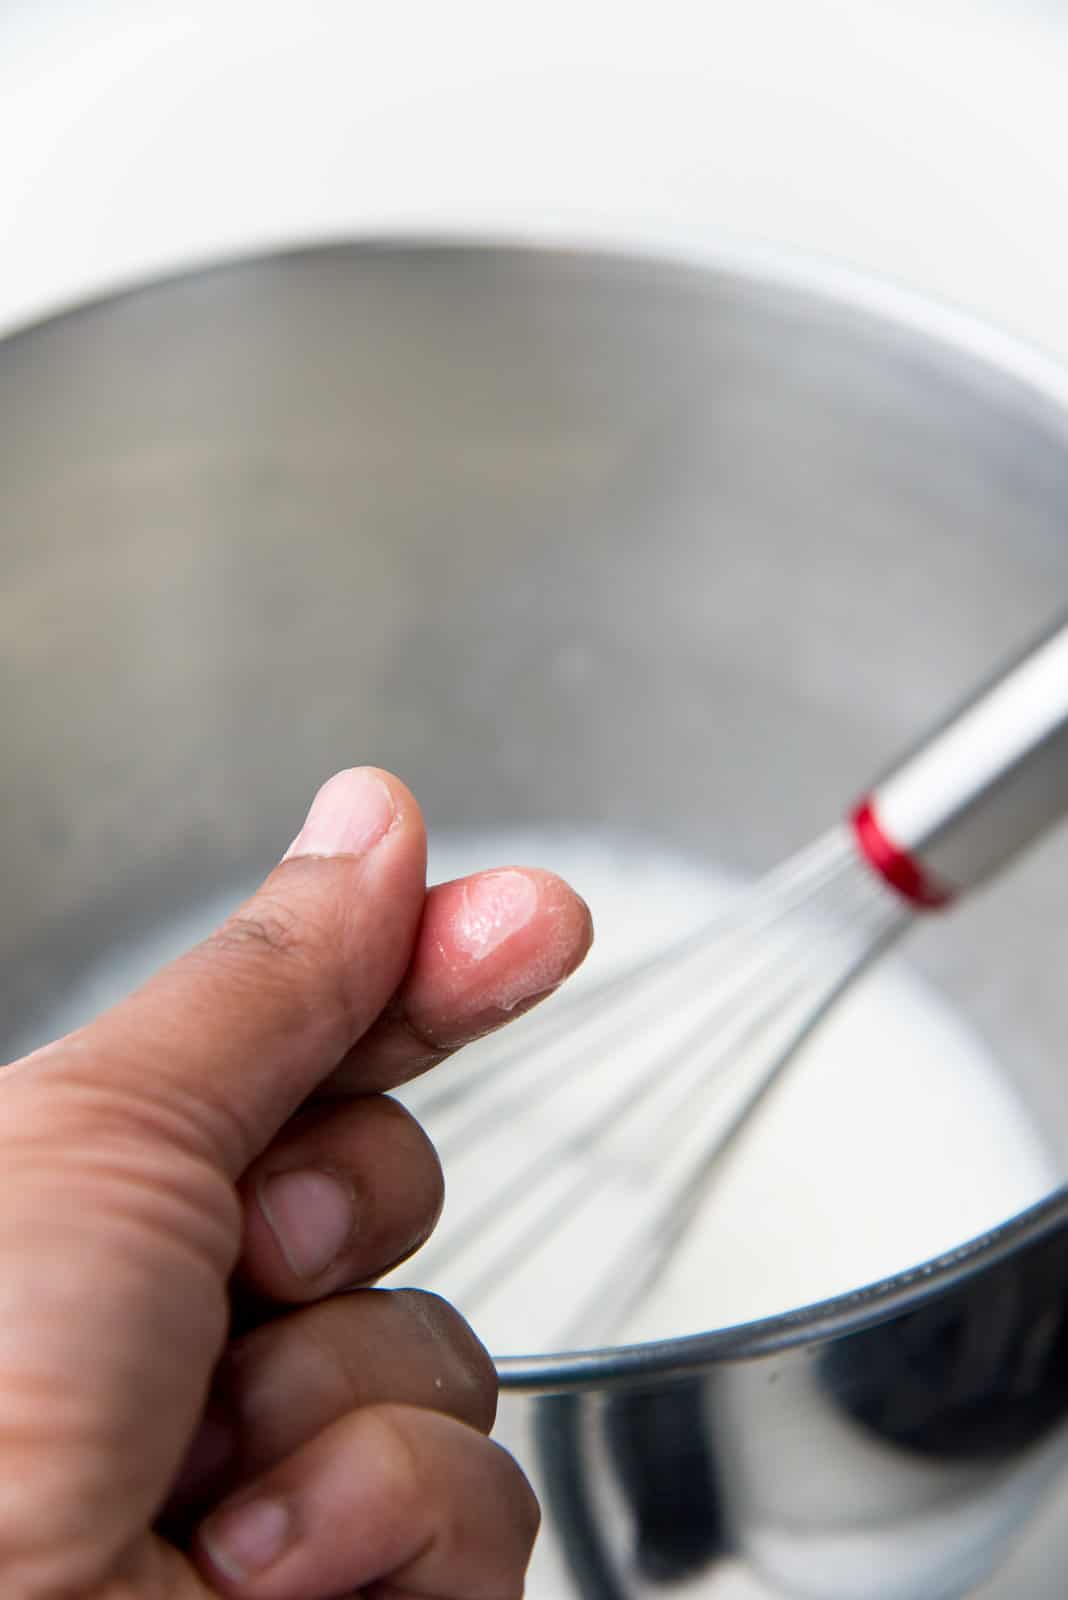
The egg whites and sugar need to be cooked over simmering water until all the sugar dissolves AND the egg whites are cooked until pasteurized. This takes me about 10 minutes with 8 egg whites + 500 g sugar with my kitchen aid artisan mixer bowl over simmering water. The exact times can vary depending on the amount of egg white-sugar mix, size of bowl, and size of saucepan too. Since all the sugar needs to be dissolved completely, it’s important to make sure the sugar on the sides of the bowl are mixed in too. You can use a clean, dry spatula to scrape down the sides. You can rub some of the egg sugar syrup between your fingers to check if the sugar is dissolved, to test for doneness (the sugar will be completely dissolved at around 160°F). This can happen in about 3 – 5 minutes. Once all the sugar is dissolved, I continue to cook the syrup for an extra 3 – 5 minutes, to make sure it’s completely pasteurized. However, I prefer a more reliable method to make sure the sugar and egg white mix are cooked thoroughly. That is to use an instant read thermometer. It’s easy, and simple to use and always accurate. While heating the egg white mixture to above 165 °F is largely sufficient, I heat mine to between 166 – 175° F. I started doing this is after reading the article on Swiss meringue from Serious Eats, where Stella heats the egg white sugar meringue up to 175°F for a more stable meringue.
Information – How to check if all the sugar has dissolved in egg white
Make sure all the sugar is dissolved in the egg white. There will be sugar granules along the side of the bowl, so rotate the bowl as you stir the egg whites to catch and dissolve all of those sugar crystals.
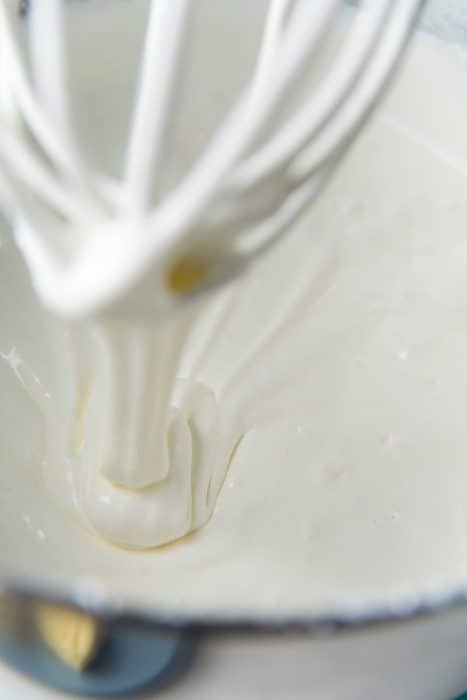
Whisking egg white-sugar mix into a meringue
After the sugar and egg mix has been heated, I like to whisk it by hand, for a few minutes. This is to,
Start the cooling process BEFORE making the meringue with the stand mixer. Since you’d be running your mixer for a while to cool it down (and make the meringue), I like to whisk the mixture BEFORE to give it a head start. Dissolve any remaining sugar crystals stuck to the side of the bowl. Since the syrup is really hot, I rotate and tilt the mixing bowl slightly to dissolve any remaining sugar crystals on the side.
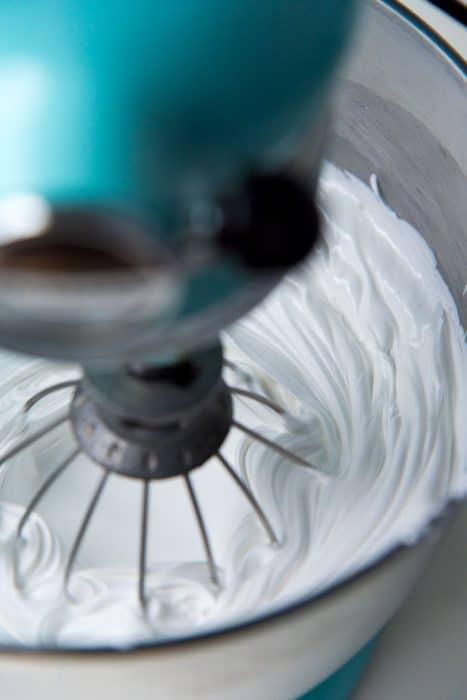
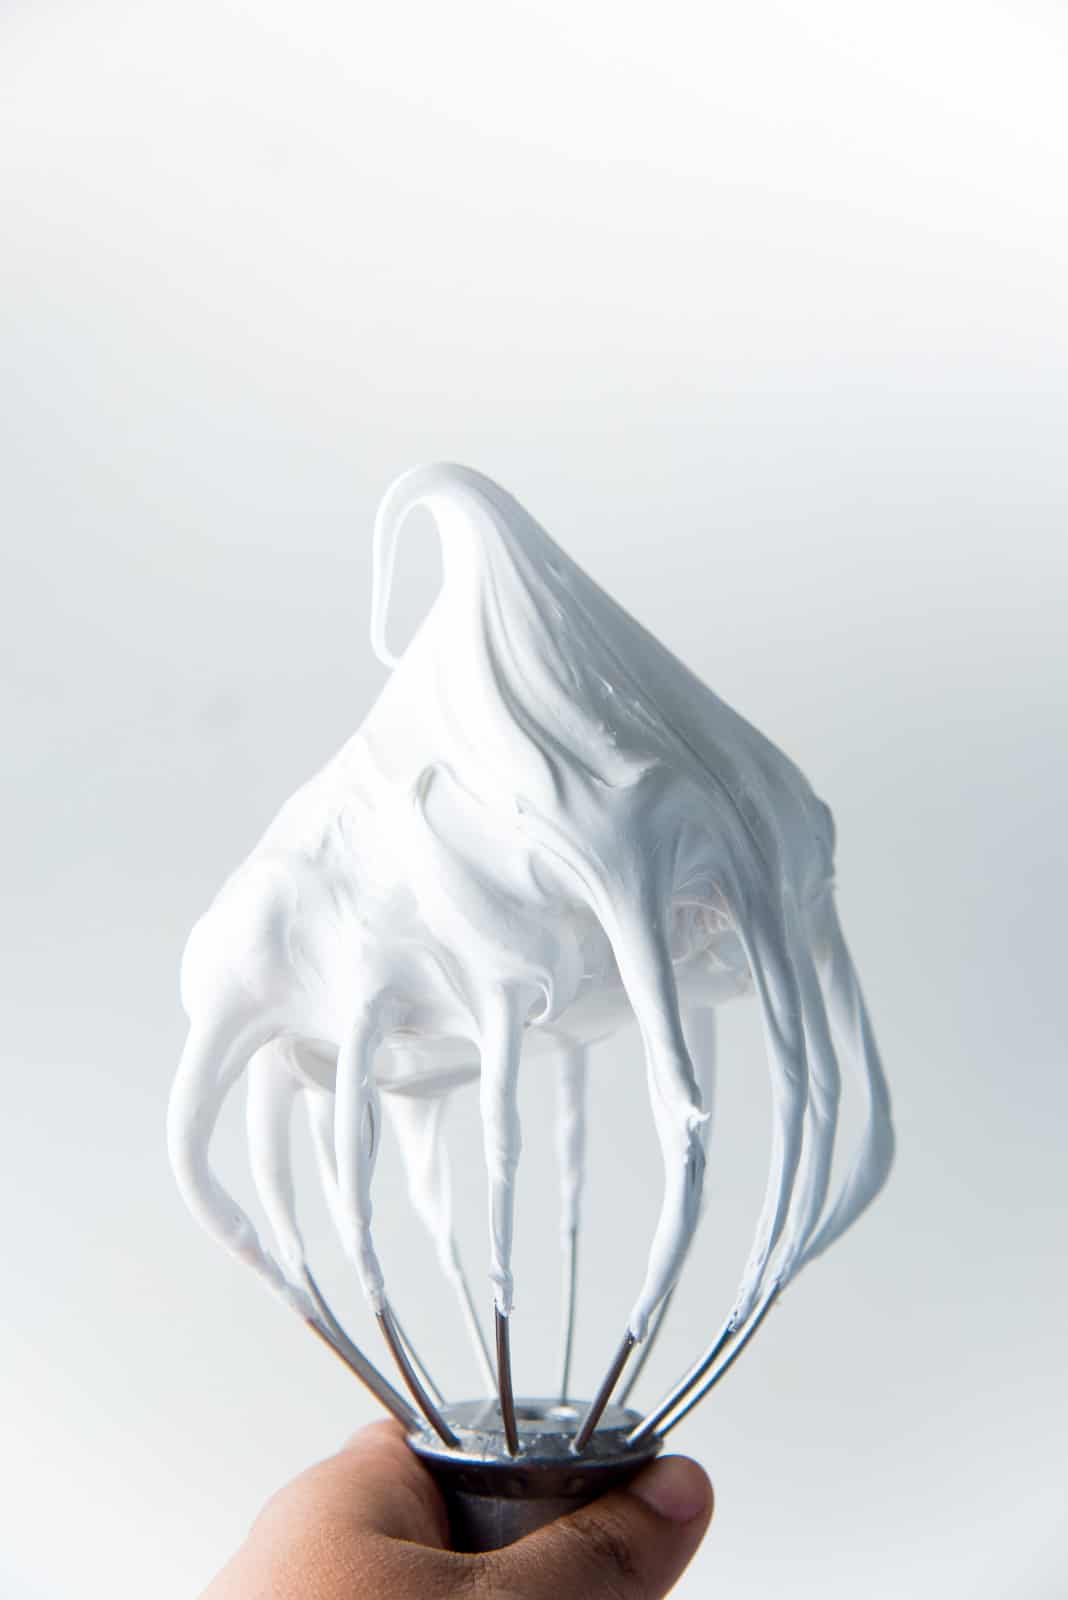
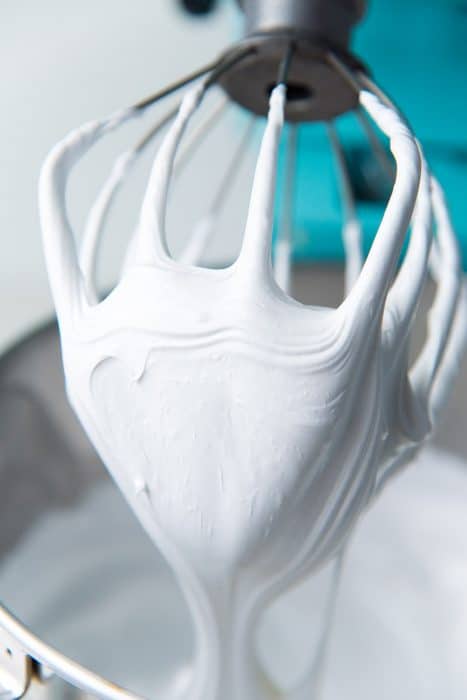
Next, you can place the mixer bowl in your stand mixer with the whisk attachment, and whisk the egg whites. Mix it on high speed, and watch the egg whites become foamy and then finally end up as a pillowy, marshmallow-like, glossy meringue. You need to whisk the meringue until you reach the stiff peak stage. Add the salt during this process too because the salt will easily dissolve in the heat.
Information – How to tell when meringue is at stiff peaks
When the meringue has reached stiff peaks, you may need to keep whisking the meringue UNTIL IT COOLS DOWN. The bowl should feel cool to the touch, or about 90°F (ideally about 80°F). This can take between 10 – 20 minutes (which why I whisk it a little by hand at first).
Adding the butter
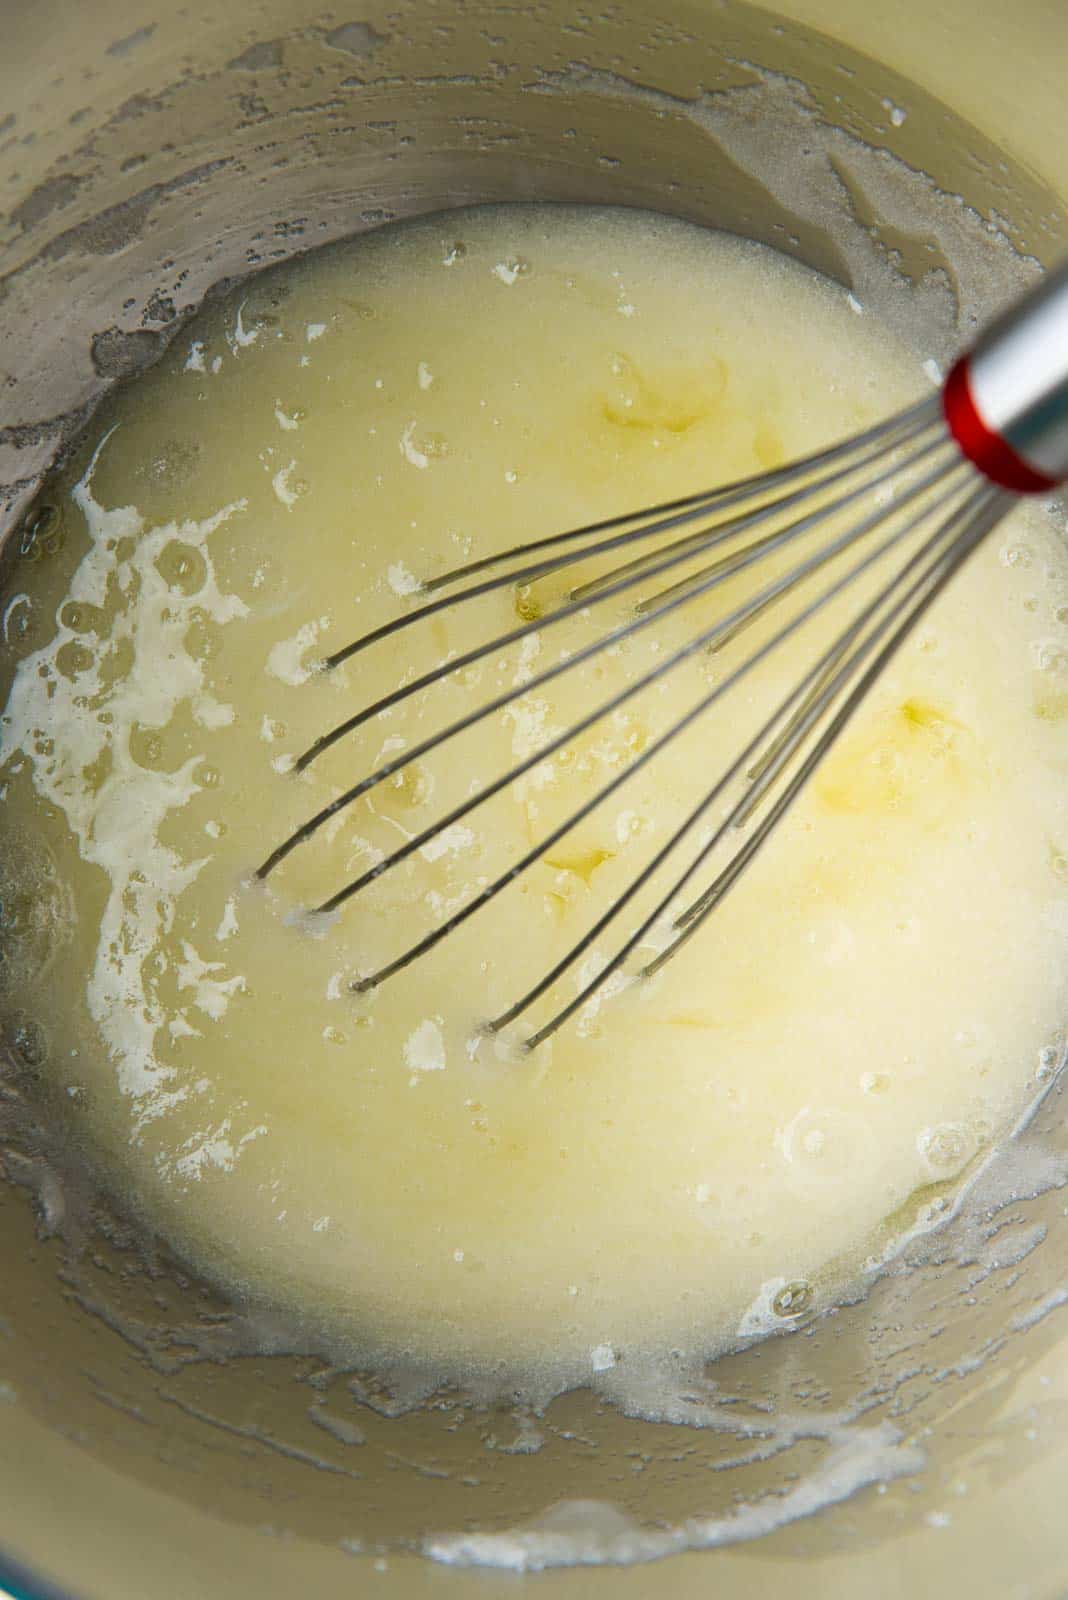
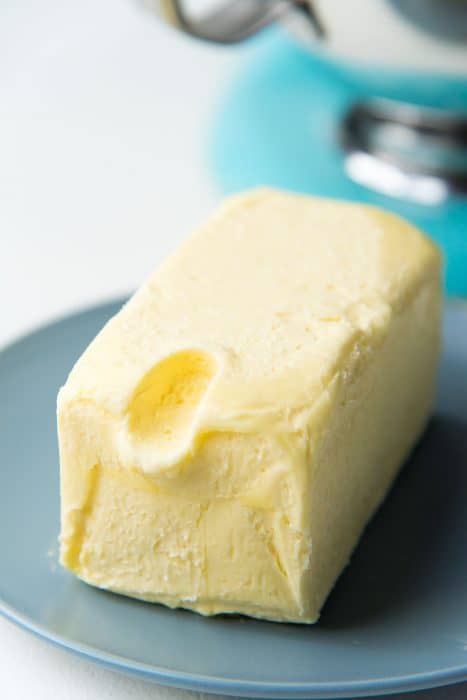
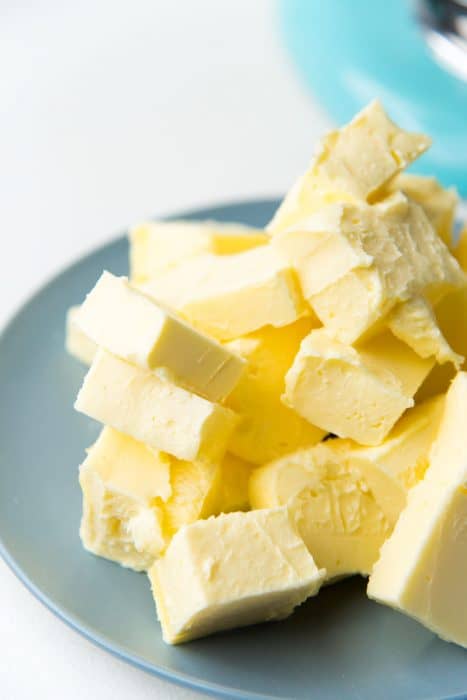
Use unsalted butter for this recipe. Make sure your butter is cool but still soft. Ideally, you want the butter to be at around 60°F, so that it cools down the meringue while being added. At 60°F, you should be able to press and leave a smooth indentation in the butter with your finger, with just the tiniest bit of resistance. While the meringue is cooling down, prep the butter by cutting it into tablespoon-sized “pats”. Doesn’t have to be precise. You will be adding 1 – 2 tablespoons at a time into the meringue. If you add the butter when the meringue is too hot, you might end up with soupy buttercream. When the meringue has cooled down sufficiently, start adding the butter, 1 – 2 tbsp at a time. Keep whisking the egg white mixture while you add the butter. I like to use the whisk attachment instead of the paddle attachment for this part of the recipe. Some recipes call for the paddle attachment, but I find that the whisk attachment does a better job of mixing in the butter. I then use the paddle attachment at the end to make the frosting smoother. However, if you prefer to use a paddle attachment you can do that too. There is a slight increase in yield when using a whisk attachment, but not enough to be regarded a considerable difference. While adding the butter, make sure to scrape the bottom of the bowl as you go. This is to make sure the meringue and butter are being mixed well. If your meringue base was over 80°F / 26.6°C, then take your time adding the butter, allowing it to cool down in between additions. I add all the butter within 6 – 10 minutes, while whisking in between, allowing the buttercream base to cool down significantly.
Stages of the Swiss meringue buttercream
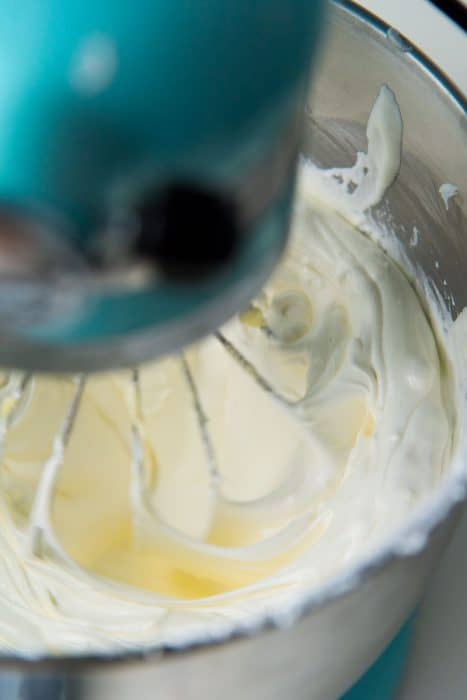
Soupy buttercream
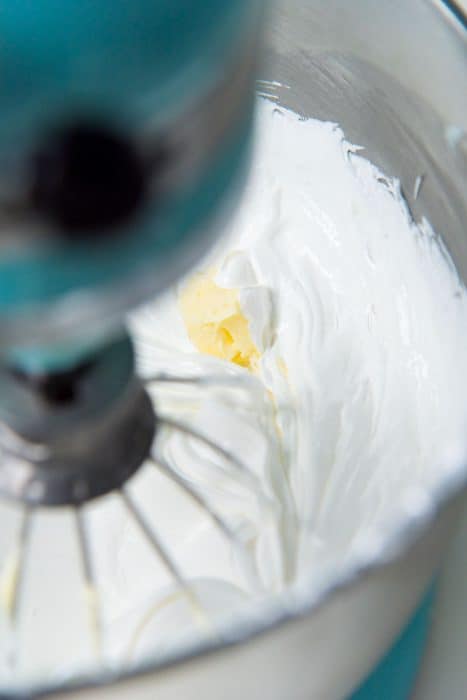
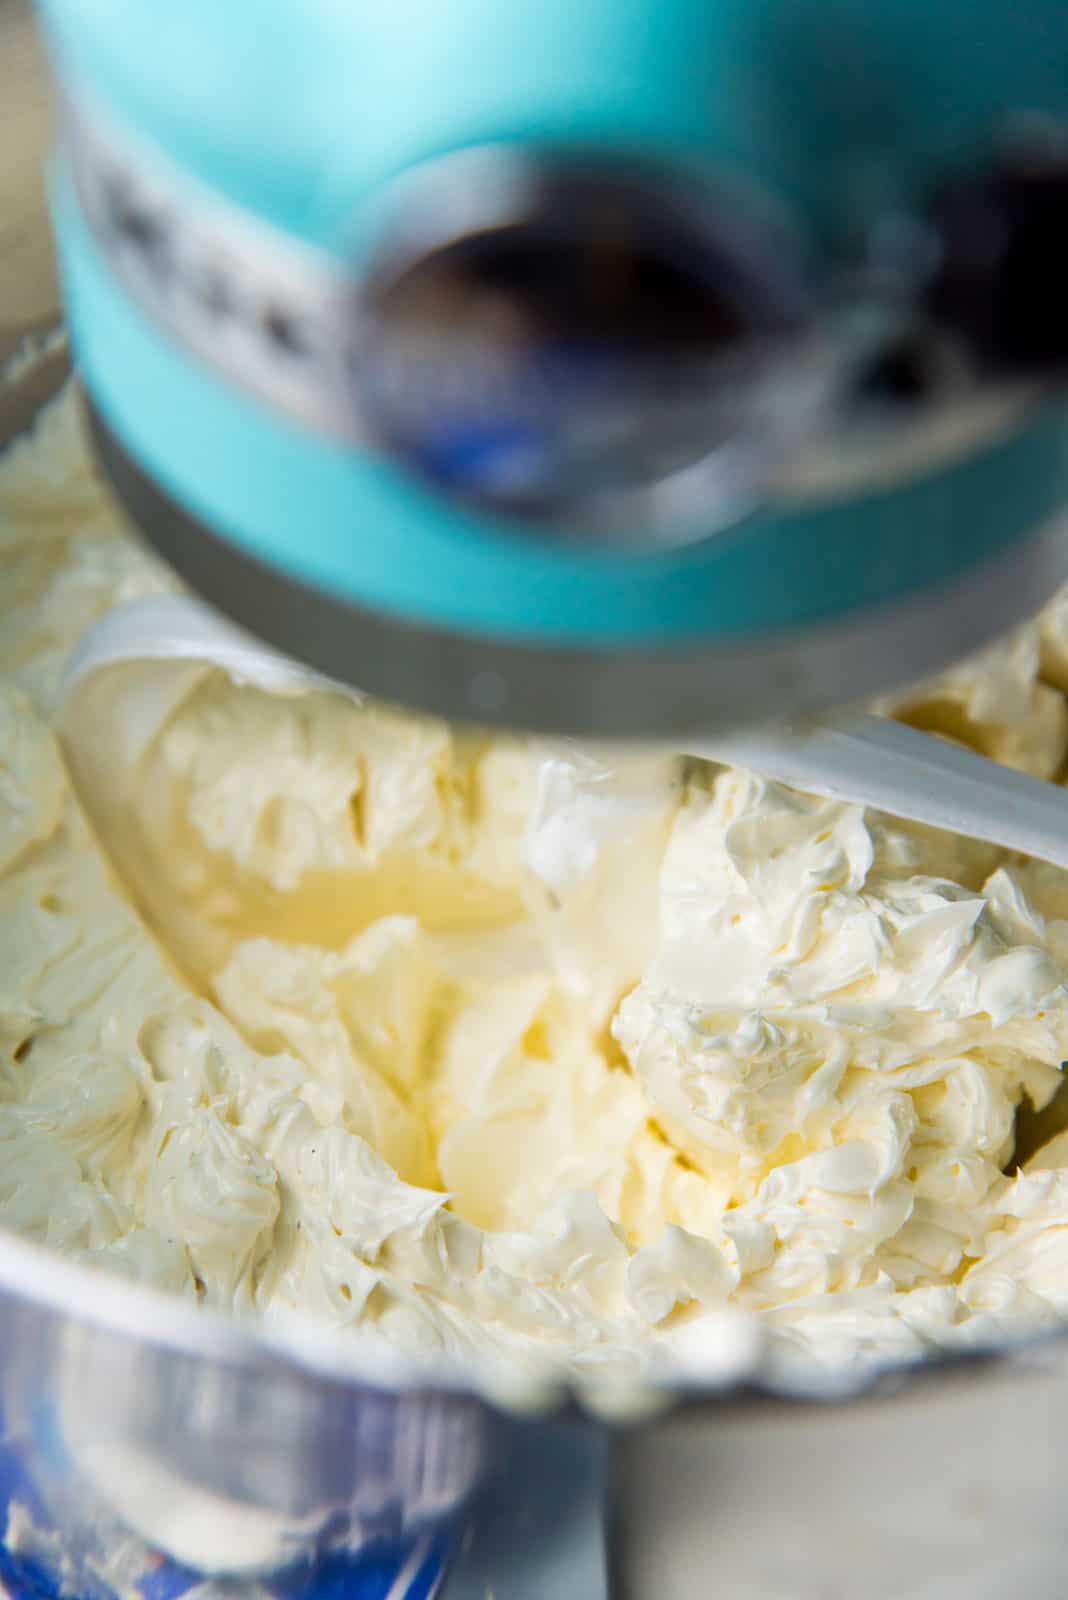
Once you start adding butter, the meringue base will deflate a lot. That is OK! It’s supposed to happen. Also the meringue will lose the stiff peaks, and become runny or soupy. This is supposed to happen too. Once all the butter is added, and it’s cooled down, the egg and butter mixture will whip back up again. This happens because the meringue base is still warm and dissolves the butter rapidly in the mixture, resulting in a very liquid base.
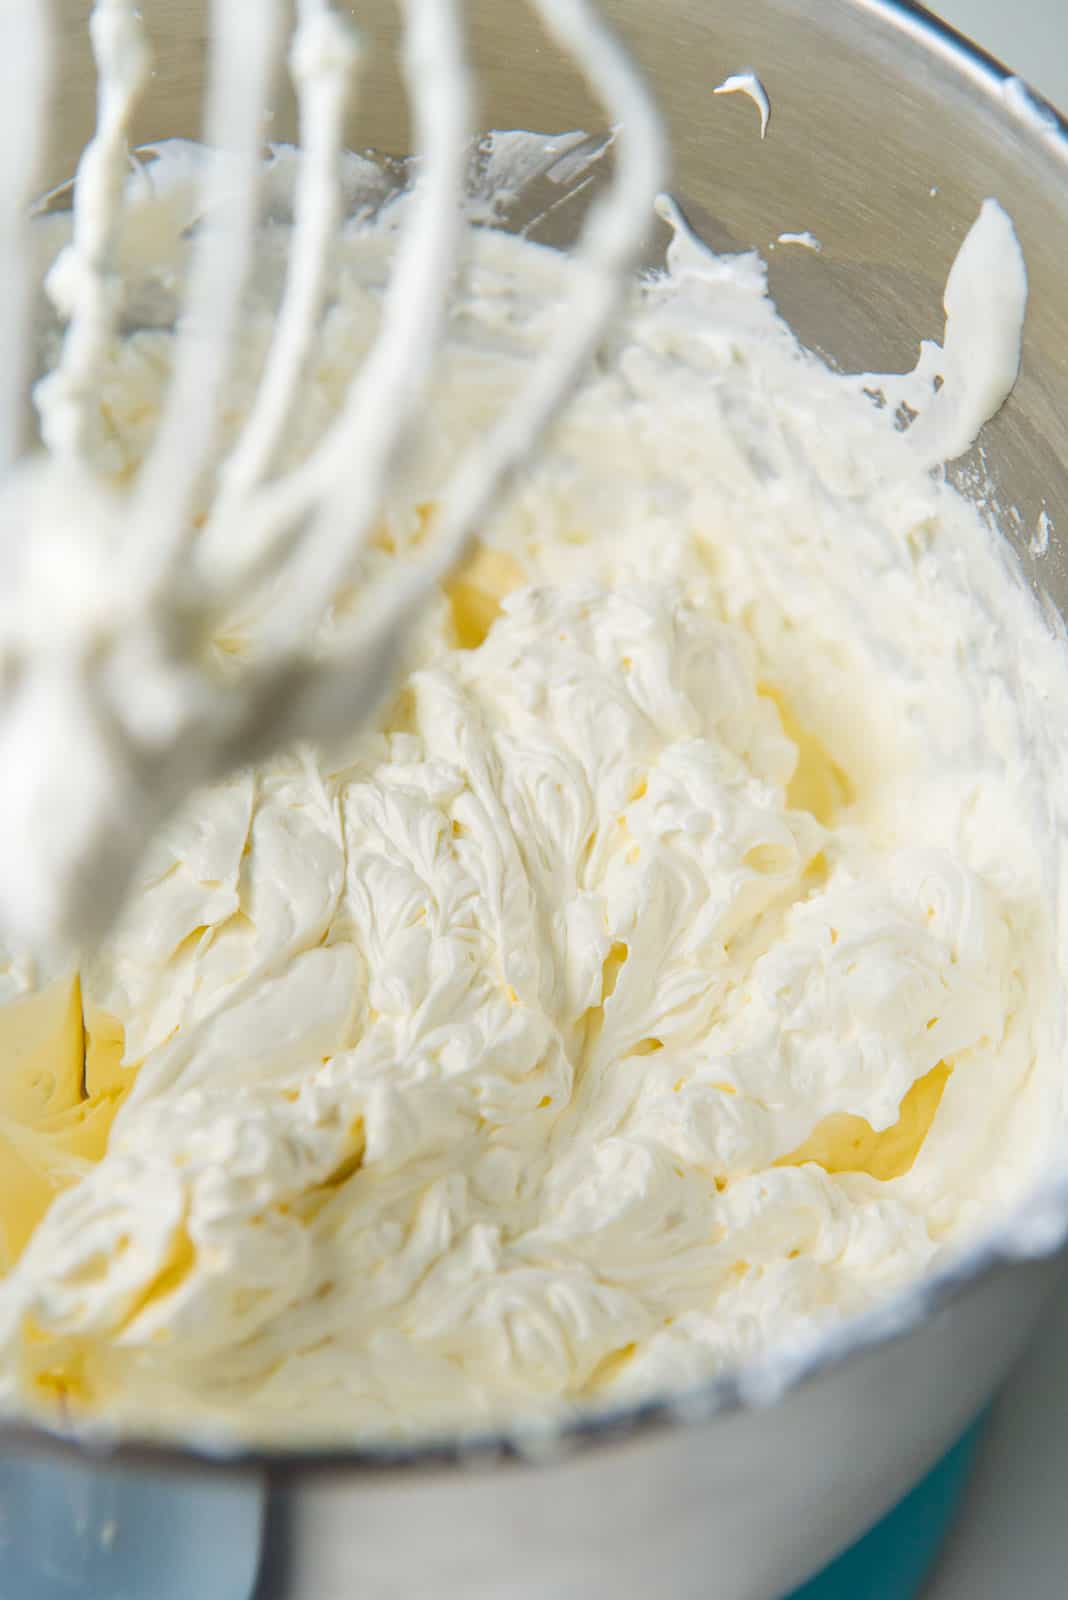
Curdled buttercream
Sometimes the buttercream may look curdled (looks like cottage cheese), once you’ve added most of the butter. IF your buttercream looks curdled, DON’T worry. Just keep whipping it and add the remaining butter slowly and the buttercream will become smooth again. This happens because the meringue has cooled down significantly (more than before), and the butter fat curdles in the warm egg syrup. The act of whisking further will break down and warm the butter and emulsify it into a smooth buttercream.
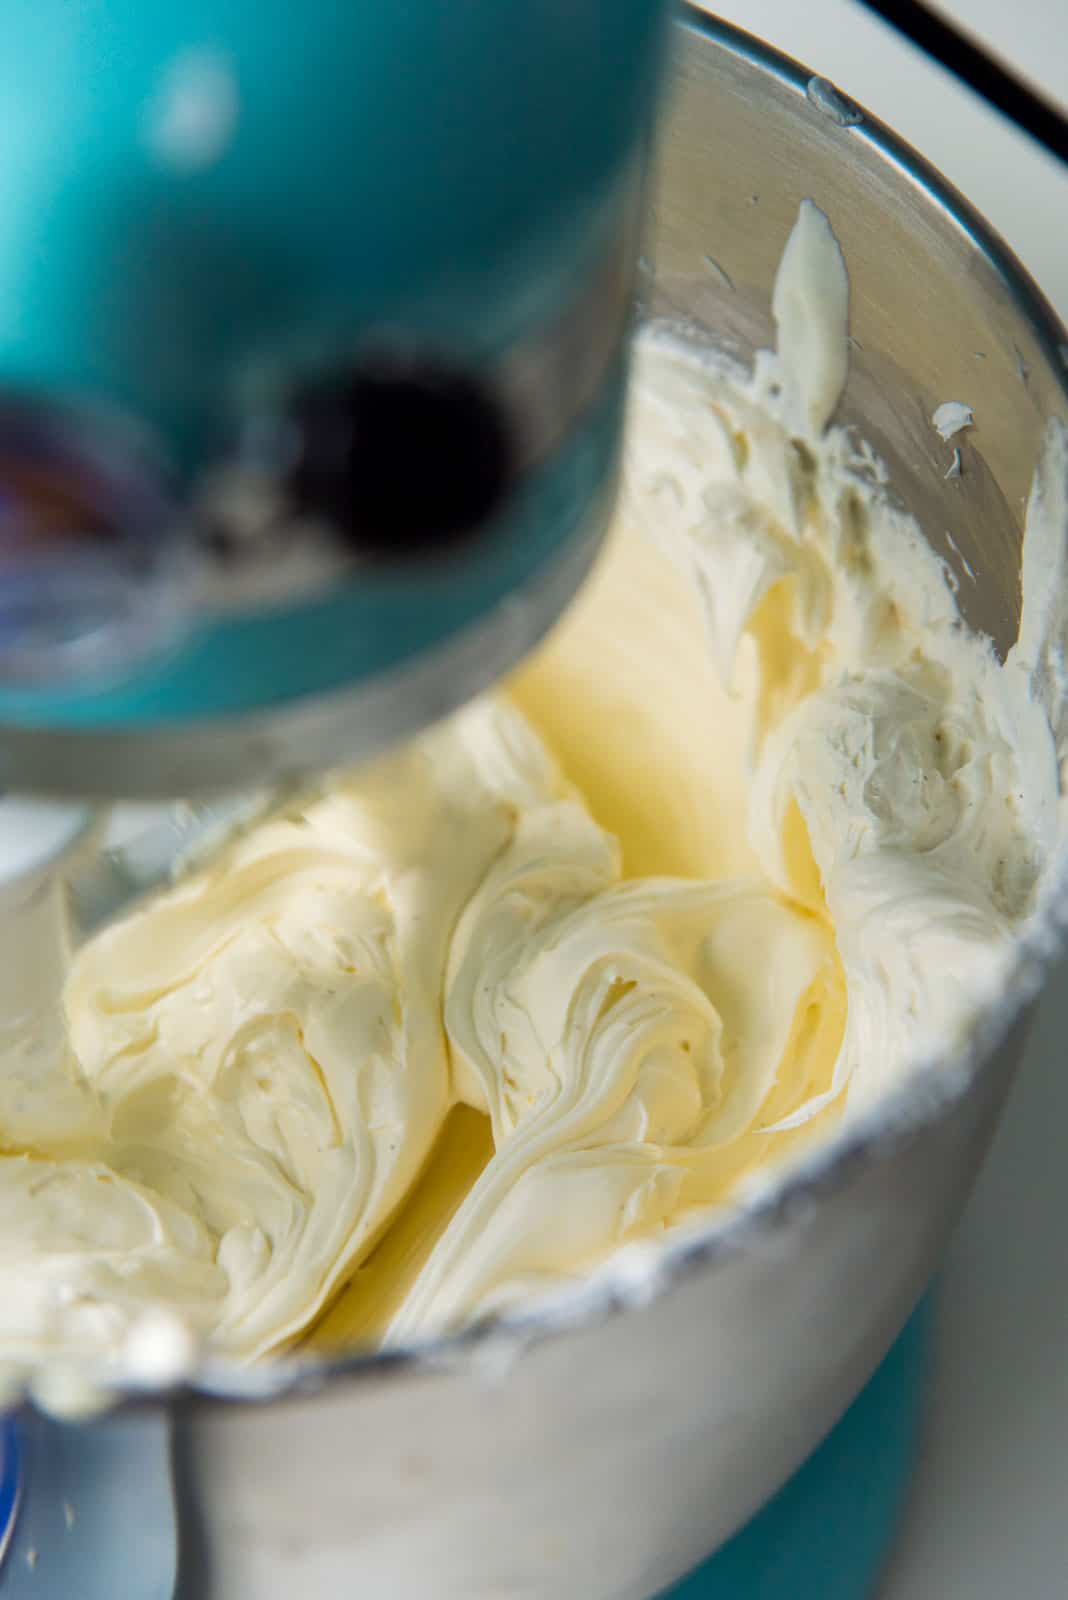
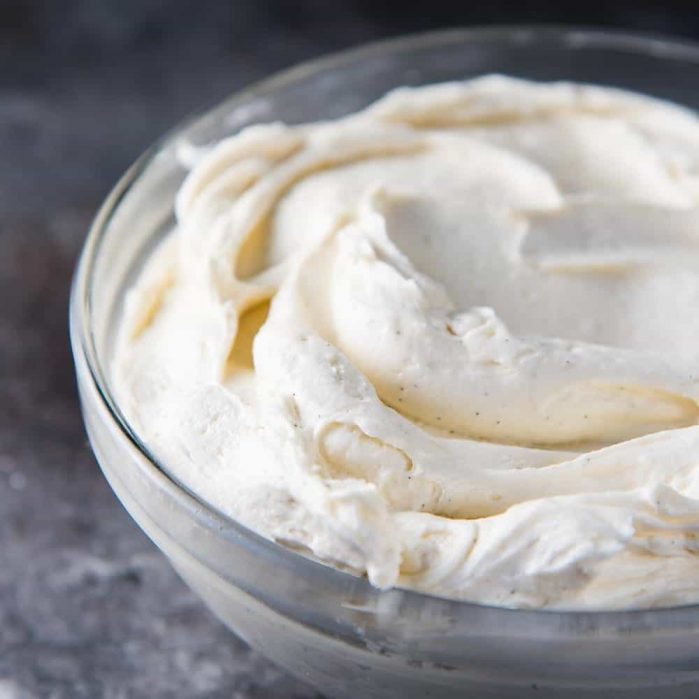
Smooth buttercream
You can add vanilla (or other) flavorings along with the last of the butter. Once you’ve added the butter, whisk it for a few more minutes until the butter completely incorporates, and the flavorings have mixed through as well. Scrape the bottom of the bowl once more, to make sure everything is being mixed through. The buttercream should be smooth and fluffy at this point. I prefer adding the vanilla extract for my base Swiss meringue buttercream recipe. But you can also add other flavorings too – like almond extract, peppermint, lemon or orange extract, coffee extract etc.
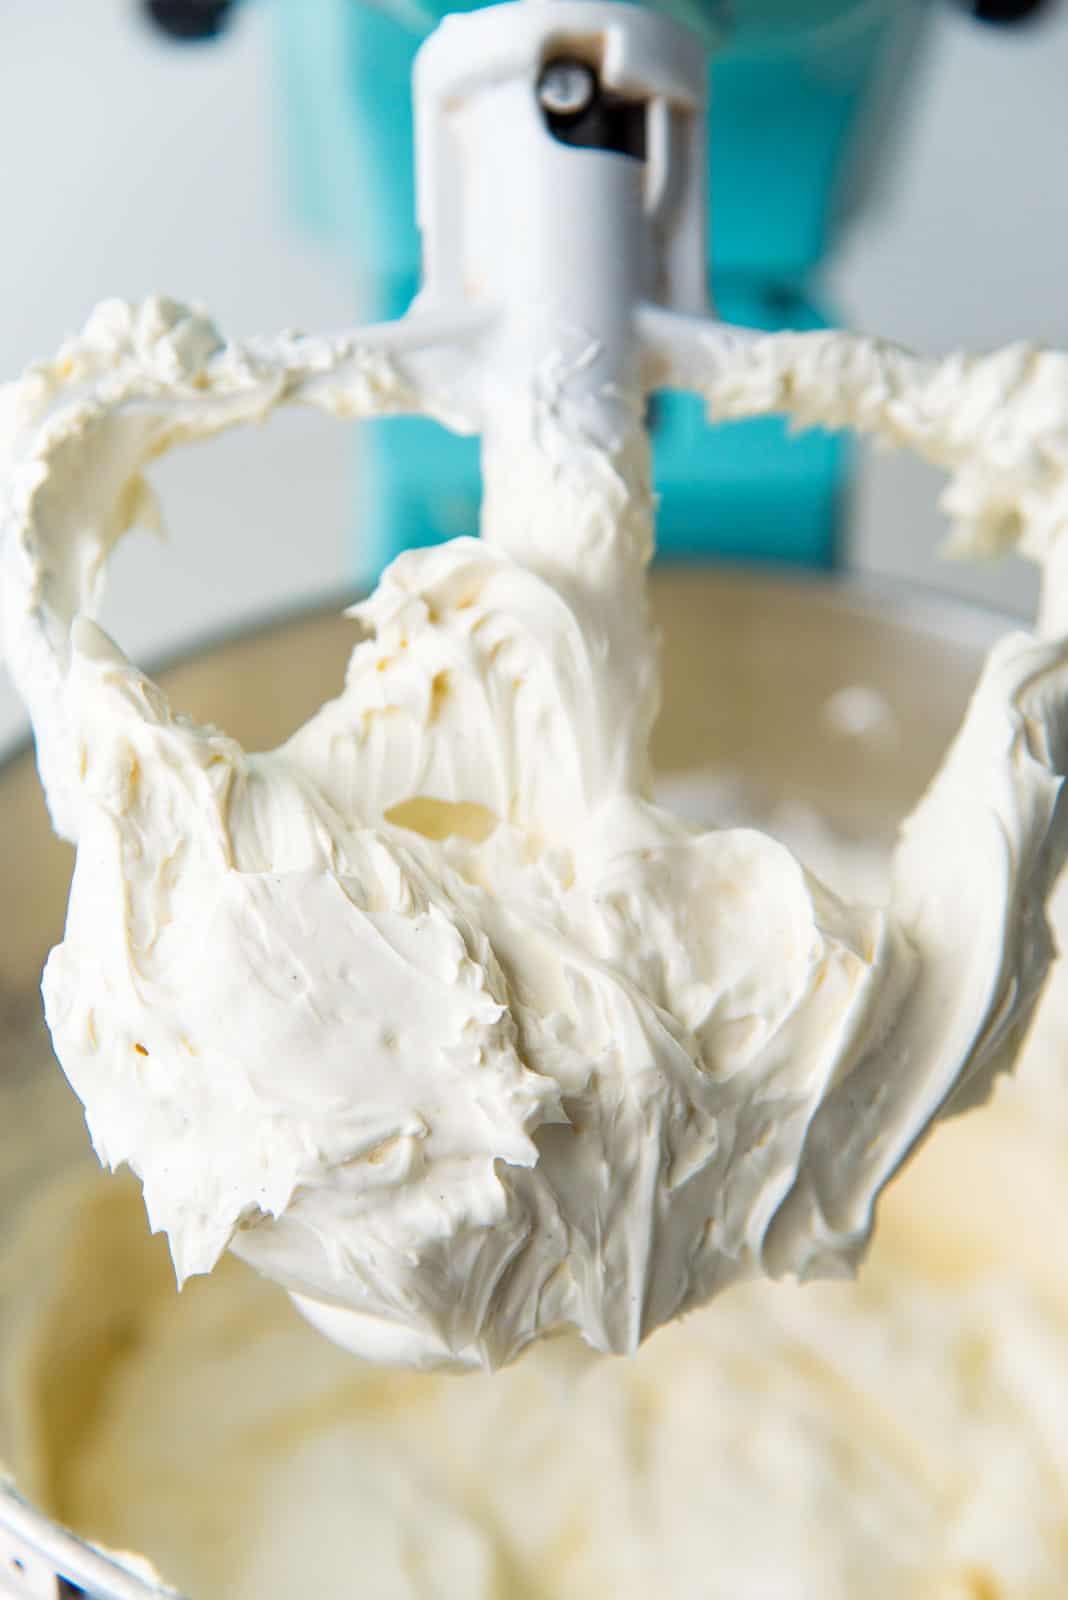
Remove excess air
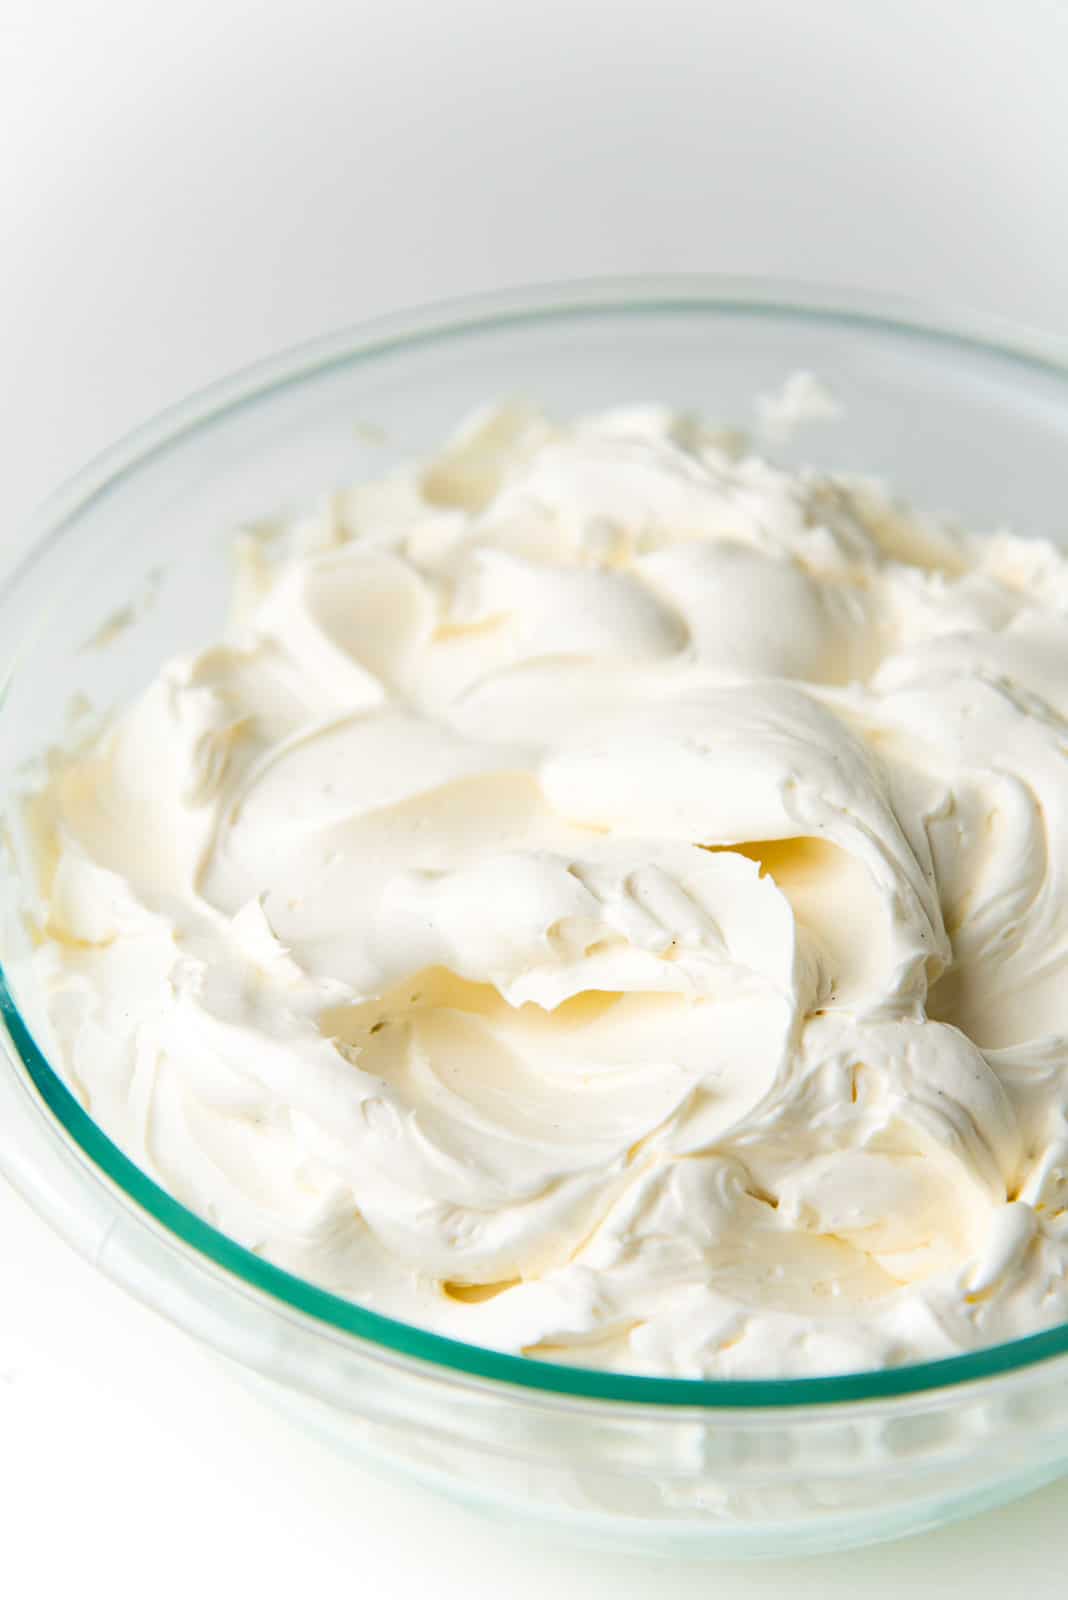
Even though the butter deflates the meringue, as the buttercream cools down and thickens, the butter is whipped, which incorporates more air. This results in a super fluffy and creamy Swiss meringue buttercream! But occasionally, there could be small air bubbles which can be a pain for when you want to have a REALLY SMOOTH frosting surface on your cakes. I use the paddle attachment and beat the SMBC for a few minutes, which will knock out some of the air bubbles in the buttercream. Continue beating until you have a smooth buttercream consistency, for about 2 minutes. You will now be able to actually see how creamy this buttercream is. Your silky, creamy and delicious Swiss meringue buttercream is now ready to be used!
Tips for perfect Swiss meringue buttercream
Bowls and utensils must be dry and clean. Fat is your enemy when making meringue. So make sure your mixing bowls, whisks, and whisk attachment are clean and dry! You can rub some lemon inside the bowl and on the utensils, and then wipe clean with paper towels, to remove any fat. This includes the egg yolks too – can’t have even a drop of egg yolk in the egg whites. Use a thermometer. If you like baking (or cooking!), do invest in an instant read thermometer. Being able to check the temperatures of the ingredients in this recipe will make it that much easier to get PERFECT results AND to fix anything that goes wrong. Be careful when heating the egg whites. Keep the egg whites moving to prevent the egg whites from scrambling. Also make sure that it won’t be mixed with any kind of fat before it’s whipped into a meringue. Whisk the meringue until it cools down significantly. You do have to whisk the meringue until it’s at least doubled in size. But after it reaches the stiff peaks stage, you will have to keep whisking the meringue until it has cooled down significantly, so that the bowl is no longer hot to the touch. This is absolutely crucial. If you add the butter while it’s too warm, you won’t get the consistency you like in the final buttercream. So make sure the meringue is at about 85 – 95°F. The butter should be softened, but slightly cooler than room temperature. The butter should be at around 68°F. The final temperature of the Swiss meringue buttercream should be around 70 – 72°F. If you’re butter is slightly cooler than this, it will help cool down the warm egg meringue base that you’re adding the butter to. Cut the butter into cubes. Doesn’t have to be precise, but portioning the butter into 1 tbsp pieces will make it easier for it to be incorporated into the buttercream. Don’t forget the salt. Don’t fear salt in sweet recipes. It balances the sweetness in the frosting and brings out the butter flavor too.
Commonly asked questions on troubleshooting
How to store Swiss meringue buttercream
You can store the buttercream at room temp. for up to 1 – 2 days. It will keep in the fridge for 7 – 10 days, in an air-tight container. And it will keep for months if frozen in an air-tight container. Just make sure to thaw it out at room temp. and re-whip the buttercream before use.
How to add flavor and color to this buttercream
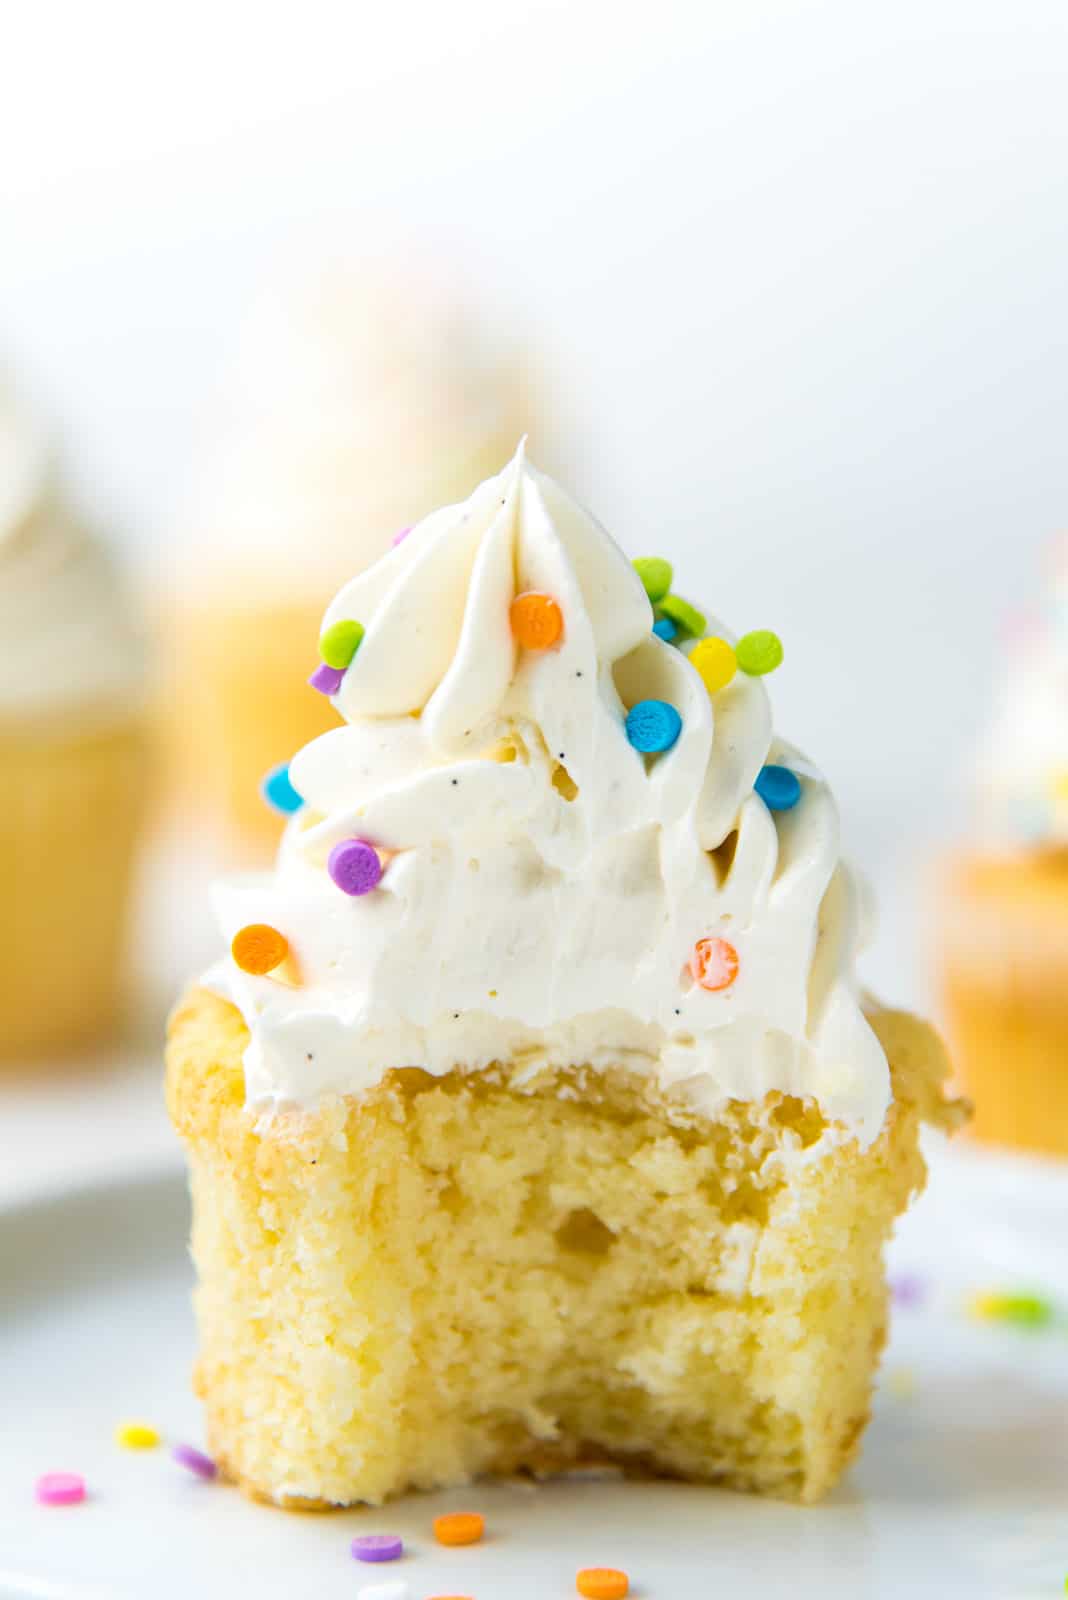
Vanilla Swiss meringue buttercream is my base flavor. I add a good tablespoon of vanilla extract to my frosting. You can also add the caviar from a vanilla bean, or vanilla bean paste instead too. This will also give the buttercream the beautiful black vanilla flecks. I usually add this while I’m adding the butter to the buttercream. Lemon Swiss meringue buttercream. Add some lemon rind, or lemon extract along with the vanilla. You can add about 3 – 4 tbsp of lemon juice too, but I prefer lemon rind or extract. See my white coconut cake with lemon swiss meringue buttercream. Chocolate Swiss meringue buttercream. Reduce the butter by 8 oz and add about 10 oz of melted chocolate instead. Remember to cool down the melted chocolate before you add it. You could even add white chocolate to this recipe. Here’s my chocolate swiss meringue buttercream recipe. Raspberry Swiss meringue buttercream. This goes for most berry flavored Swiss meringue buttercreams. Add about 1/3 cup of pureed raspberry into the buttercream. To concentrate the flavor, I like to cook the raspberries for a few minutes to thicken the puree and then cool it down completely before adding it. I also really like adding freeze dried raspberry powder.
Coloring Swiss meringue buttercream
Swiss meringue buttercream can be colored, but you have to use gel coloring or powder coloring. Since SMBC is a largely fat-based buttercream, water-based food coloring may not create a smooth color. But gel based food coloring will disperse in the buttercream much better and produce a deeper and vibrant color without affecting the consistency.
How to use Swiss meringue buttercream
Use this buttercream recipe is perfect for,
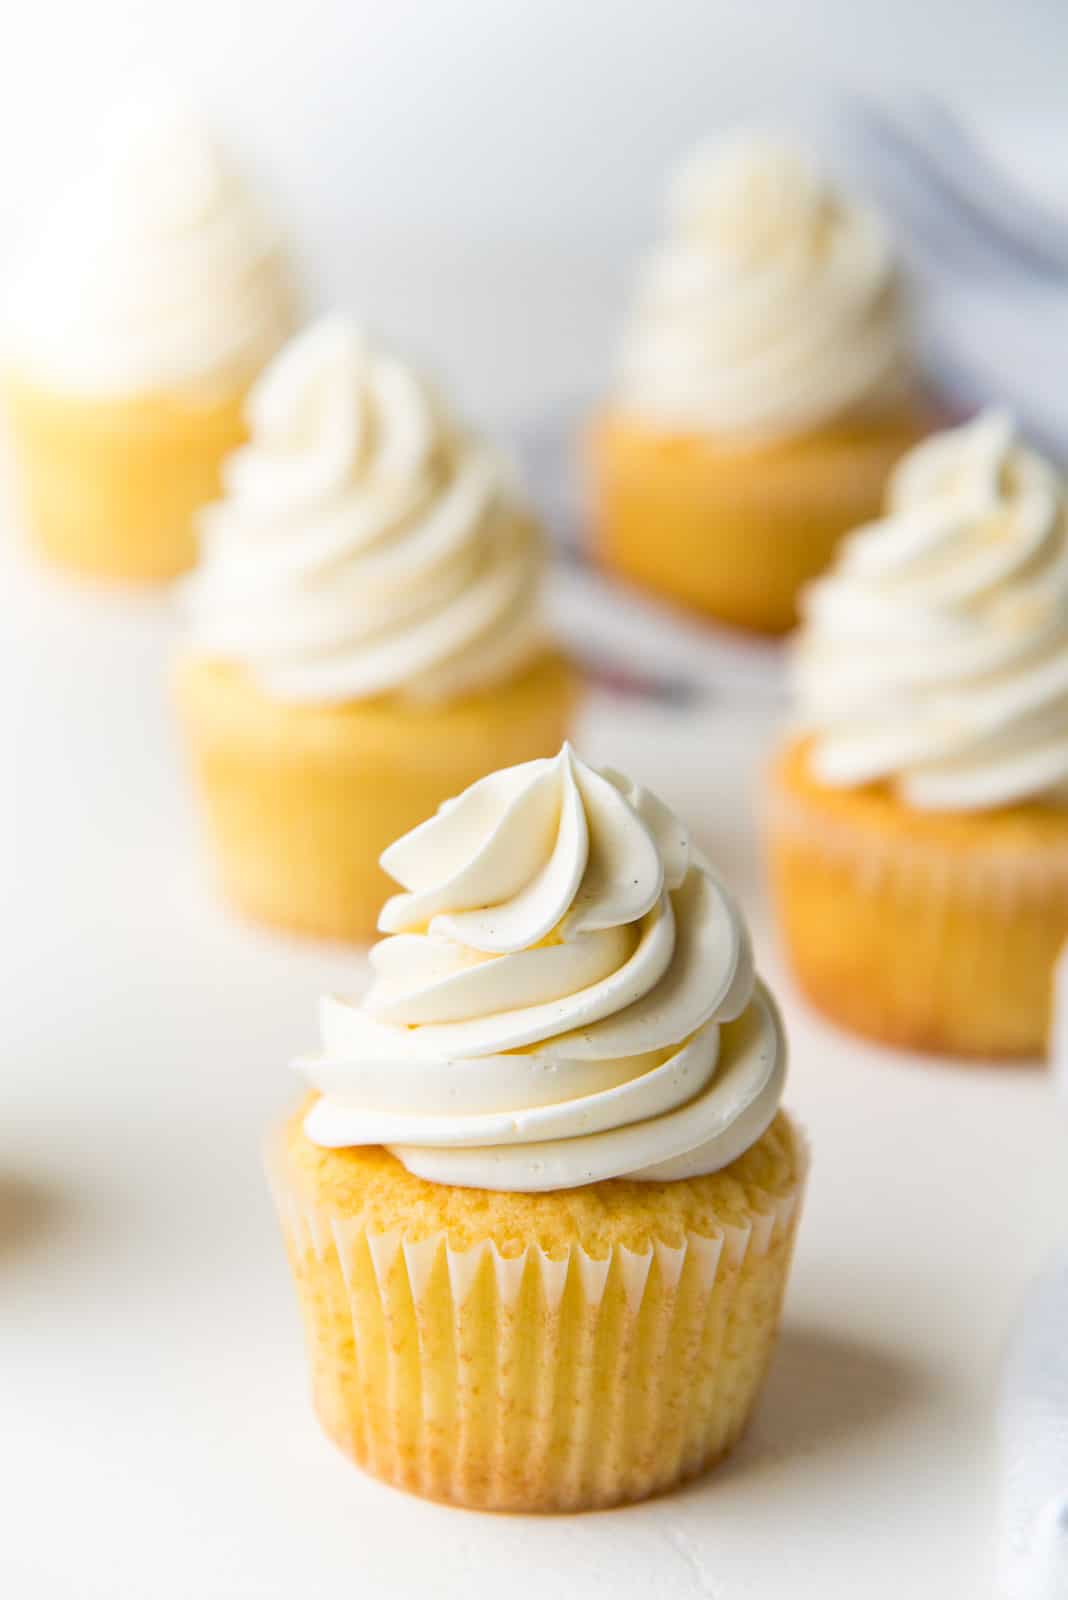
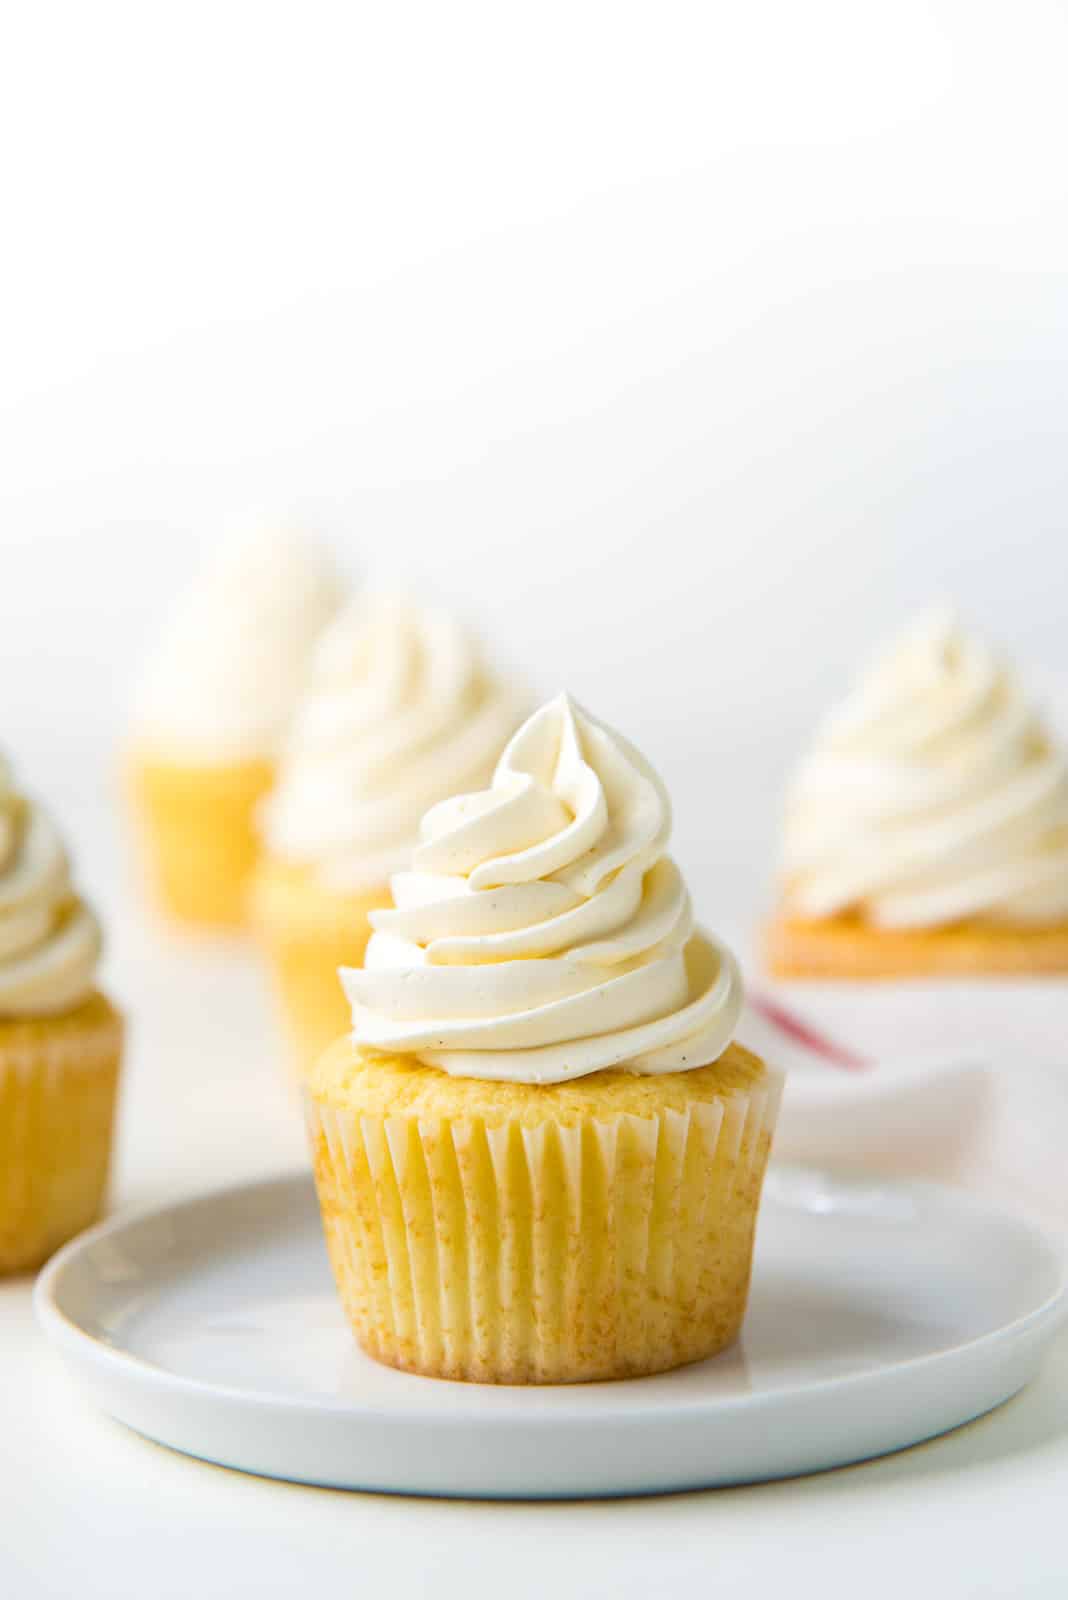
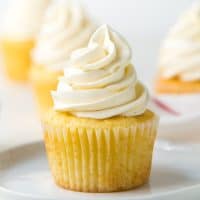
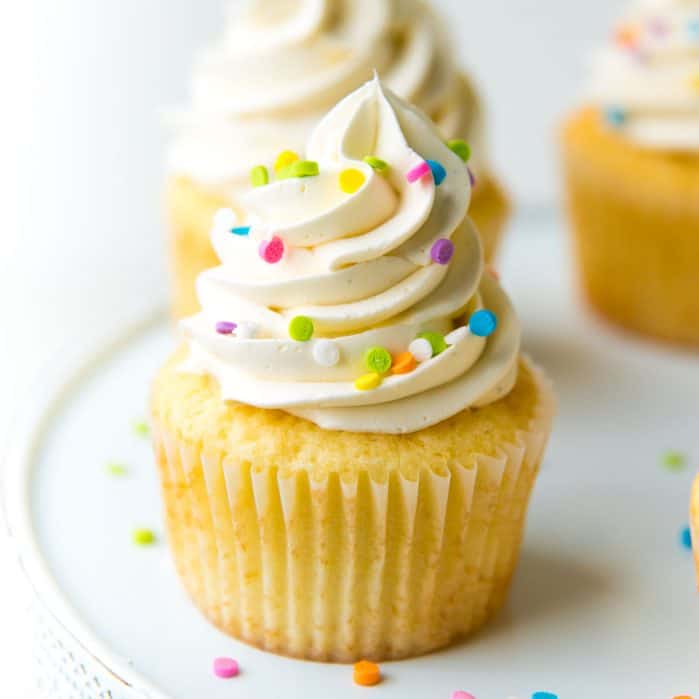
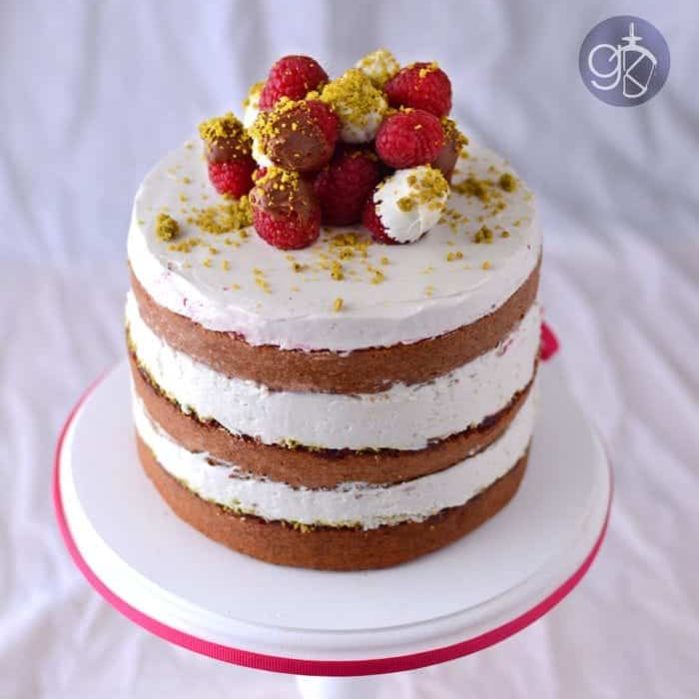
Frosting your cupcakes. Place the frosting in a piping bag with an open or closed star piping tip. Then pipe swirls on your cupcakes, like these perfect vanilla cupcakes or these gingerbread cupcakes. Filling and frosting for your cakes. This buttercream is perfect as a creamy filling for your layer cake. It’s also perfect to frost the cake, and to get those smooth finishes. Piping decorations. This is a great, stable buttercream and can be used to pipe flowers and other buttercream decorations too. Macaron fillings. This is sweet and creamy and perfect to use as a macaron filling too. I love this buttercream for wedding cakes too. It’s such a stable buttercream to use for cakes that are at room temperature.
Follow this swiss meringue buttercream recipe for perfect results everytime! All the tips shared here will help you perfect this delicious buttercream 🙂