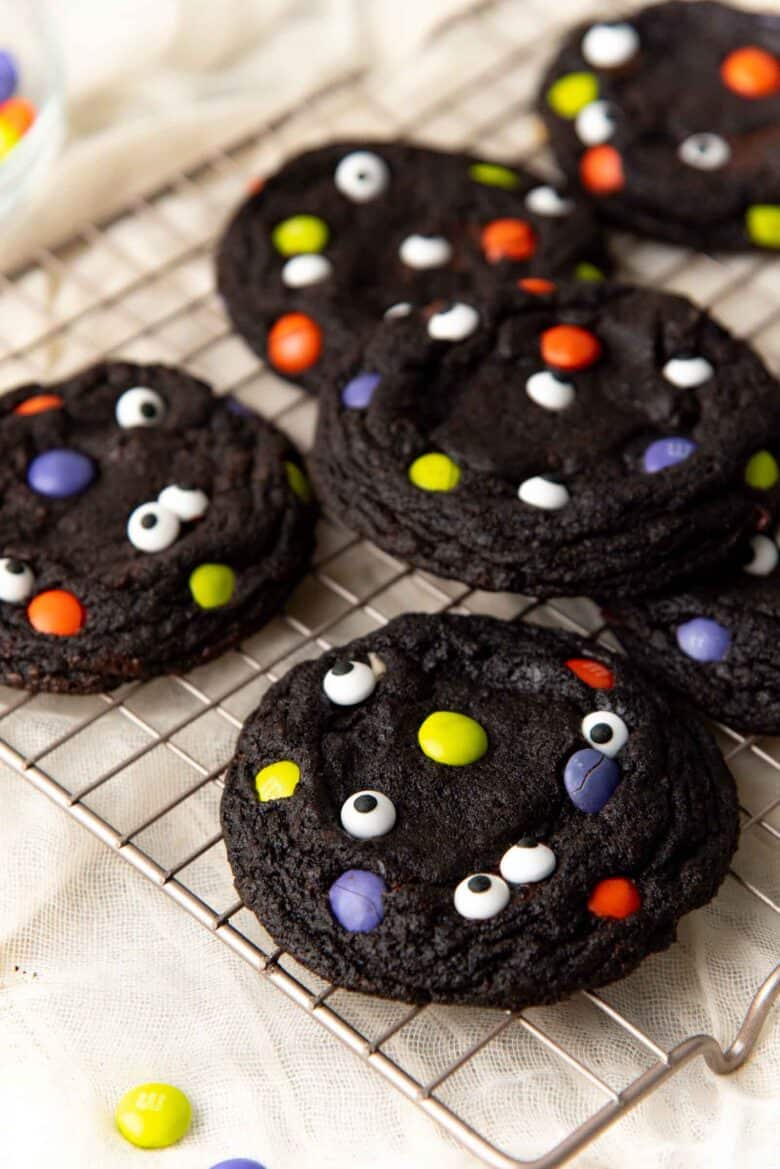
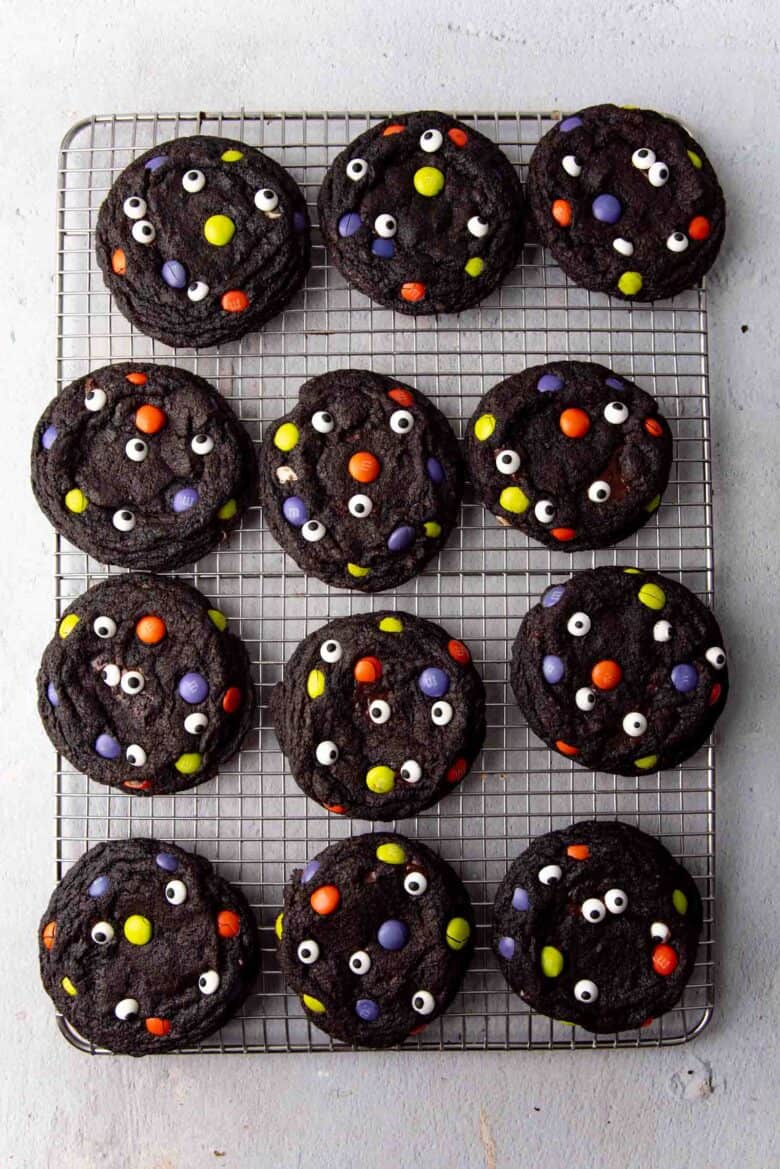
Chewy and slightly soft chocolate chip cookies, transformed into spooky, black Halloween Monster Cookies. Wickedly delicious and perfect for Halloween celebrations!
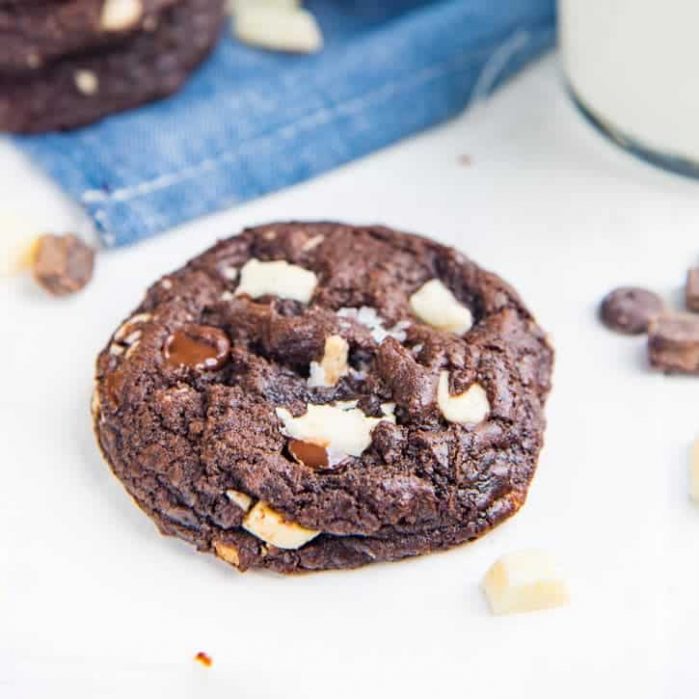
My double chocolate chip cookies are always a hit! A HUGE crowd favorite. Every time I make them for friends, family or an event, they are devoured in no time at all. The deep chocolate flavor, along with the melted chocolate chips in the cookies made me realize just how perfect these cookies would be for any Halloween party or trick or treating. But they needed a little makeover first… The makeover included,
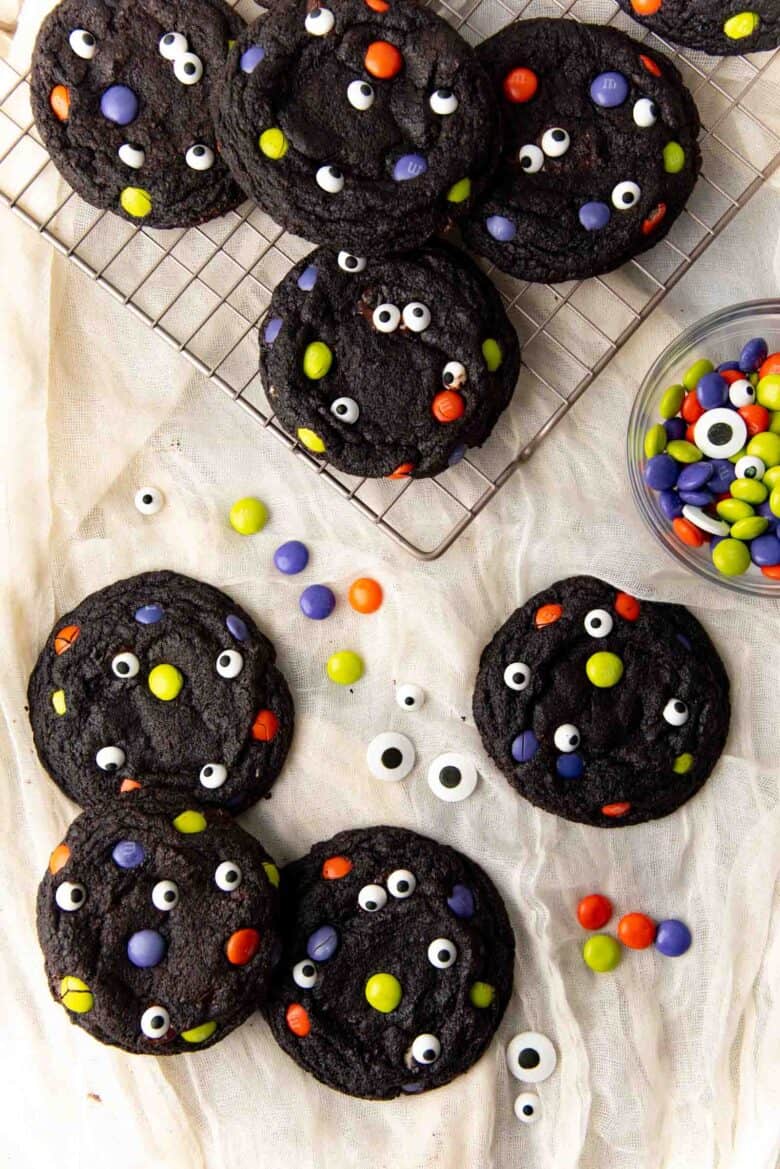
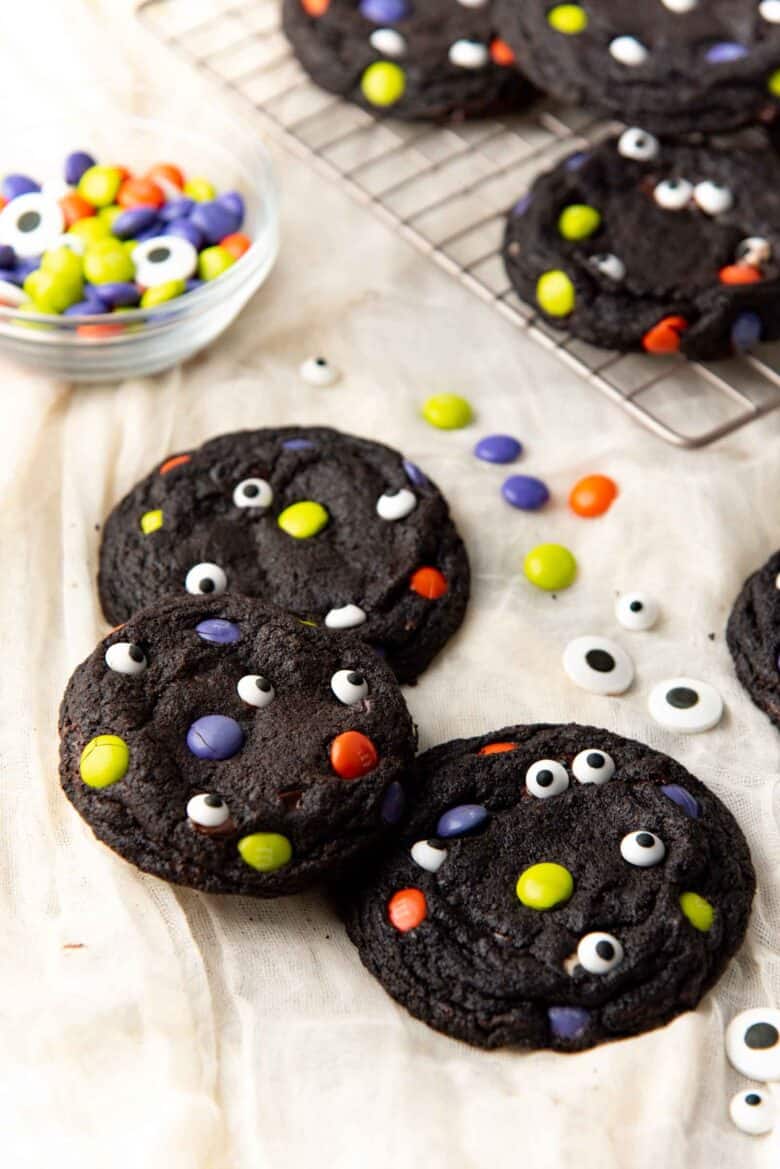
Substituting some of the cocoa powder with black cocoa powder Using Halloween themed chocolates in the cookies (Ghoul M&Ms and candy eyes)
What you can expect from these Halloween monster cookies
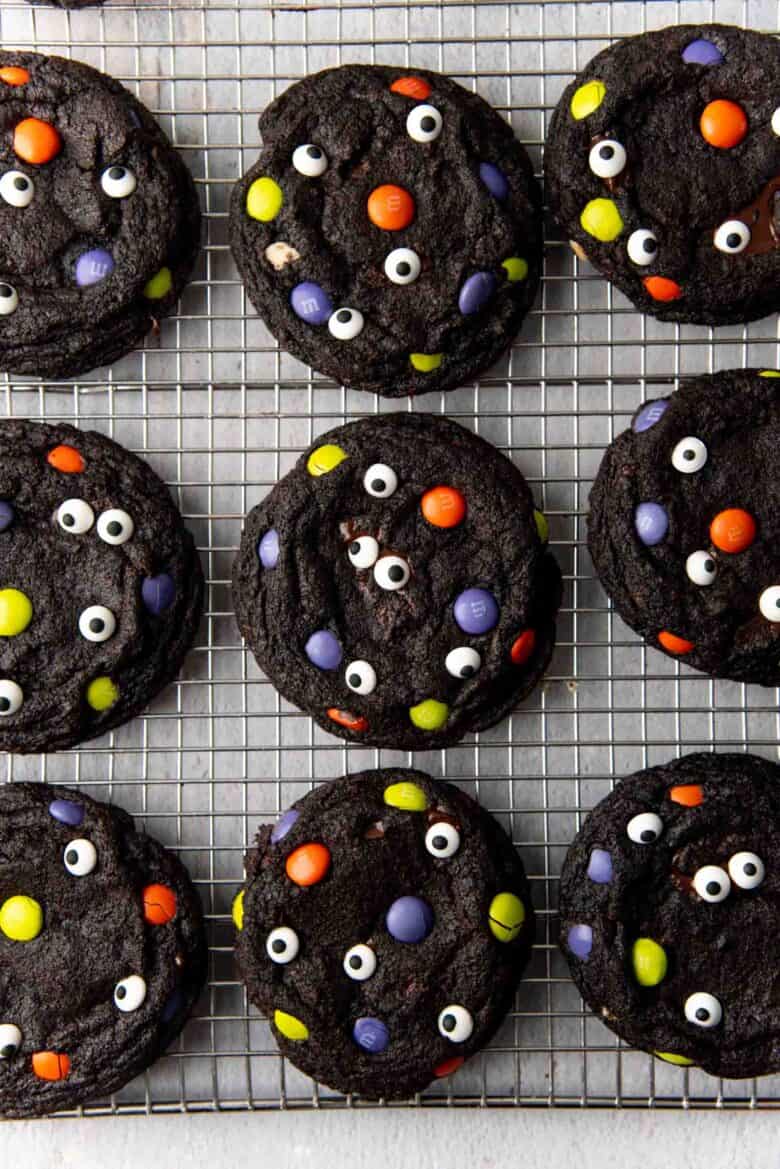
These monster cookies are an adaptation of my double chocolate chip cookies. So the cookies have crunchy edges and chewy centers. That’s just the way I enjoy chocolate chip cookies. However, you can just as easily make them chewy on the edges and almost fudgy in the center. And I’ll show you how. The cocoa powder in the cookies gives them a lovely bittersweet flavor. Plus, the black cocoa powder gives these Halloween cookies that quintessential Halloween look! 🙂 I still do add dark chocolate chips to the cookies, so that you still get nice gooey pockets of chocolate in the cookie. But instead of topping the cookies with more chocolate, I placed M&Ms on top (purple orange and green), as well as candy eyes.
Ingredients needed to make the cookies
Black cocoa – This is the key ingredient that makes the Halloween monster cookies black in color. You can also use regular cocoa powder along with black food coloring, but black cocoa is what I use here. Cocoa powder – I still use a little cocoa powder in this recipe, but this is optional. The reason why I use both regular cocoa powder and black cocoa powder is that I simply love the flavor of the regular cocoa powder I use (callebaut cocoa powder). Unsalted butter – I use melted unsalted butter. You can also use brown butter. You can use salted butter as well, but you will need to reduce or remove additional salt to balance the flavor. Sugar – Just like my double chocolate chip cookie cookies, I use a combination of white and brown sugar in these Halloween cookies. White sugar helps make the cookie crisp, while brown sugar makes the cookie chewy. So 50:50 of each gives me the perfect balance that I like! But you’re welcome to adjust the ratio of the two sugars, but remember this will change the texture and appearance of the cookie too. Flour – I use all purpose flour. Eggs – I use large eggs for this Halloween cookie recipe. Baking soda and baking powder – These are chemical leaveners that allow the cookies to expand. I prefer my cookies to be crisp on the edges and soft and chewy in the middle, and not too thick. So I mostly use baking soda. If you use mostly baking powder, the cookies won’t spread as much and you’ll get a softer cookie with a thicker center. Flavoring – To enhance the flavor, I add salt and vanilla to the dough. You can also add some coffee extract (or instant coffee). Chocolate chips and Halloween themed candy – It’s no Halloween monster cookie without Halloween themed candy! I still add chocolate chips to the cookie dough, but top the cookie with the Halloween candy. For the chocolate chips, I used dark chocolate wafers, so that they are still dark in color and there’s a bittersweet flavor. You can also add half white chocolate chips if you like.
How to make Halloween monster cookies
These Halloween cookies are super easy to make! I prefer to use my stand mixer, but you can absolutely make this dough by hand too.
How to make the cookie dough
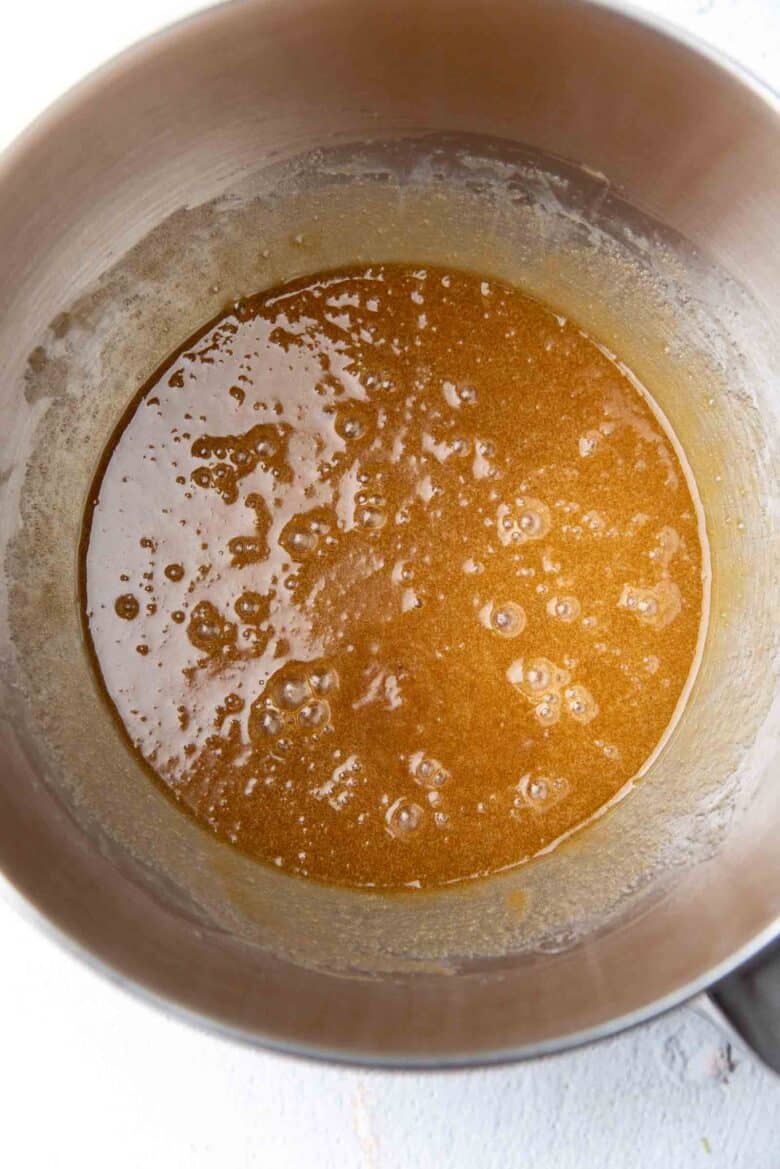
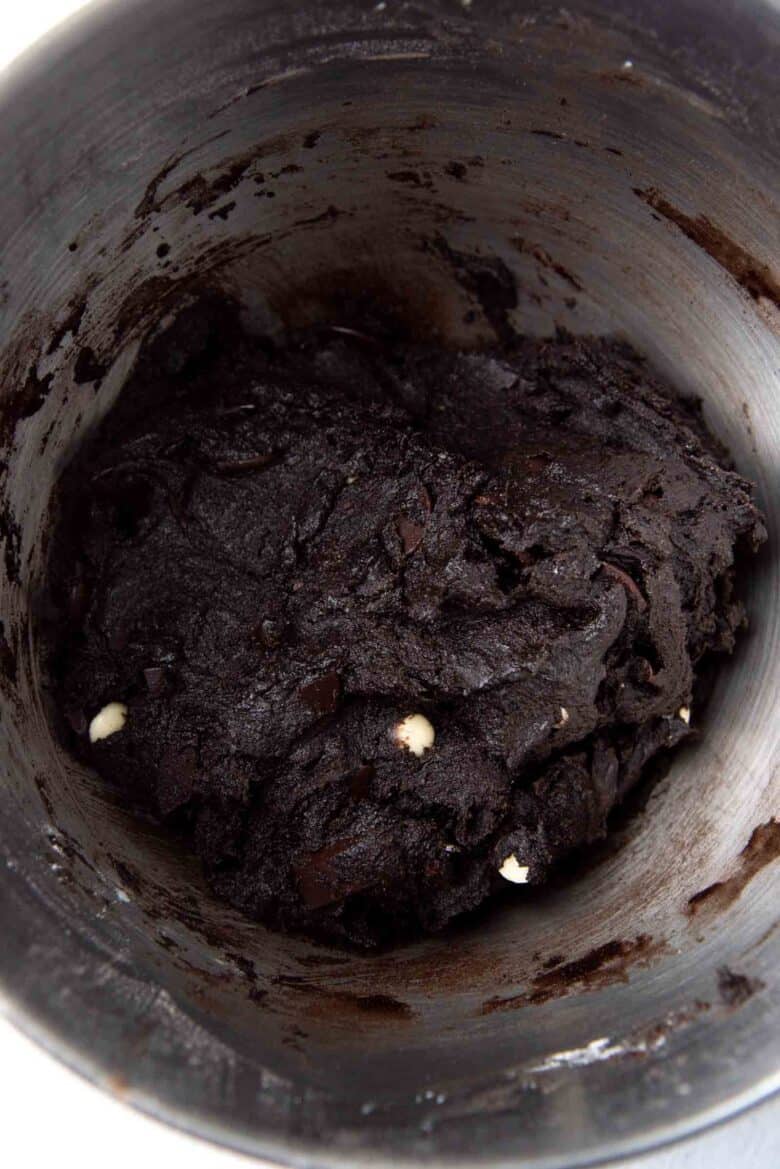
First, measure out all the ingredients and have them ready to go. This also means the butter needs to be melted and slightly cooled (but still warm). In your mixer bowl (or large bowl), add the warm butter, salt and both sugars. Mix well to combine. Don’t worry if the sugar doesn’t completely dissolve in the butter and the mixture looks separated. DO NOT cream the butter and sugar together, as this will add air to the dough, making the cookies more cake-like. Next, add the eggs and mix them with the butter and sugar. When the eggs are mixed in, the mixture will look emulsified and smooth. It should also start to thicken a little because the butter is cooling down. Stir in the vanilla and coffee extract (if using). Black cocoa is essential for these halloween monster cookies, but if you can’t find it, you can use black food coloring instead. Add the black food coloring (if using), together with the vanilla. Sift the cocoa powders, flour, baking soda, and baking powder together to remove any lumps. Add this into the dough in batches, mixing on low speed to combine. Make sure not to over-mix! I prefer to under-mix the flour, so that I can manually mix the rest of the flour with the add-ins. When the dry ingredients are mixed about 75%, add the chocolate chips to the dough. Mix on low until just combined (I personally prefer to mix this by hand, to prevent over-mixing). Fold the dough a few times with a spatula to make sure the bottom of the dough is mixed through as well, and there are no dry flour streaks. Cover and let the dough rest for about 20 – 30 minutes. This will allow all the wet and dry ingredients to distribute better. Line a sheet pan with parchment paper. Use a cookie scoop to divide the batter into equal portions (about 18 – 20 portions). Place the cookie dough portions on the sheet pan (without any spacing). To make them look more like festive halloween cookies, minus the monster eyes, stud each of the cookies with halloween themed candy (I used M&Ms). Cover the cookie portions and let them sit in the fridge for at least 8 hours, or up to 24 hours.
Baking the cookies
Make sure to preheat the oven before you bake the halloween monster cookies. To bake the cookies, I prefer to use two half sheet pans, so that I can bake one tray while the other cools. Line the half sheet pans with parchment paper. Place 4 – 6 chilled cookie portions on a parchment paper, spaced well apart. If you’re not sure how much the cookie will spread, then bake 4 cookies first to check the size. You can adjust the spacing after the first batch. Bake the cookies in the preheated oven for about 12 – 14 minutes. Rotate the pan once halfway through the baking time if needed. 12 minutes will give you a softer, fudgier cookie, while the 14 – 15 minute cookie will give you crisper edges, and a soft and chewy center. I prefer to bake my cookies for 13 – 14 minutes. As soon as the cookies comes out of the oven, press a few candy eyes (monster eyes) into the warm cookies, to turn them into Halloween monster cookies. Gently press them into the cookie so that they stay securely in the cookie. You can also place the candy eyes on melted chocolate too. Let the cookies sit in the tray for about 6 – 7 minutes, and then transfer them onto a cooling wire rack. They can be enjoyed once the cookies are at room temperature, or slightly warm.
How to store the cookies for later
Unbaked cookie dough
Place the chilled cookie dough portions in a gallon-sized ziploc bag or an air-tight container, and store in the freezer. When you’re ready to enjoy them, remove portions of cookie dough from the freezer and bake for 14 – 17 minutes at 350°F.
Baked cookies
These Halloween monster cookies can be stored at room temperature for about 3 – 5 days. You can use both parchment paper or plastic wrap to separate the cookie layers. Tortillas can also be used to separate the cookie layers. The tortillas will keep the cookies soft and prevent them from drying out. Place some tortillas on the bottom of an air-tight container (if using). Place one layer of chocolate chip cookies on top, followed by a tortilla or parchment paper, and then another cookie layer. Repeat with all the cookies (using 2 – 3 tortillas or parchment paper). If you use tortillas, replace the tortillas every 2 days or so (when the tortillas look like they are drying out). These Halloween cookies can be kept up to 3 – 5 days at room temperature. Let them thaw out, OR warm the cookies slightly in the oven before enjoying the cookies again.